Street Fighter 6 Drive System: Mechanics, Moves, and Strategy
Updated On: November 12, 2025 by Aaron Connolly
Understanding the Drive System
Street Fighter 6 flips the script on traditional meter mechanics by giving us six interconnected abilities, all draining from one shared gauge. Every Drive Impact, Parry, or Overdrive move eats into your other options, so you end up juggling resources every round.
What Makes the Drive System Unique
The Drive System feels different from other fighting games because it unifies everything under one meter. Instead of juggling a bunch of separate bars, you just have the Drive Gauge powering all your big moves.
The six Drive abilities all link together:
- Drive Impact (armored attacks)
- Drive Parry (blocking with perks)
- Drive Rush (cancels for movement)
- Drive Reversal (defensive wake-ups)
- Drive Overdrive (amped-up specials)
- Burnout state (the penalty for running dry)
Each ability spends a different amount of Drive meter. A Drive Impact costs one stock, but Overdrive moves might chew through two or three.
Burnout really raises the stakes. If you run out of Drive Gauge, you hit Burnout for several seconds. During Burnout, you take more damage and lose every Drive ability. It’s rough.
You end up constantly making choices. Blow all your meter on wild Rush attacks and you might take the round, but if your opponent survives, you’re left wide open.
Comparisons to Previous Street Fighter Mechanisms
Earlier Street Fighters made us keep track of multiple meters—V-Gauge, V-Trigger, EX meter, all separate.
Street Fighter 6 just bundles it all up. The Drive System puts defense, offense, and movement tools under one bar. It’s easier to keep track of, but it’s definitely not shallow.
Older games usually had “correct” ways to spend meter. In Street Fighter 5, saving V-Trigger for big combos was almost always right.
Now, the Drive System pushes us to mix things up. Since everything shares the same pool, you have to make real choices. If you use Drive Parry to survive pressure, you might not have enough for a Drive Rush combo later.
Meter now regenerates automatically, which is a big shift. In classic Street Fighter, you had to land hits or take damage to build meter. Here, the Drive Gauge just ticks back up over time, so you’re never totally helpless.
Role of the Drive System in Modern Matches
The Drive System shapes every match from the first second. Early rounds are all about building advantage while keeping an eye on your meter.
Neutral game feels driven by Drive abilities. Drive Impact lets you break through projectiles and create breathing room. Drive Parry helps you push forward against pokey opponents. Drive Rush gives you fast approaches and extends combos.
Comebacks work a bit differently now. Both players have the same Drive resources, so you don’t get those runaway matches where someone runs away with a meter lead.
Burnout can totally flip momentum. If you’re in Burnout, you take 20% more damage and lose all defensive options. Smart players will pile on pressure when they see you’re vulnerable.
Most matches end with both sides scraping by on low meter. Deciding whether to go on offense or hold back with almost nothing left makes for some really tense moments.
Tournament play really shows off the system. Pros who manage their Drive meter well get a huge edge. If you waste resources, you’re in trouble against players who know how to squeeze every drop out of the system.
Drive Gauge and Meter Management
The Drive Gauge has six segments and refills by itself over time. If you move forward or land attacks, it fills up even faster. Good meter usage means balancing pressure and defense, while steering clear of burnout.
Drive Gauge Structure and Function
The Drive Gauge uses six segments—that’s 60,000 points if you’re counting. Each Drive move spends a different amount.
You start every round with a full bar, right under your health.
Here’s what each move costs:
- Drive Impact: 1 segment
- Drive Rush: 2 segments (cancelled) or 3 segments (raw)
- Drive Parry: Varies with timing
- Overdrive attacks: 2 segments
The gauge refills on its own when you’re not maxed out. This keeps the pace up so you’re never just waiting around.
Refilling and Depleting the Drive Meter
Your Drive meter doesn’t just refill passively. Walking forward gives you meter faster than standing still or backing up.
Landing attacks builds meter quicker than whiffing. Even blocking gives you a bit back.
To build meter fast:
- Walk forward in neutral
- Land light attacks often
- Time your Drive Parry well
- Don’t waste meter on risky raw Drive Rush
Heads up: If you burn all six segments, you go into burnout. While in burnout, you take chip damage from blocked attacks and can’t use any Drive moves until you recover.
It takes about 10 seconds of avoiding hits to get out of burnout. Your gauge turns red so you can’t miss it.
Strategies for Balancing Meter Usage
Managing your Drive meter is all about balancing offense and defense. Don’t blow your last segments unless you’re sure it’s worth it.
If you’re just starting out:
- Keep at least 2-3 segments in reserve
- Use Drive Impact to counter
- Save meter for defense
If you’re more aggressive:
- Spend meter to extend combos
- Use Drive Rush for pressure
- Think about how much you’ll get back during combos
Watch your opponent’s meter too. If they’re in burnout, it’s time to turn up the heat.
Meter priorities, roughly:
- Defense when you’re low on life
- Combo extensions for guaranteed damage
- Pressure tools if you’re ahead
- Movement options in neutral
You’ll get more meter by staying active and pushing forward. The system really rewards you for taking space and playing assertively.
How Burnout State Changes the Game
If your Drive Gauge drops to zero, you hit burnout—a rough patch where you’re wide open. Burnout brings chip damage, extra blockstun, and takes away all your Drive abilities for a full 20 seconds.
Triggers and Effects of Burnout
Burnout kicks in the moment you spend all your Drive meter. Your character looks washed out and tired, and your gauge turns gray.
The penalties hit hard. You get +4 extra blockstun frames on everything you block, so moves that were unsafe before suddenly become safe for your opponent. They can keep up the pressure way easier.
Chip damage is a real threat now. Every blocked special or super drains your health. Even normal attacks chip away at you, which feels pretty brutal.
All Drive moves disappear. No Drive Impact, Parry, Rush, Reversal, or Overdrive. You’re stuck with basics, so defending gets a lot tougher.
Burnout lasts 20 seconds, and your meter comes back slower until it’s over.
Managing Risks During Burnout
When you’re stuck in burnout, spacing is your best friend. Stay as far away as you can, making it tough for your opponent to lay on the pressure or chip you out.
Stick to neutral game basics. Use normals, anti-airs, and smart movement. Don’t get greedy or go for risky stuff that could get you blown up.
Quick tip: Backdash and walk back to create space. Sometimes players get too eager when they see you’re in burnout, and you can catch them slipping.
Watch for fireballs and projectiles—people love to chip you out. Try to jump or walk through gaps instead of blocking everything, because chip damage adds up fast.
Throws can help too. A lot of opponents expect you to turtle up, so you might catch them off guard and reset the spacing.
Combat Tactics for Burnout Recovery
Patience is everything during those 20 seconds. Don’t mash buttons or panic—most people lose rounds in burnout by getting desperate.
Use safe normals and anti-airs. Stick to moves that are tough to punish, even with the extra blockstun.
Look for chances to land a hit or block something right as your gauge starts to come back. Well-timed blocks and perfect moves help restore your meter a bit faster.
Seriously, don’t panic. Most players get themselves KO’d by going wild instead of playing it cool.
Move around instead of relying on Drive moves. Walk back, backdash when you need to, and try to hang near the corner where you can anti-air easily.
Drive Impact: Offence and Defence
Drive Impact might be the most flexible tool in Street Fighter 6. You can use it to attack or defend, thanks to its 2-hit armor and wall splat mechanic. It opens up some wild attack and counterplay options.
How to Execute Drive Impact
You pull off Drive Impact by hitting Heavy Punch and Heavy Kick together. It’s got 26 frames of startup, so you can’t just throw it out mindlessly.
Every character has their own Drive Impact look and name—Ryu’s “Shingeki,” Ken’s “Flame Strike,” and so on. Most deal 800 damage, though Jamie’s power changes with his drink level.
You spend one Drive stock each time. You can cancel into it from any special-cancellable normal, which makes it sneaky in blockstrings or as a surprise counter.
Quick tips:
- Use it to tank incoming attacks with its armor
- Cancel from normals to catch people off-guard
- Keep an eye on your meter so you don’t risk burnout
Counters and Defences Against Drive Impact
You’ve got some solid ways to beat Drive Impact. The most direct answer is to throw out your own Drive Impact—if you time it right, you’ll get a Punish Counter.
Regular throws also beat Drive Impact clean. If you see the flashy startup, just go for a throw and you’ll snatch them right out of it. Command grabs work too, sometimes for even more damage.
Here’s what works:
- Drive Impact clash: Use your own for a Punish Counter
- Throw: Fast and reliable, just watch the timing
- Break armor: Quick jabs (cr.LK, cr.LP) can break through
- Drive Parry: Soak up the hit and counter with Drive Reversal
Super Arts ignore Drive Impact’s armor and can punish hard. Some characters, like Marisa, have armor-breaking moves that don’t even need meter.
Wall Splat and Advantage Scenarios
Wall Splat happens if Drive Impact hits and pushes your opponent into the corner. That leaves them in a juggle state for big combos and damage.
If you land Drive Impact midscreen, it just knocks them away. In the corner, they stick to the wall for a second. You can follow up with a jumping heavy or a character-specific combo.
Wall Splat situations:
- Regular hit: Standard Wall Splat, juggle away
- Punish Counter: Crumple state for max damage
- Burnout: Stun instead of Wall Splat—huge punish opportunities
- Airborne: Higher Wall Splat, even better juggles
If your opponent’s in Burnout, a corner Drive Impact stuns them instead of wall splatting. You get a free big combo, and they get their Drive Gauge back once the stun ends.
Blocking Drive Impact gives you a lot of frame advantage and pushes your opponent back. They can’t use Drive Reversal during the stagger, so you get to keep the pressure going.
Mastering Drive Parries and Perfect Parries
Drive parries let you absorb attacks and build meter. They cost half a drive bar and offer better rewards than blocking.
Perfect parries demand frame-precise timing. If you nail the timing, you get extra advantages and more time to punish your opponent.
How Drive Parry Works
You perform a drive parry by pressing medium punch + medium kick at the same time, or just hit the drive parry button if you’re using modern controls.
Your character glows blue and takes a defensive stance.
If your opponent attacks while you’re in this state, you absorb the hit and take no damage.
Instead of losing meter like with blocking, you actually gain some drive meter back.
Drive parries eat up half a bar right away. If you keep holding the buttons, the meter keeps draining slowly.
Heads up: You can’t parry throws. Opponents might grab you during parry recovery frames.
You can cancel drive parries into other moves. That includes drive rush (which only costs 0.5 bars) or drive reversal for a counterattack.
You can parry almost any attack, including specials and supers. Just time it before the hit lands.
Perfect Parry Timing and Rewards
Perfect parries happen if you parry within two frames of an opponent’s attack hitting.
You’ll see a slow-motion effect and a flashy visual splatter when you get it right.
The window is tiny. Most players don’t land these consistently, but it’s worth practicing against common attacks.
Perfect parry rewards:
- More frame advantage for punishing
- Extra invincibility frames
- More drive meter back
- Better positioning for combos
You pay the same half-bar cost as a regular parry. The risk and reward make perfect parries tempting in clutch moments.
If your opponent is predictable, learn their attack rhythms. Focus on their favorite moves instead of trying to perfect parry everything.
Parry vs. Traditional Blocking
Blocking keeps you safe, but it costs drive meter and pushes you backwards.
You take chip damage from specials if you’re in burnout.
Drive parries, on the other hand, build meter. You stay in place and can immediately counterattack or dash in.
Blocking works against throws, but parries don’t. Mix up both options to stay unpredictable.
Drive parries shine when:
- You need meter badly
- The opponent uses predictable pressure
- You want to hold your ground
- You’re looking to set up a counterattack
Blocking is better when:
- Your drive gauge is almost empty
- You face throw-happy opponents
- Your opponent throws in tricky mix-ups
- You just want a simple, safe defense
Utilising Drive Rush for Speed and Pressure

Drive Rush gives you three ways to close distance and keep up the pressure. These work best when you mix them into combos and your overall strategy.
Drive Rush Activation Methods
You can trigger Drive Rush in two main ways. Both cost one bar from your Drive Gauge.
Standard Drive Rush asks you to press Medium Punch and Medium Kick together, then quickly tap forward twice.
Your character glows blue and dashes forward with a burst of speed.
Parry Drive Rush starts with a Drive Parry. During the parry animation, press forward twice to activate the rush.
This version is faster and harder for your opponent to react to.
Timing really matters. Standard Drive Rush makes your intentions obvious.
Opponents can spot it and get ready to counter.
Parry Drive Rush is sneakier. It flows right from defense into offense, catching people off guard.
Try this when your opponent expects you to stay defensive.
Quick tip: Practice Parry Drive Rush in training mode for 10 minutes each day. You’ll pick it up fast.
Combo Extensions with Drive Rush
Drive Rush stretches basic combos into much bigger ones. It lets you bridge gaps between moves that don’t usually connect.
After landing a light attack, cancel into Drive Rush to keep your combo going.
That dash lets you reach opponents who would otherwise get away.
Heavy attacks really shine with Drive Rush cancels. Land a heavy punch, cancel into Drive Rush, then follow up with another heavy or a special.
Timing your cancels is key. Cancel too soon and you waste drive meter. Cancel too late and your opponent blocks or counters.
Drive Rush Combo Structure:
- Starter: Light or medium attack
- Cancel: Into Drive Rush on hit or block
- Extension: Heavy attack or special move
- Finisher: Super move or knockdown setup
Heads up: Each Drive Rush costs a bar. Don’t blow your whole gauge in one combo unless you’re sure it’s worth it.
Drive Rush in Offensive Mind Games
Drive Rush adds psychological pressure to your offense. Your opponent never quite knows when you’ll use it.
Frame advantage is huge here. After some blocked attacks, Drive Rush keeps you safe and lets you stay on offense.
Your opponent has to respect your next move instead of swinging back.
Mix up your timing. Sometimes rush right after an attack; other times, pause for a moment before dashing in.
Empty Drive Rush is a fun trick. Dash forward with no attack, then grab or go low when they expect a big combo.
Just the threat of Drive Rush can make your opponent play more defensively. They might hang back, giving you room for throws and mix-ups.
Try this: Use Drive Rush after moves that leave you at a slight disadvantage. That forward momentum can beat your opponent’s counter attempts.
Balance your aggression with meter management. Try to keep at least two Drive bars ready for defense when your offense runs out of steam.
Drive Reversal as a Defensive Tool

Drive reversal gives you a universal counter-attack when you’re under heavy pressure. It costs two drive bars but gives you invincible startup and can knock down aggressive players.
Using Drive Reversal Under Pressure
You can use drive reversal after blocking, during a drive parry, or when you’re getting up from a knockdown.
Hit forward plus both heavy attack buttons to activate it.
Timing is everything. Against fast attacks, opponents might recover in time to block and punish you.
Slower or riskier moves leave them open for your counter.
The move starts up in 20 frames from blockstun or parry, and 18 frames from wakeup. Wakeup reversals are a bit quicker, but still risky against well-timed attacks.
Best times for drive reversal:
- Opponent uses slow, heavy attacks
- They commit to risky pressure
- They’re in burnout (reversal is safer at -2)
- You’re cornered and need space
Drive reversal knocks them down and does white damage only. It won’t finish matches, but it gives you breathing room.
Metre Cost and Risk Considerations
Every drive reversal costs two bars out of your six. That’s a lot, so you can’t just throw them out carelessly.
The risk-reward balance is a big deal. Drive reversals are -6 on block, so most characters can punish you easily.
If you whiff, you’re wide open for big combos.
Smart opponents will bait your reversal with safe attacks or early buttons, block your counter, and punish hard.
This makes drive reversal a commitment—you have to pick your moment carefully.
When your opponent is in burnout, drive reversal is much safer at -2. That makes it a better defensive option in those situations.
Treat drive reversal as just one of your defensive options. Mix it up with parries, blocking, and movement to keep them guessing.
Overdrive Moves and Enhanced Specials
Overdrive Arts are powered-up specials that use Drive Gauge, giving you more damage and better utility.
These replace the old EX system, so every fighter gets access to strong versions of their signature moves.
What Are Overdrive Arts?
Overdrive Arts turn regular specials into heavy hitters by spending two bars of your Drive Gauge.
To do one, just perform a special move but press two punch or two kick buttons instead of one.
You’ll see flashy effects—your character glows, and the move gets new properties.
How Overdrive differs from normal specials:
- More damage—sometimes up to 50% more
- Extra hit properties—longer range or multi-hit
- Better frame data—safer on block or faster startup
- Special effects—knockdown or wall bounce
The two-bar cost means you can’t spam these. If your gauge runs dry, you risk burnout.
Advantages of Overdrive Over Standard Specials
Overdrive specials can swing the match in your favor. Their enhanced properties make them must-haves for combos and clutch moments.
Damage scaling is a big deal. A normal combo might deal 200 damage, but with Overdrive Arts, you can push that to 300 or more.
Some Overdrive moves give you invincibility frames. For example, Ryu’s Overdrive Shoryuken is a great anti-air because it starts invincible.
Combo extensions are easier with Overdrive. Standard moves might end your combo, but Overdrive can open up more follow-ups.
Pressure tools are safer. Overdrive specials often let you keep up the offense without worrying as much about getting punished.
Corner carry is real. Many Overdrive moves push your opponent closer to the wall, making them more vulnerable.
Effective Use of Overdrive in Battle
You need to balance offense and meter management with Overdrive. Spending two bars recklessly leaves you open to pressure.
Best times for Overdrive:
- Confirming into big damage
- Busting through tough defenses
- Securing a round when health is low
- Creating safe offense during their recovery
Drive Gauge conservation is always important. Try to keep at least two bars for defense, like Drive Reversal or Parry.
Combo integration works best when you confirm the hit first. Practice going from light attacks into Overdrive specials instead of just tossing them out.
Matchups matter for Overdrive timing. Against rushdown, save meter for defense. Against zoners, use Overdrive to break through their projectiles.
Spend time in training mode to figure out which Overdrive moves are best for your main. Each character’s specials have their own perks.
Combos and Drive System Synergy
The Drive System changes how combos work in Street Fighter 6. It adds mechanics that boost your damage and open up new routes.
Drive Rush gives extra frame advantage for longer combos. Drive Impact lets you armor through attacks and keep up the pressure.
Integrating Drive Mechanics into Combos
Drive Rush is the backbone of modern combos. If you cancel a normal attack into Drive Rush, your next move gets +4 frames advantage.
That frame boost lets you link attacks that normally wouldn’t connect.
Light punches become much safer combo starters with Drive Rush.
Key Drive Rush Uses:
- Cancel medium punch into Drive Rush for longer combos
- Use after a successful Drive Parry for big frame advantage
- Combine with jump-ins for better ground control
Drive Parry opens up combo opportunities when you get the timing right.
Perfect parries freeze your opponent, giving you a free combo starter.
The window is tight, but the rewards are big. After a good parry, go for your strongest attack or even a grab.
High-Damage Routes with Drive System
Drive Impact wall splats give you some of the highest damage combos in the game. If you can push your opponent into the corner, this mechanic really shines.
In the corner, a Drive Impact wall splat guarantees follow-ups. You can land your character’s best combo right after the wall bounce.
Optimal Damage Sequence:
- Corner carry combo → Drive Impact
- Wall splat → Heavy punch starter
- Maximum damage combo → Super Art finish
Overdrive moves have replaced EX specials and hit noticeably harder. They cost two Drive Gauge bars, but honestly, the payoff is usually worth it.
Combo routes that end with Overdrive specials hit for about 20-30% more damage than standard versions. The scaling works out better than with regular special moves.
Example Combos Using Drive Tools
Here’s a basic Drive Rush combo that fits most characters:
Medium Punch → Drive Rush Cancel → Crouching Medium Kick → Heavy Special Move
Drive Rush extends combos way past their usual limits. The frame advantage makes the medium kick link much more consistently.
If you’re in the corner, try this wall splat setup:
Jump Heavy Kick → Standing Heavy Punch → Drive Impact → Wall Splat → Crouching Heavy Punch → Super Art
Drive Parry combos need tight timing but pay off big:
Drive Parry (perfect timing) → Drive Rush → Standing Medium Punch → Crouching Medium Kick → Overdrive Special
Using the double Drive mechanic gives you a ton of frame advantage. This combo is great against aggressive players who love to press buttons.
Managing Chip Damage in Street Fighter 6
In Street Fighter 6, chip damage only happens if you hit burnout—when your Drive Gauge is totally empty. You can avoid chip damage by managing your Drive Gauge, and you can punish opponents in burnout by forcing them to block.
Chip Damage During Burnout
Chip damage starts as soon as your Drive Gauge hits zero and you enter burnout. During burnout, any blocked attack chips away at your health bar instead of just draining meter.
Normal blocking keeps you safe. If you have any Drive Gauge left, blocking just drains meter, not health. That’s why Drive Gauge management can decide whether you live or die.
Burnout leaves you exposed. You not only take chip damage from blocked attacks, but you also get stuck in blockstun for four extra frames. So, a move that’s usually +1 on block suddenly becomes +5, giving your opponent a huge advantage.
You can actually lose the round from chip damage while in burnout. The threat of dying from blocked attacks forces you to make desperate or risky decisions.
Drive Gauge comes back slowly during burnout. It refills automatically, but way slower than usual. You can’t use any Drive moves until you get some meter back.
Preventing and Capitalising on Chip Damage
Keep an eye on your Drive Gauge to dodge burnout. Each Drive move costs between half a bar to three bars, so try to save meter if you’re running low.
Land perfect Drive Parries to rebuild meter. If you time your parries just right, you actually refill your Drive Gauge. Parrying projectiles helps you recover meter even faster than just waiting.
Pressure opponents in burnout hard. If your opponent has no Drive Gauge, they can’t Drive Reversal out of your combos. Keep making them block to rack up chip damage.
Throws ignore chip damage completely. If you’re in burnout, sometimes it’s smarter to take a throw than to block a long attack string. Throws deal direct damage but don’t trigger chip mechanics.
Character-Specific Interactions with the Drive System
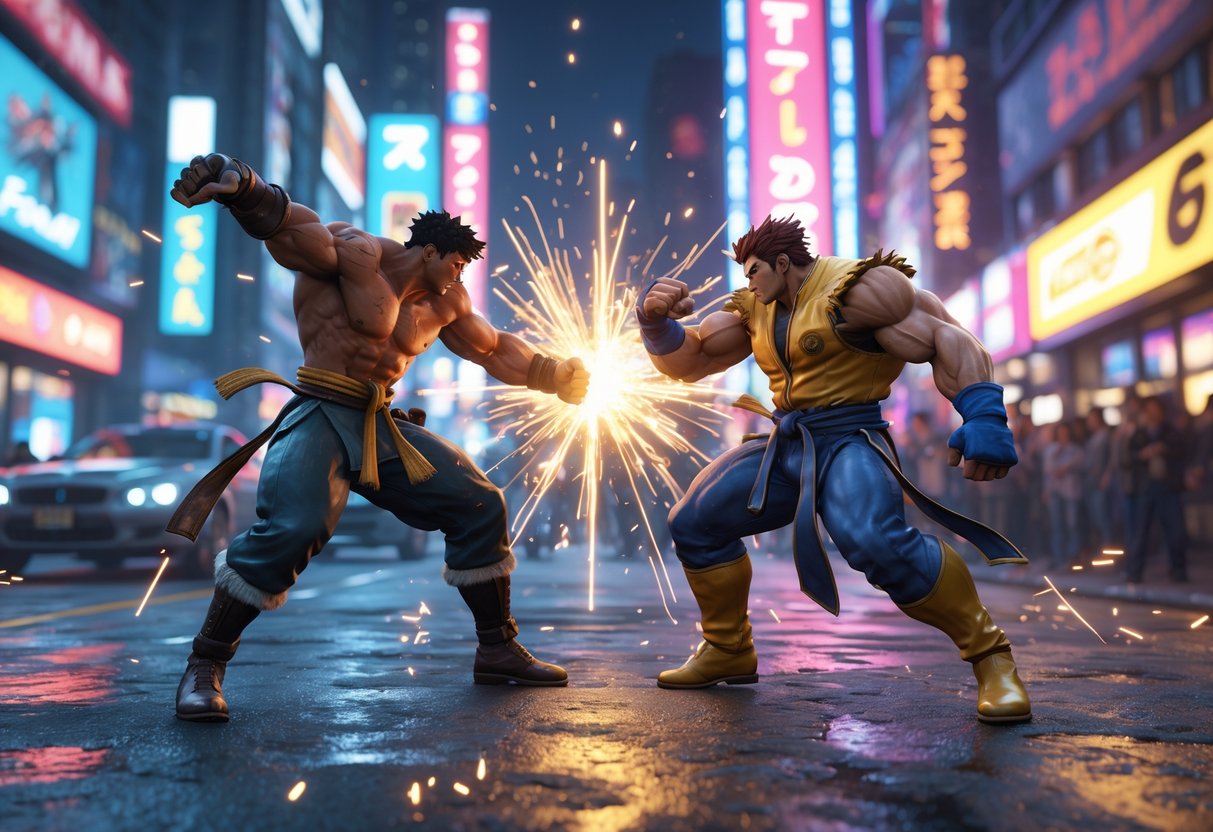
Every fighter in Street Fighter 6 taps into the Drive System in their own way, depending on their moveset and overall style. Projectile users like Ryu and Ken get extra mileage out of Drive Rush, while grapplers lean on Drive Impact for corner pressure.
How Ryu and Ken Utilise Drive Mechanics
Ryu uses Drive Rush to follow up his Hadoken projectiles. If you cancel a Hadoken into Drive Rush, you can create some pretty nasty pressure. The extra frame advantage lets you close the gap fast for more combos.
Drive Parry fits Ryu’s defensive style perfectly. You can parry enemy projectiles to build meter and stay safe. His Shoryuken turns into a real threat when you use it as an Overdrive move—it hits hard and costs two Drive bars.
Ken’s Drive Rush game feels a bit different. He moves faster, so his Drive Rush approaches are more in-your-face. You can Drive Rush after a medium kick for mix-up opportunities.
Key Drive combos for both:
- Hadoken → Drive Rush → Heavy attacks
- Drive Parry → Shoryuken counter
- Drive Impact in the corner for wall-splat setups
Adapting Drive Tactics for Different Fighters
Zoners like Ryu should focus on Drive Parry and pick their Drive Rush moments carefully. Meter management matters a lot for defensive characters. Drive Reversal is a lifesaver when you’re stuck in the corner.
Rushdown fighters can go wild with Drive Rush. These characters build meter back through constant pressure, so spending it is less risky. Drive Impact helps them keep up the momentum.
Grapplers should focus on Drive Impact for corner carry. The wall-splat opens up throw chances. Use Drive Parry sparingly, since grapplers often burn through meter fast.
Your best Drive System strategy depends on your character’s strengths. Try to match your Drive usage to your main gameplan, not just some generic approach.
Platform Notes and Competitive Considerations
The Drive System works pretty much the same everywhere, but input precision and tournament rules can make a difference. High-level play has developed some specific Drive System strategies that really affect the meta.
Differences on PC and Consoles
PC Version Advantages PC gives you the sharpest Drive System execution. Lower input lag helps with those tricky Drive Parry timings. A lot of pros use PC for training mode.
Console Performance PlayStation 5 runs at tournament standards. Xbox Series X is just as smooth, but you don’t see it as much in big events. Both keep Drive mechanics running at 60fps.
Input Considerations Fight sticks work the same on all platforms. Pad players might notice slight timing differences from system to system. It’s worth trying your Drive Rush combos on your main setup before entering a tournament.
Online Play Differences Rollback netcode can mess with Drive Impact spacing online. Drive Parry timing feels a bit different if there’s lag. Practice both online and offline to get comfortable with your Drive System timing.
Drive System in Tournaments and High-Level Play
Tournament Settings Capcom Pro Tour events stick with standard Drive Gauge settings. Nobody tweaks the Drive mechanics. Everyone starts each round with a full Drive Gauge.
Meta Impact Drive Rush has changed how people play neutral. Players manage Drive Gauge way more carefully than with older meter systems. Playing it safe with your Drive usage often makes the difference in tight matches.
High-Level Strategies Top players use Drive Impact more for pressure than raw damage. Drive Parry is a must-have for defense. Punishing burnout separates the pros from the casual crowd.
Character Balance Some characters just get more out of certain Drive mechanics. Rushdown types are running the show in tournaments right now. Mastering the Drive System is more important than just having good execution.
Frequently Asked Questions

The Drive System adds a whole new layer to Street Fighter 6’s combat mechanics. Here are some common questions that come up—and honestly, they’re the ones most players want answered.
How do you perform a Drive Rush in Street Fighter 6?
You can pull off a Drive Rush in two ways. Double-tap forward to dash straight at your opponent.
The other method is to cancel from a normal attack. Land a basic attack, then double-tap forward right away to cancel into the dash.
Drive Rush costs one to three Drive Gauge bars, depending on how you do it. It gives your next attack a +4 frame advantage.
If you stack this with other effects like Punish Counters, you can get up to +12 frames on light punches. That’s a lot of time.
What is the functionality of the Drive Impact in Street Fighter 6?
Drive Impact acts as a heavy, armored strike that eats enemy attacks. Hit Heavy Punch and Heavy Kick together to use it.
It costs one Drive Gauge bar and knocks blocking opponents backward. If you land it near a corner, you get a wall-splat.
When your opponent blocks Drive Impact, they lose a bar of Drive Gauge. It’s a good way to drain their resources.
If your opponent is in Burnout, a successful wall-splat stuns them and there’s no way out except waiting for the Drive System to recover.
Can you explain how the Drive Gauge operates in Street Fighter 6?
The Drive Gauge has six bars under each player’s health meter. These bars power all your Drive moves: Impact, Rush, Parry, Reversal, and Overdrive.
You lose bars when you use Drive moves or take chip damage. The gauge refills automatically during the match and resets at the start of every round.
If you parry successfully or block well, you refill your Drive Gauge faster. This turns defense into a real risk-reward system.
If you run out of bars, you enter Burnout. Now you’re open to extra damage and chip from every attack.
What are the frame data specifics for using Drive Impact in the game?
Drive Impact gives you armor frames that absorb attacks during startup. The exact number depends on the character, but it’s usually early in the move.
The move puts a lot of blockstun on your opponent. You get time to keep up pressure or reset to neutral.
Wall-splats give you extra hitstun for follow-ups. Your opponent can’t do anything until the splat animation ends.
Against Burnout opponents, wall-splat stun lasts for several seconds. They just have to wait it out.
How does the Drive Reversal mechanic work in Street Fighter 6?
Drive Reversal comes out while you’re blocking. Hold Heavy Punch and Heavy Kick together during blockstun to use it.
It costs two Drive Gauge bars, so it’s pricey but worth it when you’re in trouble. It breaks up your opponent’s combos and pushes them away.
The reversal doesn’t do much damage—it’s mostly for getting out of tight spots. Use it if you’re stuck in a long pressure string.
Drive Reversal also helps you get some Drive Gauge back. That makes it handy when you’re on defense and need to recover.
Could you describe the changes to dash mechanics in Street Fighter 6?
You’ll still find the classic dashes, but now there’s also the new Drive Rush system. Regular dashes don’t use any meter and just give you your usual movement speed.
Drive Rush, though, amps things up with better dash properties and frame advantages. If you land an attack after a Drive Rush, you get extra plus frames.
This enhanced dash moves faster and covers more ground than your standard movement. It really helps you close the gap, especially if you’re dealing with zoning opponents.
If you start a Drive Rush from a parry, you’ll spend less meter than if you cancel from an attack. That little difference changes up your risk and reward when trying to approach.

