Position Play Practice: Mastering Cue Ball Control for Success
Updated On: October 26, 2025 by  Aaron Connolly
Understanding Position Play Fundamentals
If you want to master position play, you’ve got to develop sharp cue ball control and really get how angles open up scoring chances.
These core skills are what separate casual players from those who can actually run racks.
Defining Position Play and Its Importance
Position play is all about deciding where the cue ball will land after each shot.
This skill lets us set up easier follow-up shots and keeps us in charge of the table.
Position play does three big things:
- Sets up natural angles for your next shot
- Helps you avoid tough spots that force risky moves
- Keeps your offense rolling through the rack
When our position play is good, we don’t need to take as many tough shots.
By planning two or three balls ahead, we can score with more consistency.
A lot of folks focus only on sinking balls, but if you leave the cue ball in a bad spot, you’ll probably miss or have to play safe.
Then you’re just handing control over to your opponent.
Speed control is huge here.
If you smack the cue ball too hard, you lose out on positioning options.
Softer shots give you more precision over where the cue ball ends up.
Key Principles of Cue Ball Control
Cue ball control comes down to three things: speed, spin, and contact point.
If you want consistent positioning, you need to get the hang of all three.
Speed affects how far the cue ball travels:
- Soft shots keep the cue ball close
- Medium speed gives you balanced options
- Hard shots send it further, but you lose precision
Spin changes how the cue ball acts:
- Topspin makes the cue ball roll forward after contact
- Backspin pulls it back or stops it
- Sidespin curves the cue ball’s path before and after hitting another ball
The spot where the cue ball hits the object ball sets its initial direction.
We use geometry to predict these angles, though it’s not always as easy as it sounds.
Drills help us get a feel for different speeds and spins.
Start with stop shots and draw shots, then work up to more complicated routes.
Role of Angles in Positional Strategy
Angles help us plan position routes more efficiently.
The angle of separation between cue ball and object ball shapes our options.
Straight-in shots don’t give you much to work with:
- The cue ball can only move forward or backward
- Speed control matters a ton
- Sometimes you need spin just to get decent position
Angled shots open up more possibilities:
- The natural angle sends the cue ball to predictable spots
- We can tweak the angle with spin
- Suddenly, you’ve got a bunch of position zones to aim for
The 90-degree rule is handy for predicting cue ball direction.
On medium-speed shots without spin, the cue ball typically heads off at a right angle from the object ball’s path.
We plan our routes by working backward from the final ball.
That way, every position along the way fits the overall plan.
With enough practice, position play starts to feel more natural as you spot common patterns and know how to handle them.
Essential Techniques for Achieving Position
If you want to master position play, you’ll need real control over speed, some smart spin choices, and the ability to make good decisions when you’ve got the cue ball right where you want it.
Speed Control Methods
Speed control is the bedrock of solid positional play.
We have to develop consistent stroke mechanics that deliver just the right amount of power.
Practice short, medium, and long shots with different speeds.
Start with gentle shots using mostly your forearm.
This builds the muscle memory you’ll need for delicate work.
Medium power shots need smooth acceleration through the cue ball.
Keep your bridge hand steady and don’t rush the follow-through.
A lot of players hurry these and end up losing accuracy.
For power shots, use your whole arm but stay balanced.
It’s about controlled acceleration, not just hitting hard.
Try using a speed scale from 1 to 10 in practice.
A level 3 shot should barely reach the far rail, while a level 7 should hit the opposite end with moderate pace.
Ball weight matters too.
A heavier hit drives the cue ball further; lighter contact gives you softer landings and better angle control.
Effective Use of English
English means adding sidespin to the cue ball.
This technique really opens up your options and helps you get around blockers.
Right english makes the cue ball curve left after hitting a rail.
Left english curves it right.
It feels backwards at first, but you’ll get used to it.
Use running english when the natural path fits your plan.
This keeps up the speed and creates predictable angles off the rails.
Reverse english slows the cue ball and can change the angle sharply.
Try this when you need to kill speed or make a sharper turn.
Start out with just a quarter-tip of english.
Full-tip sidespin is rarely helpful and usually just complicates things for newer players.
Inside english keeps the cue ball’s path straighter.
Outside english gives you more deflection, but bigger reactions off the rails.
Managing Ball in Hand Situations
Ball in hand gives you total control over cue ball placement.
This is your chance to use strategic thinking instead of just grabbing the easiest shot.
Put the cue ball in a spot that sets up natural angles for your next two or three shots.
Steer clear of extreme angles, even if they look tempting.
Think about pattern play when placing the cue ball.
Sometimes the easiest shot right now leaves you in a tough spot for the next one.
Safety still matters, even with ball in hand.
If you miss, leave the cue ball where your opponent will struggle.
When you’re unsure, go for centre table positioning.
That gives you lots of angle options and avoids getting stuck with straight-in shots.
Don’t hug the rails unless you’ve got a specific reason.
Cue balls on the rail limit your stroke and spin options.
Before you place the cue ball, visualise the sequence.
Picture the next few shots, then decide where to put it.
Developing Consistent Speed Control
Good speed control comes from precise stroke mechanics and steady practice routines.
We build consistent cue ball velocity with targeted drills and smart positioning.
Practical Speed Control Drills
Start with the basic lag drill.
Put the cue ball on the baulk line and roll it gently to the top cushion and back.
Try to stop the cue ball within six inches of the baulk line.
This drill teaches you how far your follow-through sends the ball.
Next, move on to the three-speed drill.
Line up three balls along the centre at different distances.
Pot each one using soft, medium, and firm strokes.
Drill steps:
- Soft stroke: 12–18 inches of follow-through
- Medium stroke: 18–24 inches
- Firm stroke: 24–30 inches
Keep your bridge distance the same to build muscle memory at each power level.
Try the clock drill to develop accuracy.
Place balls at 12, 3, 6, and 9 o’clock around a centre pocket.
Each shot needs a different speed to avoid running past your target.
One Rail Position Approaches
One rail position play takes careful speed judgment.
Aim for specific angles off the cushion, not just hoping for good position.
If you hit harder, you get a sharper angle off the rail.
Softer shots give you gentler angles.
Try the rail speed ladder drill.
Set up balls at different distances from the rail.
Each shot needs just the right speed to land in the same spot.
Rail speed tips:
- Short rail: 60% of normal power
- Medium rail: 75%
- Long rail: 85%
Before you shoot, picture the cue ball’s path off the cushion.
This mental rehearsal sharpens your speed sense.
Minimising Cue Ball Movement
Less cue ball movement means fewer things can go wrong.
Aim for the shortest path to your next ball.
Stun shots stop forward roll, giving you tight distance control.
Hit the cue ball at centre height with a firm, short stroke.
Try the stop shot drill.
Pot straight balls and keep the cue ball still.
You’ll need perfect centre contact and the right speed.
Tips for less movement:
- Use stun for balls 1–3 feet away
- Add a touch of screw for close positioning
- Pick natural angles when you can
Practise aiming for position zones, not an exact spot.
A two-foot area gives you some wiggle room while keeping your next shot easy.
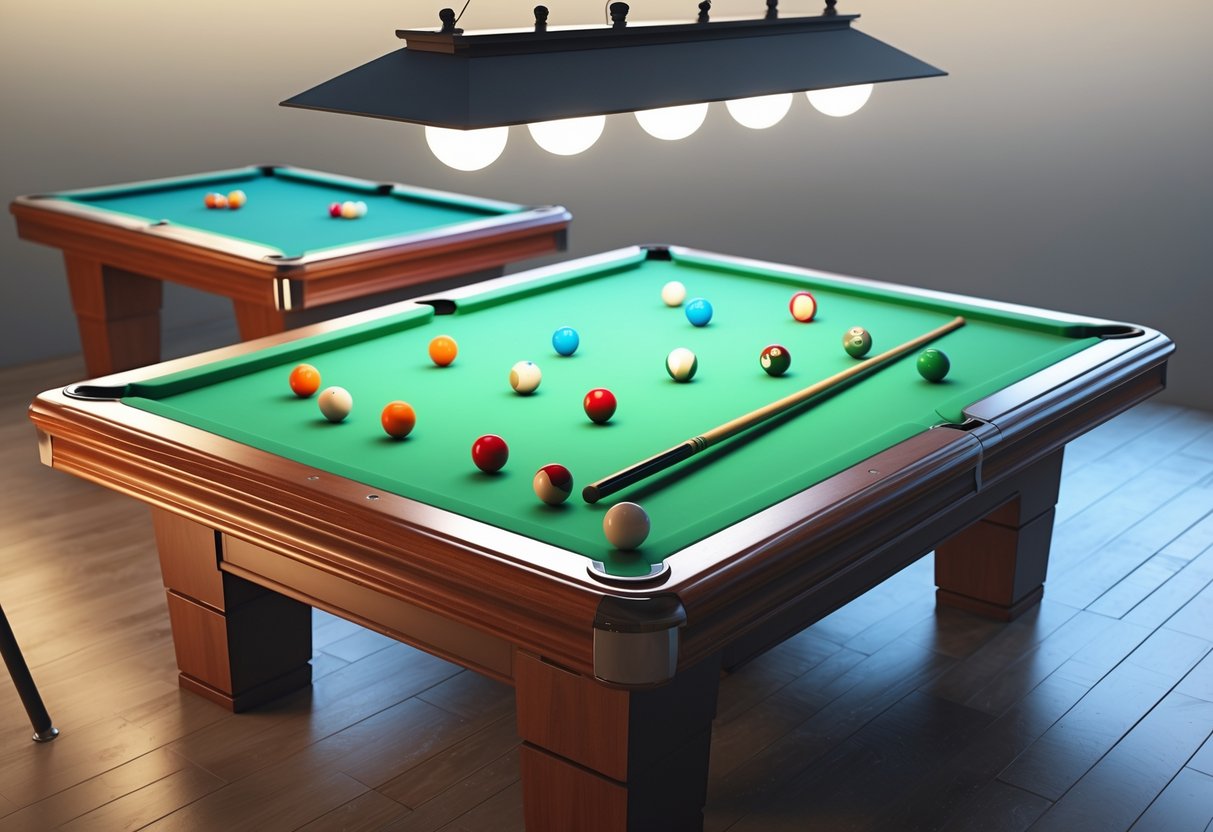
Popular Drills for Position Play Practice
Three main types of drills really help build solid position play.
Each one targets a different skill and sharpens your cue ball control for competitive games.
Line Drill Variations
The line drill is great for speed control and pattern recognition.
Set up object balls in a straight line and pot each one, keeping the cue ball inside certain zones.
Start with five balls along the centre line.
Try to pot each ball without letting the cue ball travel more than one diamond from where it started.
How to progress:
- Week 1: Stop the cue ball within two diamonds
- Week 2: Tighten it to one diamond
- Week 3: Add draw and follow shots
- Week 4: Mix up the ball spacing
If you’re more advanced, set up balls at 30-degree angles.
Now you’ve got to control speed on cut shots, not just straight-ins.
Make it harder by adding pattern requirements—pot balls in order and keep position for the next shot.
Wagon Wheel Drill Progressions
The wagon wheel drill builds angle control and cue ball placement from all over the table.
Put six balls around the perimeter, like spokes pointing to the centre pockets.
Start with the cue ball in the middle.
Pot each ball and return the cue ball to the centre, inside a chalk circle.
Skill stages:
- Basic: Just get the cue ball back to centre
- Speed: Use different speeds for the same result
- Spin: Mix in draw, follow, and side spin
- Pressure: Finish the sequence within a time limit
This drill teaches you to spot angles and visualise paths before you shoot.
Don’t rush—plan your speed and spin each time.
Target Practice Drills
Target practice drills build accuracy by making you finish with the cue ball in a specific spot.
Use chalk circles or playing cards as targets.
Set up three balls at different distances from the corners.
Put your targets near the far rail and try to land the cue ball there after each shot.
Difficulty levels:
- Beginner: Big targets (6-inch circles)
- Intermediate: Medium (4-inch)
- Advanced: Small (2-inch)
- Expert: Several targets per shot
With the card variation, move the card after each successful shot to make it tougher.
Speed control is still key—if you want to hit the targets, you need reliable cue ball travel.
Try different speeds to reach the same spot.
This drill really comes in handy during matches, especially when the next shot depends on your position play.
Pattern Play for Advanced Positioning

Advanced pattern play is all about making smart choices and keeping balls in easy spots.
You’ll connect shots so each position leads smoothly into the next, often using draw shots to control distance.
It’s not always simple, but once you get the hang of it, you’ll see your consistency jump.
Understanding Pattern Play Choices
Pattern play is all about planning several shots ahead, not just thinking about your next ball. You’ve got to scan the whole table and figure out which order gives you the easiest path to victory.
Good patterns keep things simple. Pick routes that steer clear of tough cuts or awkward angles. If you see two balls near pockets, try playing the harder one first while you still have options.
Think about cue ball travel distance between shots. Shorter moves are much easier to control than sending the cue ball on long journeys across the table. That’s why so many pros like patterns that keep the cue ball hanging out in the center.
Key pattern principles:
- Tackle problem balls early when you have escape routes
- Save easy balls for later when you’re running out of choices
- Don’t shoot yourself into a corner
- Set up natural angles on your last balls
Pool instructor Tin Man’s “Three Time” drill really drives this home. Players who pick poor patterns end up struggling, even if they make the same shot over and over.
Utilising Draw Shot for Position
Draw shots pull the cue ball backwards after contact, letting you control distance for positioning. This move becomes essential when you need to stop short or land in a specific spot.
Strike the cue ball below center to get backspin. How much draw you get depends on how low you hit and how firmly you stroke. More backspin means the cue ball travels further back after hitting the object ball.
Use draw shots when you need the cue ball to travel shorter distances than a rolling shot would allow. You’ll see this a lot when balls are close together or you need to land near a cushion.
Draw shot applications:
- Stopping short of obstacles
- Setting up better angles for the next shot
- Controlling speed on short-distance shots
- Avoiding scratches in the corners
Practice draw shots at different speeds. Soft draw gives you subtle changes, while a firmer stroke can pull the cue ball back several feet.
Connecting the Dots Strategy
Connecting the dots means creating smooth transitions between each shot in your run-out. You want every position to set up the next shot naturally, not force something tricky.
Map your route backwards from the final ball to where you are now. This helps you spot trouble areas before you even start. If the path looks messy, try switching up your shot order.
Look for natural patterns where the angles just line up. When you pot a ball along the rail, the cue ball often lands perfectly for a shot at center-table.
Connection principles:
- Every shot should make your position better
- Avoid patterns that demand perfect execution
- Give yourself more than one option when you can
- Use side cushions to help steer the cue ball
The best patterns feel almost effortless because each position flows into the next. If your cue ball keeps landing in the same small area during practice, you’ve found a pattern worth sticking with.
Incorporating Drill Systems and Resources
Structured drill systems and solid educational resources really form the backbone of position play training. Modern players get a lot out of systematic approaches like RDS, comprehensive online resources, and educational platforms that offer tested frameworks.
Runout Drill System Techniques
The Runout Drill System (RDS) gives you a reliable way to build position play skills through structured practice. This system breaks down tough positional concepts into manageable steps.
RDS focuses on three main things: position recognition, pattern development, and execution under pressure. You start with basic positioning drills, then move on to more complex scenarios.
Key RDS Components:
- Static position drills for building a foundation
- Dynamic movement patterns with time limits
- Pressure drills with defensive interference
- Progressive difficulty as you improve
Sessions work best when you follow a consistent structure. Begin with 10 minutes of position recognition exercises. Move on to 15 minutes of pattern work focusing on specific movements.
Wrap up each session with game-like scenarios that test your position awareness under pressure. This progression helps you build both technique and tactical smarts.
Using Drill Resource Pages
Online drill resource pages give coaches and players a huge library of position-specific exercises. These platforms offer instructions, video demos, and clear progression paths for all skill levels.
Good resource pages organize drills by position type, difficulty, and training goals. Look for sites with setup diagrams, coaching tips, and common mistakes to watch out for.
Most platforms let you filter drills to fit your needs:
| Filter Type | Examples |
|---|---|
| Position | Centre-back, midfielder, winger |
| Duration | 5-minute, 15-minute, 30-minute |
| Players | Individual, small group, full team |
| Equipment | Cones only, balls required, goals needed |
The best resource pages update often with fresh content. User ratings and coach feedback help you find the most effective exercises.
Leveraging Billiard University Material
Billiard University offers a ton of educational content that goes way beyond simple drill instructions. Their system covers theory as well as practical applications.
The real strength is in their structured learning pathways. Students work through beginner, intermediate, and advanced modules at their own speed.
Key features include:
- Video analysis of pros
- Interactive practice tools
- Progress tracking
- Expert commentary on technique
Billiard University materials work best if you mix them with regular practice. Use their theory to understand positioning, then try it out on the table.
Their assessment tools highlight where you need work. Regular testing helps you keep your technique sharp as you move up.
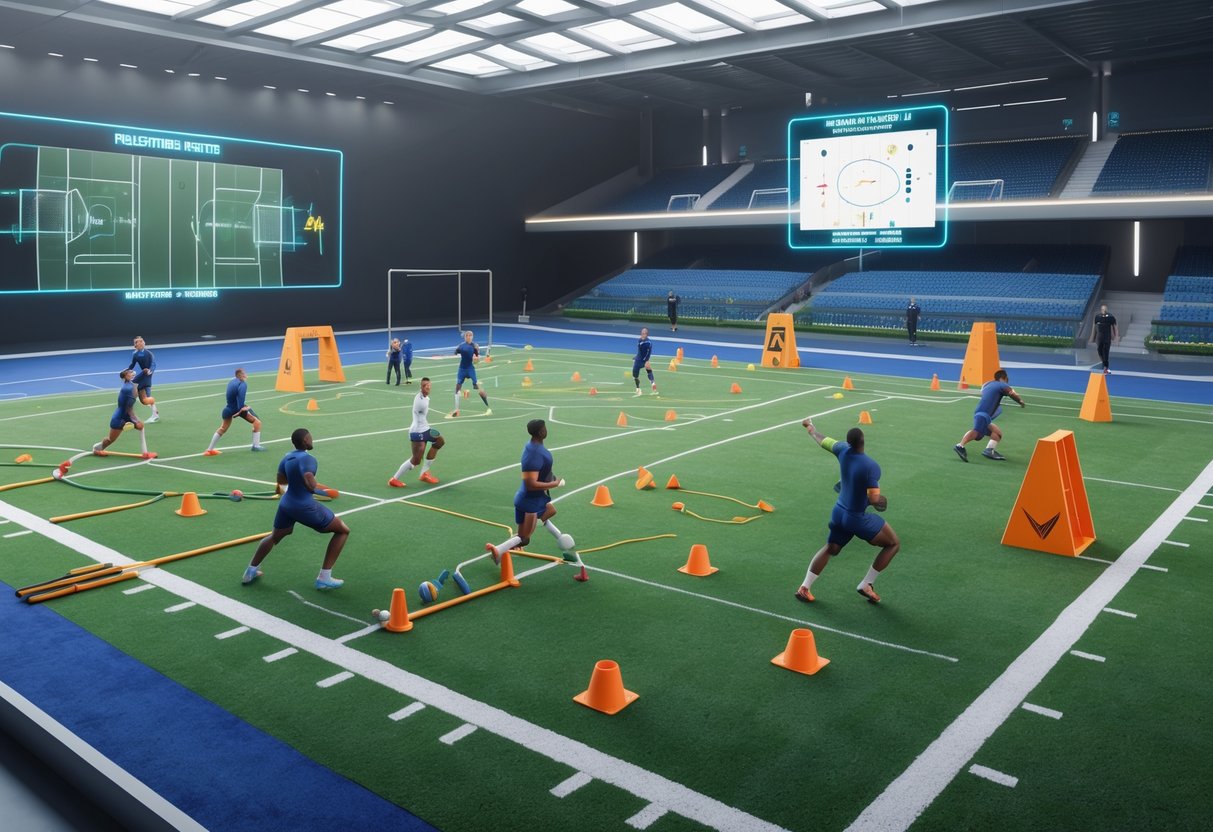
Wagon Wheel Drills: Enhancing Positional Awareness
Wagon wheel drills set up a structured training space where players learn to keep proper spacing while moving in coordinated patterns around the pitch. These exercises help teams develop the spatial sense to control possession and spot gaps in defenses.
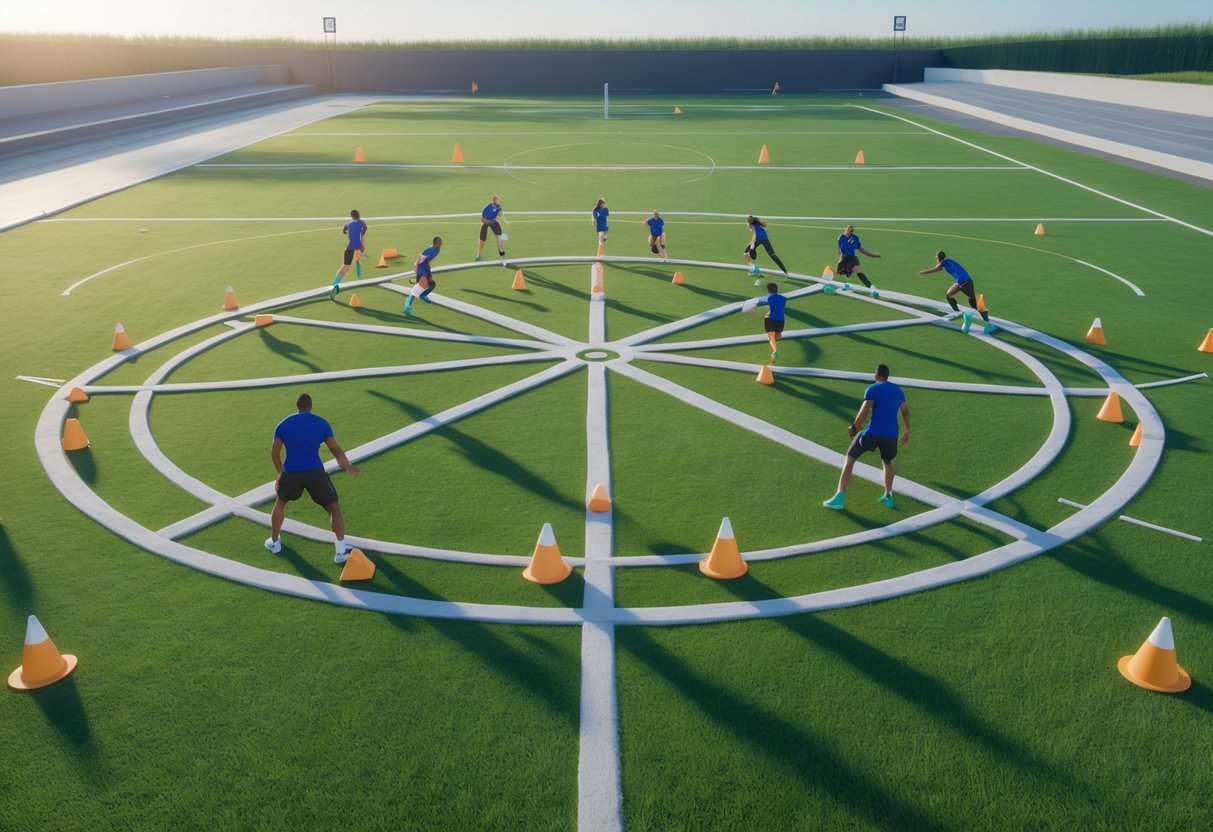
Setting Up the Wagon Wheel Drill
We start by laying out cones in a big circle around the center, making eight to ten stations about five meters apart. Players stand at every other station, leaving empty spaces between them.
The drill kicks off with a ball at any station. Players pass clockwise or counterclockwise while moving to the next open station in the same direction. This creates a rotating wheel.
Key setup points:
- Use 6-8 players max for good spacing
- Mark stations clearly
- Keep the circle 15-20 meters wide
- Start with one ball, then add a second moving the other way
This drill is simple but effective. Players quickly realize they need to keep scanning for teammates and the ball, all while staying in the right spot.
Common Challenges and Solutions
Players often bunch up or move too fast at first, breaking the wheel. We remind everyone that each player owns their station and has to wait for the right time to rotate.
When you add more balls, communication gets tricky. Players can’t just pass and move—they need to call out before every pass.
Frequent problems we see:
- Players rush passes and lose accuracy
- They lose track of the shape during rotation
- Bad first touches kill the flow
- Changing direction mid-drill causes confusion
To fix this, we start slow and pick up speed little by little. Sometimes we use a metronome or clap to set the rhythm. When mistakes happen, we pause and reset instead of letting chaos take over.
A lot of players struggle with visual scanning. They focus only on the ball and forget to check where everyone else is.
Progression for Experienced Players
Advanced players can handle two balls moving in opposite directions. This really tests their awareness of passing options and avoiding collisions.
We add rules where certain players can only use specific stations, mimicking real positions. Defenders stick to deeper stations, attackers rotate through the front.
Advanced variations include:
- One-touch passing
- Adding a defender in the center to intercept
- Changing rotation speed based on game scenarios
- Mixing in different pass types (driven, lofted, through balls)
For the toughest challenge, we shout “break” and everyone has to instantly create a goal-scoring chance while keeping positional discipline.
Experienced teams can handle direction changes mid-drill. Quick communication keeps the new pattern going without losing possession or breaking the shape.
Target Practice Drills for Cue Ball Placement
Target practice drills help you master cue ball control by aiming for specific spots after each shot. Start with big targets, then shrink them and add distance to build accuracy over time.
Aiming for Precise Cue Ball Endpoints
The Circle Target Drill is a great place to start. Place a paper plate or chalk circle where you want the cue ball to stop.
Set up an object ball in different spots. Try to pocket it and land the cue ball inside your target zone.
Begin with 6-inch circles about a foot from the object ball. Start with straight shots, then add angles.
Focus on these:
- Stroke speed: Slower strokes are easier to control
- Follow-through: Finish your stroke toward the target
- Tip position: Hit center for basic control
Progressive Accuracy Training means shrinking your target each week. Start with dinner plate-sized circles, then move to saucer size.
Once you hit 50 shots at one size, cut the target by 2 inches. This builds muscle memory in small steps.
Track your accuracy in a notebook. Aim for 70% before shrinking the target again.
Adapting Target Size and Distances
Distance Variation Training challenges your stroke consistency at different lengths. Start with short 2-foot shots, then stretch to full-table.
Keep the target size the same, but move the cue ball further away. This teaches how stroke power affects accuracy.
Multiple Target Setup puts three different-sized targets at different distances:
- Small (3 inches) close-up
- Medium (5 inches) mid-table
- Large (7 inches) at the far end
Practice hitting each target in order during one session. This feels a lot like real games where position changes constantly.
Advanced Challenge Drills add obstacles. Place balls between your starting spot and the target.
You’ll need to use English or curve shots to steer around them and still land on target. This really sharpens your position play.
Time yourself running each drill. If you can finish faster without losing accuracy, your cue ball control is improving.
Utilising Ball in Hand for Position Play Mastery
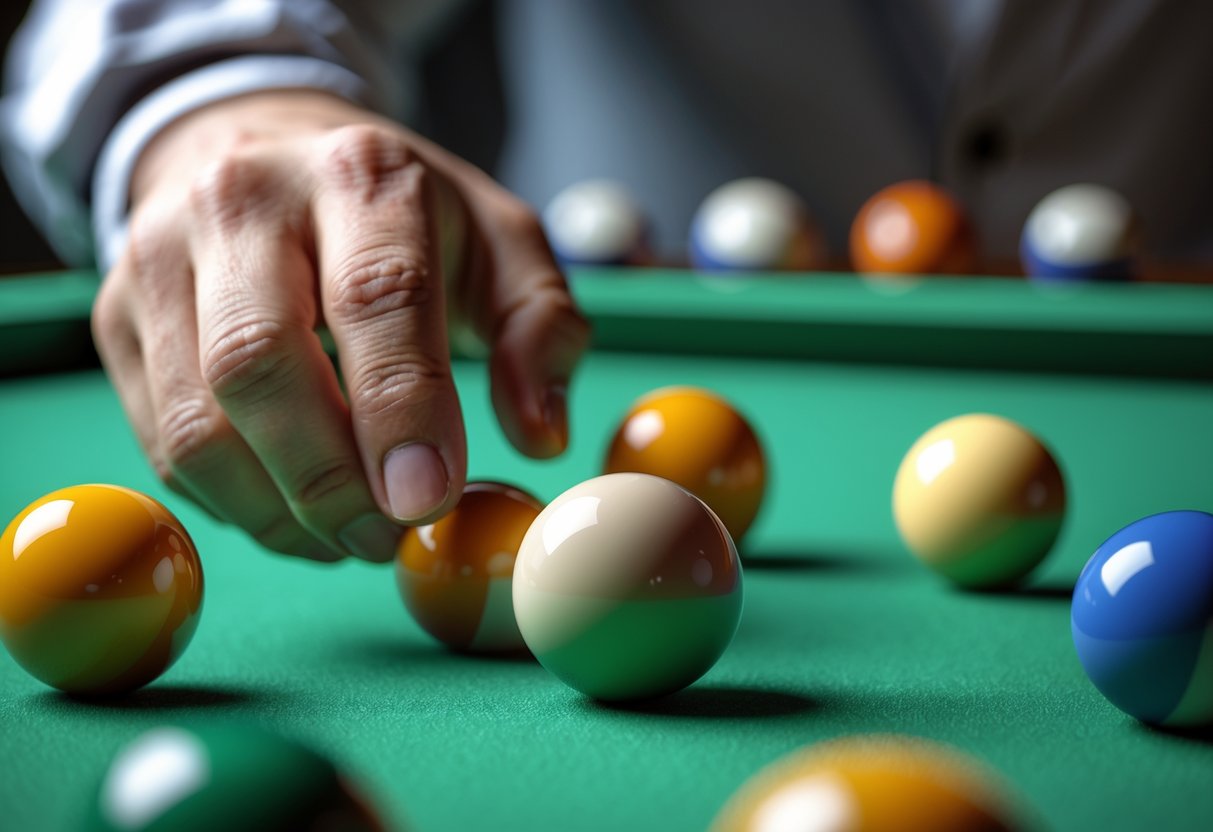
Ball in hand gives you total control over cue ball placement, so it’s perfect for practicing advanced position play. By setting up specific situations and sticking to structured routines, you can learn to turn ball in hand into full run-outs.
Creating and Solving Position Scenarios
Set up tough position scenarios that make you think past just pocketing the next ball. Put balls in clusters or at tough angles, then use ball in hand to figure out creative solutions.
Start with simple two-ball combos. Place one ball near a pocket and another somewhere tricky. Practice placing the cue ball for the first shot and perfect position on the second.
Natural angle practice is super useful here. Set up shots where you can avoid using crazy spin by following the natural path. If an object ball is close to the pocket, place the cue ball against the rail for a predictable angle.
Work on cluster-breaking scenarios often. Set up three balls touching and use ball in hand to break them apart safely. This helps you spot these chances during real games.
Try the “furniture rearranging” drill. Set up balls that block key paths, then use ball in hand to move problem balls while keeping your run-out alive.
Ball in Hand Practice Routine
A simple 20-minute routine can cover the ball in hand situations you’ll see in games.
Minutes 1-5: Practice basic positioning. Set up straight shots with the cue ball behind the head string. Work on placing the cue ball for easy angles to your next target.
Minutes 6-10: Focus on safety play. Create layouts where running out isn’t possible and practice defensive shots to improve your table for later.
Minutes 11-15: Take on combo opportunities. Look for balls that can knock others into better spots while you make your shot.
Minutes 16-20: Practice win-the-game situations. Set up layouts where you could run the table, and focus on cue ball placement for the clearest path forward.
Keep a log of which scenarios trip you up. Most players struggle with short-side position play, so give those extra attention.
Practical Game-Like Scenarios for Real-World Application
You can’t just drill position play in isolation and expect it to work in real matches. You need to put those skills to the test, under pressure, in situations that feel like the real thing.
When you move from practice drills to actual games, try to recreate the kinds of scenarios you’ll see in tournaments or league play. That’s where the learning really sticks.
Applying Drills in 8-Ball and 9-Ball
8-Ball Position Practice
Try setting up the table with three of your group balls left, plus the 8-ball. This simple setup mimics a lot of real 8-ball endgames.
Work on these scenarios:
- Early game safety battles – Try to leave your opponent snookered, but keep your own position strong.
- Mid-game run-outs – Focus on clearing your group and lining up for the 8-ball.
- Defensive shots – When you can’t pot, practice leaving your opponent with tough angles.
We always push for practice under pressure. Use a 60-second shot clock for each shot. It’s not exactly fun, but it’s a good way to feel the same nerves you’ll get in a real match.
9-Ball Specific Drills
Nine-ball’s a different beast. You need to work on running balls in order, and the pressure’s always on.
Try these drills:
- Push-out situations – Practice push-outs that leave your opponent in trouble, not yourself.
- Combination shots – Get good at hitting the lowest ball and setting up for the next.
- Safety exchanges – Learn how to tuck the cue ball behind higher-numbered balls.
Mix up the ball placements every time. That way, you’re not just memorizing patterns—you’re learning to think on your feet.
Transferring Practice to Match Play
Mental Preparation Techniques
Most players struggle to bring their best position play into matches. The pressure just messes with your decision-making.
Try these mental prep tricks:
- Visualisation – Before a match, picture yourself running through tough position scenarios.
- Breathing routines – Stick to your same pre-shot routine, whether you’re practicing or playing for real.
- Backup plans – Always have a Plan B in mind if your first shot doesn’t work out.
Match Simulation Practice
Grab a practice partner and run through full match setups. Use tournament racks, shot clocks if you can, and keep score.
Ask someone to make proper referee calls for you. The more real it feels, the better you’ll handle pressure when it counts.
Tracking Performance Metrics
Keep an eye on your stats during games. We track things like:
- Position success percentage – How often did you land the cue ball where you wanted?
- Safety execution rate – How many defensive shots actually worked?
- Run-out completion – How often did you run the table without letting your opponent back in?
Compare your practice stats to your match stats. If there’s a big gap, you probably need to do more game-like practice.
Resources for Ongoing Position Play Improvement
If you want to get better at position play, you need the right gear and a steady routine. Good drills and the right equipment can make a big difference.
Online resources help you see what great positioning looks like, so you can copy the pros.
Recommended Practice Tools
Cones and markers are a must. You’ll want at least 20 bright cones for marking out zones, passing lanes, or where players should stand.
Sometimes, flat markers are better than tall cones. They help you see positioning without getting in the way during drills.
Bibs or training vests in different colors make it easy to split players into groups. Four colors usually cover most drills.
For finishing drills, small pop-up goals or target areas are super handy. They’re easy to set up and pack away.
A whiteboard and markers let coaches sketch ideas fast. Magnetic boards with player pieces are even better for showing movement.
Training poles work well as stand-in defenders. They force players to find ways around obstacles and keep their shape.
Online Drill Collections and Videos
The Coaching Manual has some solid positional pattern drills. Their stuff rotates players through different roles and focuses on movement, receiving, and passing.
Modern coaching websites offer position-specific training and feedback. Look for sites that go beyond the basics and actually break down performance with analysis tools.
Video analysis platforms let you see how top teams like Barcelona or Manchester City use positioning to create advantages. There’s a lot to learn just by watching.
Tactical theory guides break down key principles, like playing out from the back, using half-spaces, and forming passing triangles.
Many sites offer free drill databases along with premium stuff. Start with the free drills—you can always upgrade once you know what you need.
Frequently Asked Questions
People always have questions about cue ball control, good practice drills, and positioning strategies. Here are some answers that might help you get a grip on position play.
How can I improve my cue ball control in billiards?
Start with target practice drills. Place a coin or chalk at different spots and try to land the cue ball right on them.
Work on your stroke mechanics. Keep your bridge hand steady and follow through straight every time.
Practice stun shots—where the cue ball stops dead after contact. It’s a great way to learn speed control and see how the cue ball reacts.
Stick with center ball hits at first. Don’t worry about adding spin until you’re comfortable with the basics.
What are some effective drills for practising position in pool?
Try the “Three Time” drill. Shoot each ball three times, but always play from the worst position you left yourself. It’s tough, but it really highlights weak spots.
Set up five balls in a line and work on moving the cue ball to different spots after each shot. It’s a simple way to build up consistency.
Play ghost games—take ball-in-hand only when you miss or lose position. It’s a solid test of your pattern recognition.
Use coins or chalk marks as targets. Try to land the cue ball in those small areas every time.
Could you suggest techniques for maintaining a stable bridge hand?
Plant your bridge hand firmly before you even get down on the shot. It should feel locked in place from start to finish.
Spread your bridge fingers wide. The wider your base, the steadier your bridge stays.
Practice a closed bridge for more control. Loop your index finger over the cue, but keep the rest of your fingers pressed to the table.
Don’t lift your bridge hand during your follow-through. It’s a bad habit and messes with your accuracy.
What’s the best way to understand the angles for position play?
Start by learning the tangent line. When you hit an object ball with no spin, the cue ball moves off at a 90-degree angle from the contact point.
Try to picture the cue ball’s path before every shot. Look at your target, then figure out where you need to hit the object ball.
Use the “ghost ball” method to estimate angles. Imagine where the cue ball needs to be to make the shot, then aim for that spot.
Begin with straight shots, then slowly work up to sharper angles. Nailing the easy ones first builds confidence.
Can you explain the role of spin in achieving better positional play?
Top spin rolls the cue ball forward after contact. Use it when you need the cue ball to keep moving down the table.
Bottom spin, or draw, pulls the cue ball back after hitting the object ball. It’s perfect for bringing the cue ball closer to you.
Side spin, or english, changes the cue ball’s path off the cushions. It’s tricky and should be a last resort for most position shots.
Focus on center ball hits first. Too many players rely on spin when a smarter shot choice would do the trick.
What are the key principles for planning multiple shots ahead?
Start by thinking about your final ball and work backwards. Figure out where you want to be for that last shot, then sketch out how you’ll get there.
Pick shot patterns that make position play easier. Aim for shots that leave you with natural angles for your next ball, instead of forcing yourself into awkward transitions.
Spot the key position shots early on. These are the moments where you absolutely need to land in the right spot to keep your run going.
Try breaking racks into smaller chunks. It can help to focus on just 2-3 balls at a time, instead of trying to map out the whole run right away.
