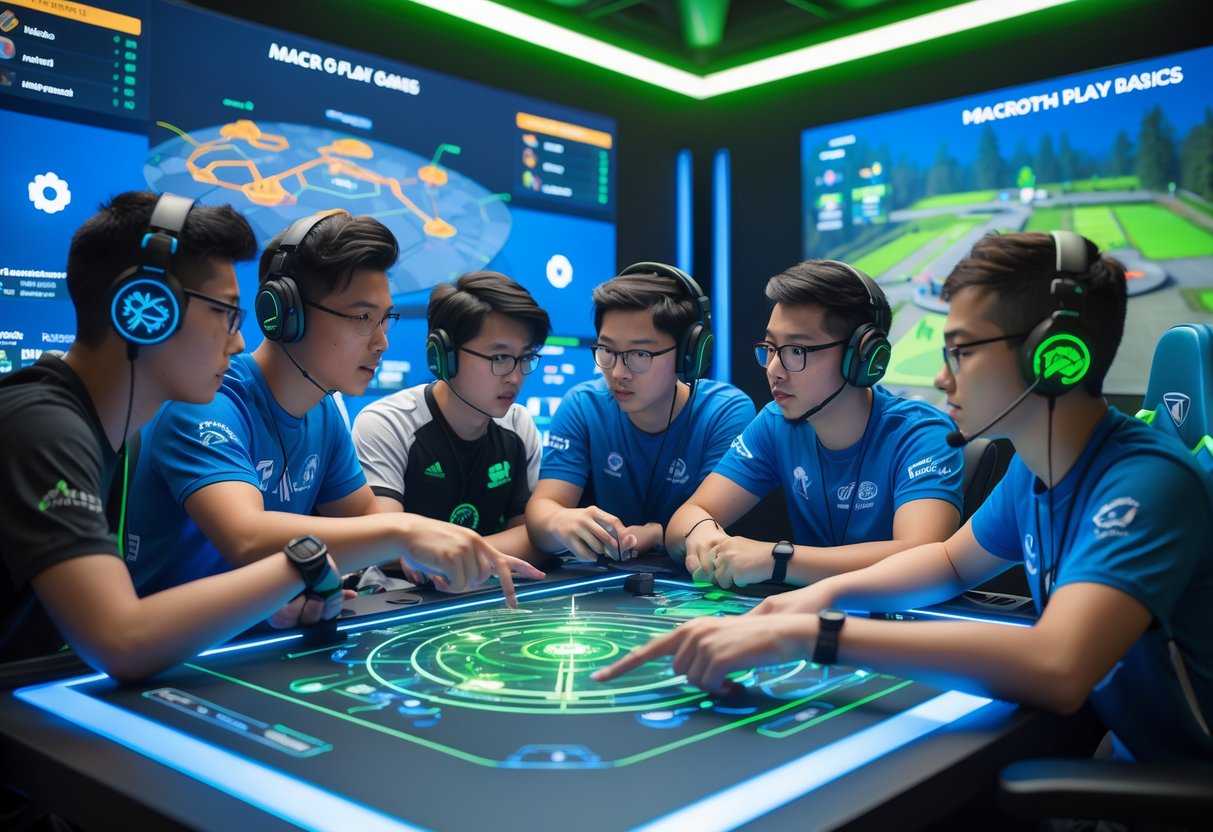
Macro Play Basics: Essential Strategies for Winning Competitive Games
Updated On: November 12, 2025 by  Aaron Connolly
What Is Macro Play?
Macro play means making decisions that shape the entire game, not just individual fights or flashy moments.
It’s about long-term planning, objective control, and team coordination—winning through smart positioning and resource management, not just raw mechanics.
Definition and Key Concepts
Macro play revolves around strategic decision-making that influences how a match develops over time.
You don’t just react; you plan several moves ahead.
The basics? Objective control, map positioning, and resource management.
Teams use macro strategies to grab advantages through towers, dragons, or other objectives, instead of just chasing kills.
Vision control matters a lot in macro decisions.
Teams drop wards in key spots to spot enemy movements and plan their next steps.
Wave manipulation also comes into play.
Players push or hold minion waves to put pressure on different parts of the map.
Timing is everything for macro.
Knowing when to group, when to split up, or when to contest objectives—that’s what separates good teams from the great ones.
Macro Play Versus Micro Play
Micro play is all about sharp execution during fights and individual mechanics.
It’s landing skill shots, juggling cooldowns, and making those split-second calls in battle.
Macro, though, zooms out.
It’s about rotating between lanes, picking which objectives matter most, and moving as a unit across the map.
Game dynamics shift a lot depending on what teams focus on.
A team with better micro might win more fights, but still lose if their macro falls apart.
The best teams? They nail both.
They blend strong individual skills with clever, big-picture planning to keep winning.
Most players pick up micro skills first, just by practicing.
But macro? That usually comes later, as you start to read the game and make smarter choices.
Strategic Importance in Games
Strong macro play often decides who wins, even if the other team has better mechanics.
Teams that control objectives and manage resources well can win games, even when they’re behind in kills.
Strategic decision-making grows more important as you climb in skill.
Pro teams spend hours studying macro and drilling coordinated moves.
Good macro gives teams multiple ways to win.
They don’t rely on just one plan—they adapt as the game unfolds.
Map control leads directly to more gold, experience, and safer positioning.
Teams with better macro naturally build up advantages over time.
This strategic layer keeps games interesting.
Even when teams seem evenly matched, macro differences can turn matches into tense, tactical battles.
Core Objectives in Macro Play
Game objectives are the targets on the map that give your team real, lasting advantages.
Knowing which objectives to chase—and when—can set you apart from the crowd.
Types of Game Objectives
Most competitive games have similar objective types.
Primary objectives (like Baron and Elder Dragon in League of Legends) give huge, game-changing buffs for several minutes.
These take teamwork and solid setup.
Secondary objectives are things like small dragons, towers, and jungle buffs.
They offer smaller advantages that add up.
A lot of players ignore these, but grabbing several can set you up for the big stuff later.
Territory objectives help you control parts of the map and vision.
Towers, inhibitors, and control points force enemies to respond or lose ground.
Smart teams use these to build pressure and set up for bigger plays.
Resource objectives are all about gold, experience, or other currencies.
Think jungle camps, minion waves, and bounties.
If your team collects resources efficiently, you’ll hit power spikes before your opponents.
Setting Winning Priorities
Objective priorities change depending on the game state and your team comp.
Early game teams should go after small dragons, towers, and Herald.
Push these while your champs are strong.
Late game comps need to farm safely and control vision.
Don’t risk big objectives until you’re ready—just clear waves and keep your jungle safe.
Game state actually matters more than team comp.
If you’re ahead, secure objectives to stretch your lead.
If you’re behind, look for picks around objectives or trade pressure elsewhere instead of forcing bad fights.
People often mess up by forcing Baron when they’re behind, or ignoring soul-point dragons just to chase kills.
Before you commit, ask yourself: “Does this objective actually help us win?”
Objective Timings and Control
Dragon spawns five minutes after the first one dies (which happens at five minutes).
Plan your recalls and roams around these timers.
Show up early—like, a minute or two before—to set up vision and clear enemy wards.
Baron shows up at 20 minutes, usually when teams have two or three items.
You need vision control and a numbers edge to take Baron safely.
Never start Baron if all enemies are alive—unless you’re way ahead.
Setup time really matters for big objectives.
Drop wards a minute or so before spawn.
Clear enemy vision and block off their paths.
Get your team in position to deny their approach.
Post-objective moves often decide how much you gain.
After snagging Baron, push multiple lanes instead of recalling right away.
Use the buff timer to get as much as possible.
Dragon buffs stick around, so keep securing them all game.
A quick tip: Track enemy summoner spell cooldowns before big objectives.
Teams without Flash or teleport are much easier to engage.
Understanding Map Control
Map control lets teams steer the game’s pace.
It comes down to three skills: tracking enemies, placing wards for vision, and moving as a team to grab advantages.
Map Awareness Fundamentals
Map awareness means always watching what’s happening everywhere.
You should check your minimap every few seconds.
This habit helps you spot enemy moves before they become real threats.
Good map awareness starts with knowing jungle timing.
If you know where the enemy jungler started, you can predict their next step.
Most junglers stick to certain paths early on.
You should also track enemy cooldowns.
When someone burns their escape, they’re vulnerable for the next 10–20 seconds.
That’s a window for a smart play.
Enemy positioning reveals their plans.
If three enemies vanish from lanes, they’re probably setting up for an objective or a gank.
You can use that info to counter them or grab something else.
Lane states matter, too.
If minions push toward your towers, enemies have to pick between farming or roaming.
That’s your chance to make aggressive plays somewhere else.
Vision Control and Warding
Vision control wins games by feeding you better info.
Drop wards in river bushes, jungle entrances, and around big objectives to track enemy movement.
Ward timing is key.
Ward before objectives spawn, not after fights break out.
Since dragon spawns every five minutes, set up vision 30–60 seconds early.
Different ward types have different jobs:
| Ward Type | Duration | Best Use |
|---|---|---|
| Stealth Ward | 90-150 seconds | Long-term vision |
| Control Ward | Until destroyed | Area denial |
| Sweeping Lens | 10 second sweep | Clearing enemy vision |
Coordinate vision with your team.
If your support wards bot river, your jungler can focus on top side.
That way, you cover more ground.
Denying enemy vision is just as important.
Before you go for big objectives, clear enemy wards.
If they can’t see you, they can’t react in time.
Rotations and Lane Assignments
Rotations mean moving players between lanes to get a numbers advantage.
You rotate when you can outnumber the enemy somewhere.
The most common move? Shift from a winning lane to help struggling teammates.
Timing rotations depends on minion waves.
Push your lane before you rotate, so you don’t lose farm.
This usually takes half a minute or so to set up.
Good rotations create pressure everywhere.
If you rotate bot lane to mid, enemies have to pick: defend mid or keep bot farm.
Either way, your team wins out.
We coordinate rotations with team communication.
Simple callouts like “rotating mid in 30” help everyone get ready.
That kind of coordination really sets top teams apart.
Lane assignments change as the game goes on.
Mid game often means sending your best split-pusher to a side lane, while the other four group elsewhere.
This forces enemies to split up and stretch their resources thin.
Resource and Farm Management
Smart resource management is where good macro players really shine.
You’ve got to balance efficient farming with smart resource sharing, all while managing risk across the map.
Efficient Farming Techniques
Last-hitting is still the core of good farming.
Time your attacks to finish off minions for gold, and deny your opponent the same.
Wave management decides when and where minions meet.
Push waves before you recall, so you don’t miss farm under your tower.
If you’re ahead, freeze waves near your tower to safely starve your enemy.
Farming patterns help you squeeze out more gold.
Clear minion waves first, then hit jungle camps if you’re a carry.
Mid laners can grab wraith camps between waves for extra income.
| Priority Level | Farm Type | Gold Value | Risk Level |
|---|---|---|---|
| 1 | Cannon minions | 60-90g | Low |
| 2 | Regular minions | 20-25g | Low |
| 3 | Jungle camps | 40-80g | Medium |
| 4 | Enemy jungle | 40-80g | High |
Back timing keeps you from missing farm.
Recall after pushing a wave and when you have enough gold for a real upgrade.
Don’t recall while your wave crashes into your tower.
Balancing Resources and Risks
Risk assessment guides every farming choice.
High-value farm in a dangerous spot isn’t worth dying for.
A death gives up gold and cedes map control.
Resource priority changes as the game goes on.
Early game? Focus on safe, steady farm.
Mid game? Balance farming with taking objectives.
Late game? Stick with your team—don’t solo farm and risk getting caught.
Map awareness protects your farm.
Check where enemies are before you enter their jungle.
If enemies are missing, farm safe.
Drop wards around valuable camps you want to take.
Opportunity cost is real for every farm decision.
Taking jungle camps means you might miss lane farm.
Staying in lane too long could cost you an objective fight.
Team resource allocation needs communication.
Carries should get minion waves.
Junglers focus on camps and objectives.
Support players help others farm by providing vision and safety.
Jungle and Lane Resource Distribution
Jungle camp allocation depends on roles.
AD carries usually take krugs and gromp for sustained damage.
AP champs prefer blue buff and raptors for cooldowns.
Lane assignments should maximize your team’s gold.
Solo laners take full gold and XP from their lanes.
Bot lane carries share farm, with supports grabbing relic shield procs and a few minions.
Neutral objective timing helps coordinate team resources.
Take dragon and baron when you control the map.
If you’re behind, only go for these if it’s your last shot.
Resource funnelling works in certain comps.
Mid laners can give jungle camps to hyper-carries, but that takes real coordination and protection.
Cross-map trading lets you swap resources smartly.
Take enemy jungle when they’re on the other side of the map.
Trade objectives of equal value instead of forcing bad fights.
Decision-Making in Macro Play

Smart macro decisions win more games than flashy plays ever will.
It’s about spotting the right moment to act, adapting on the fly, and knowing when to lead or just react.
Identifying Opportunities
Good macro players spot chances before everyone else even realizes they’re there. That’s what really separates average players from strong strategic thinkers.
Map state awareness sits at the heart of finding those moments. We keep an eye on enemy positions, cooldowns, and respawn timers at all times. If their jungler pops up bot lane, we can jump at top-side objectives without much risk.
Resource advantages open up the best windows. When we’re ahead in gold or experience, we push for fights around big objectives. If we’re behind, we hunt for picks on stragglers or grab uncontested objectives instead.
Key opportunities to watch for:
- Power spikes when our team hits big item timings
- Vision control near Baron or Dragon spawns
- Split push chances while enemies group somewhere else
- Recall timings that leave objectives exposed
Timing is everything. A Dragon attempt feels perfect with 30 seconds left on enemy death timers, but with only 15 seconds? That’s risky. We have to figure out if we can finish the objective and get out alive.
Quick win: Set reminders for major enemy ultimates and summoner spells. If their key abilities are down, that’s our moment to engage.
Adaptation During Game Phases
Game flow changes a ton as matches move along. We need to shift our thinking with each phase to stay ahead.
Early game is all about small wins. We make calls around lane priority, jungle camps, and first tower gold. Fights break out over Scuttle crabs and early Dragons. The stakes aren’t huge yet, but these moves set up the rest of the match.
Mid game gets messy fast. Team fights suddenly decide several objectives at once. We look at:
- Which team scales better
- Current gold gaps
- Vision around key spots
- Who’s got Teleport ready for flanks
Late game? Every decision feels like it could end the match. Baron and Elder Dragon fights settle things. We play it safe, but when the right chance shows up, we strike.
Warning: Teams often throw leads by forcing fights they don’t need. Sometimes the smartest macro move is to chill and avoid unnecessary risks.
Our champ picks also shape our choices. Assassins hunt for solo picks. Tanks engage when the team’s ready. ADCs look for angles to dish out max damage in fights.
Reactive Versus Proactive Strategies
Good macro play means balancing bold moves with smart reactions. Both styles matter, depending on how the game’s going and what our comp can do.
Proactive play means we take charge. We start fights on our terms, set objective timings, and control the pace. This works when we have:
- Strong early champs
- Gold or XP leads
- Better vision
- Trust in our team fighting
Reactive strategies let us answer enemy plays. We punish their mistakes and scale up to our power spikes. Go reactive when:
- Our late game’s better
- We’re behind in gold
- The enemy has better engage
- Our comp is built for counter-engage
The best teams switch it up mid-match. We might push early to get ahead, then play it safe to hold the lead. Or we start slow and ramp up aggression as we hit item spikes.
| Strategy Type | Best Used When | Key Focus |
|---|---|---|
| Proactive | Ahead in gold/exp | Force favourable fights |
| Reactive | Behind or scaling | Counter enemy mistakes |
| Mixed | Even game state | Adapt moment by moment |
Great macro play mixes both. We stay ready to react, but we’re always watching for chances to take control.
Macro Play by Role
Every role in competitive gaming calls for its own macro decisions—these choices really shape how matches play out. Jungle control, lane positioning, and objective timing all shift depending on your champ and where you’re playing.
Jungler Macro Principles
Junglers set the pace for the whole map with their pathing and objective timing. You need to track enemies and squeeze out as much as possible for your team.
Camp Management is where it starts. Clear camps fast between ganks, but don’t get caught farming when a big objective’s up. Stack neutral camps when you can to boost your carries’ gold.
Vision Control is a constant job. Drop wards before big objectives spawn—usually two minutes ahead of Dragon or Baron. Block enemy jungle camps with sentries to deny their farm and mess with their pathing.
Lane Assistance changes the flow of the match. Gank when enemies push too far or burn their escapes. Sync up with laners who have CC ready to lock down kills.
Key jungle responsibilities:
- Rune control at 2, 4, and 6 minutes
- Drake/Baron setup 90 seconds before spawn
- Counter-ganking when enemies get aggressive
- Deep warding in enemy jungle quadrants
Top Lane Macro Basics
Top lane macro is about building pressure and watching for teleport chances. Where you stand can change team fights and objective control.
Wave Management means paying attention to minion placement. Hold the wave near your tower early to dodge ganks. Push hard only when you know the enemy jungler isn’t nearby.
Teleport Usage is what sets great top laners apart. Save teleport for big fights around Dragon or to answer enemy moves. Don’t just use it to get back to lane unless you’re bleeding farm.
Split Pushing gets important in mid-game. Push side lanes while your team groups up for objectives. This forces enemies to decide between defending towers or contesting big objectives.
Top lane priorities:
- Tower destruction for map control
- Jungle camp control in your area
- Roaming timing when your wave is pushed out
- Late-game positioning to swing team fights
Mid Lane and Mage Macro Play
Mid lane sits at the center, so you need eyes everywhere—side lanes, jungle, all of it. Mage champs shine at controlling choke points and starting fights.
Roaming Windows open up when you clear your wave fast and see a shot in a side lane. Use AoE to clear, then move with your jungler to gank.
Rune Priority matters for keeping lane control. Fight for power runes at even minutes, especially if you’re on tempo mages like Storm Spirit or Queen of Pain.
Objective Participation shows your value after laning. Get in position for burst damage at Dragon, but always plan a way out. Mages usually kick off fights with CC.
Resource Management means watching your mana. Use bottles smartly and coordinate with supports for consumables. Don’t waste spells and leave yourself open.
Mid lane essentials:
- Ward placement at river choke points
- Smoke coordination with supports
- Team fight positioning for max spell value
- Late-game shot-calling from mid
Bot Lane and Support Strategies
Bot lane needs the tightest teamwork—it’s just more complicated than solo lanes. ADCs juggle farming and moving around the map, while supports handle vision control and find roaming chances that can turn games.
ADC Macro Movements
As an ADC, you’ve got to think past just last-hitting. Lane priority really matters after you finish the first wave and three melee minions from the second—hit level 2 first and you can take control.
Push the wave under their tower before you recall. That way, you deny them gold and XP while you shop. If you recall at the wrong time, you lose farm and pressure.
In mid-game, don’t just sit bot forever. Follow your strongest teammate instead of farming solo. Check the scoreboard to see who’s carrying.
Key Movement Priorities:
- Rotate to objectives 60-90 seconds before they spawn
- Group with fed teammates, not just your support
- Farm side lanes only if it’s safe and your team knows
You don’t have to show up for every fight. Sometimes, scaling quietly helps more than forcing a risky skirmish.
Support Macro Decisions
Support macro is all about gathering info and making plays. We scout early using the “Five-Point” strat, with everyone watching jungle entrances.
Early Game Focus:
- Ward river bushes around the third minion wave
- Execute minions on the second wave, not the first
- Roam when we have lane priority and our ADC is safe
Vision wins mid-game. Place wards based on where your fed player is, not just in standard spots. If our mid is ahead, drop deep jungle wards near their lane for safety.
Roaming Rules:
- Only roam when we’ve got lane priority or after a good recall
- Ping your plans
- Clear enemy wards and plant our own
For objectives, get vision denial going 90 seconds early. We can’t rely on 50-50 smite fights.
Synergy and Lane Rotations
Bot lane duos have to talk about wave states and enemy positions all the time. We need to sync our level 2 timing so nobody dives in while the other’s farming.
Rotation Priorities:
| Situation | Action | Timing |
|---|---|---|
| Dragon spawning | Set up vision | 90 seconds early |
| First tower down | Move to strongest player | Immediately |
| Enemy roaming | Match rotation or grab tower | Within 10 seconds |
When our tower drops, don’t just stick bot by default. Check who needs help most. Fed solo laners usually offer better win chances than just farming more bot.
Common Synergy Mistakes:
- Support roams without saying anything
- ADC farms while the team fights for objectives
- Both players recall at once
If we’re behind, lane swaps help. Move mid for safer farm and easier team play. After 15 minutes, bot lane isn’t home base anymore.
Good bot lane macro means both players know their win conditions and adjust together—not just doing their own thing.
Objective Control: Dragons and Major Buffs
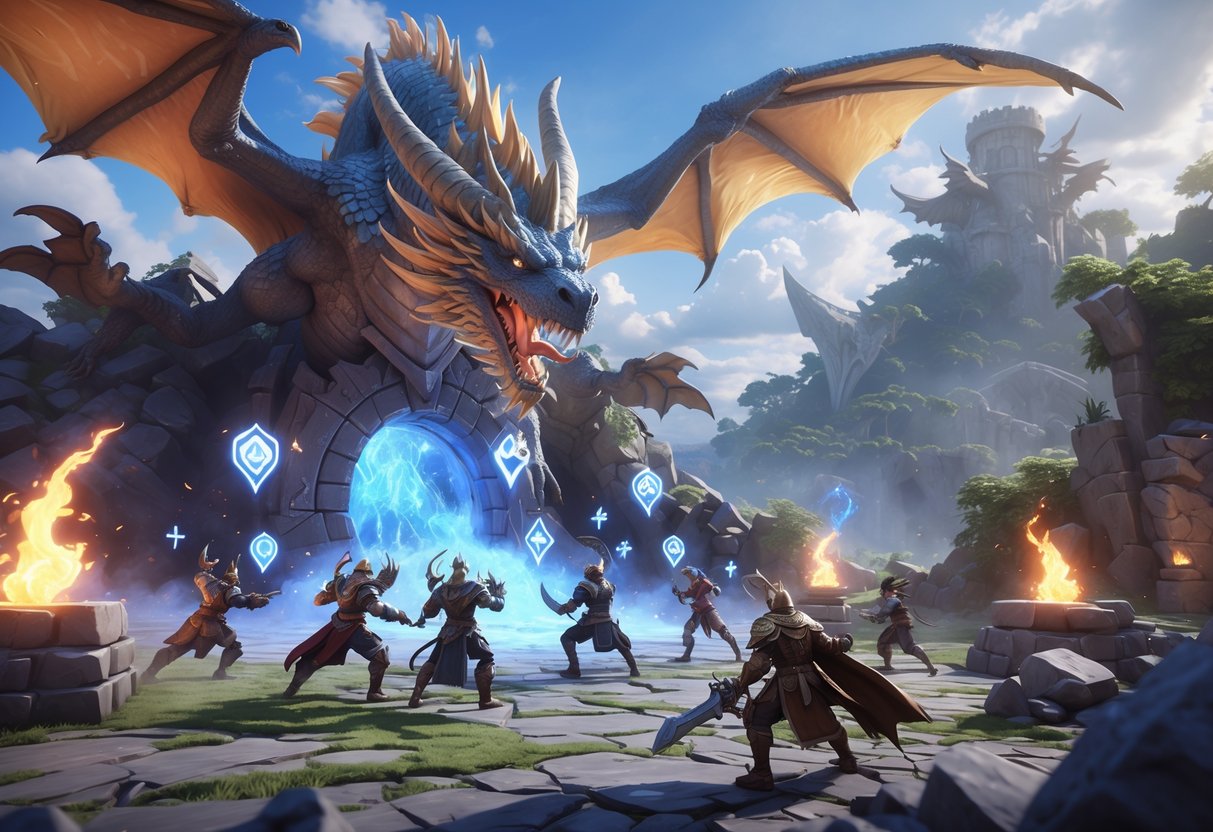
Dragons and Baron give game-changing advantages that can flip matches. Nailing the timing and getting everyone on the same page for these objectives is what separates winning teams from the rest.
Dragon Prioritisation
Not every dragon is worth fighting over. Knowing which drake to contest can save your team from a bad scrap.
Mountain Drake usually sits at the top. It gives damage against towers, Baron, and other dragons. That buff speeds up objective control all game.
Fire Drake comes next for most comps. The AD and AP boost means more teamfighting power and makes it easier to secure kills.
Ocean Drake gives sustain with health and mana regen. If you stack these, your team can stick around much longer without backing.
Air Drake has the least immediate effect. The movement speed is nice for rotations, but it doesn’t help much in fights.
Elder Dragon Priority by Stack Count:
- 1-2 stacks: Only contest if you’re clearly ahead
- 3+ stacks: Fight for it no matter what
- Soul point: Always contest—dragon soul wins games
Timing and Team Assignments
Securing dragons takes good timing and everyone doing their job. Start prepping 60-90 seconds before spawn.
Support sets up vision near dragon pit. Ward river bushes and enemy jungle entrances. Sweep enemy wards.
Jungler heads bot side early. Clear camps nearby for XP and better positioning.
ADC and Support get there first to start dragon safely. Start when your team has control.
Mid and Top create pressure elsewhere or rotate down. Push your waves before moving so you don’t lose farm or plates.
Critical timing windows:
- After a bot lane win
- When enemy jungler shows top
- After a successful bot gank
- Before enemy respawns (20+ second death timers)
Contesting High-Value Objectives
Baron and Elder Dragon need a different approach than regular drakes. These fights are all-in for both teams.
Baron Control starts with vision denial. Use control wards and sweepers to clear enemy vision around Baron. Keep eyes on enemy jungle paths.
Put one player on zoning duty while four take Baron. Pick your tankiest or strongest duelist for that job.
Elder Dragon fights decide games. Get there early with everyone and buy defensive items if you’re behind—survival matters more than damage.
Contest Decision Framework:
- Fight: You’ve got numbers or better position
- Disengage: Enemy arrives with vision and full health
- Split: Send one to pressure while the rest contest
- Trade: Take towers or other objectives if they get dragon
Don’t contest big objectives if you’re blind or missing key players.
Team Fights and Group Coordination
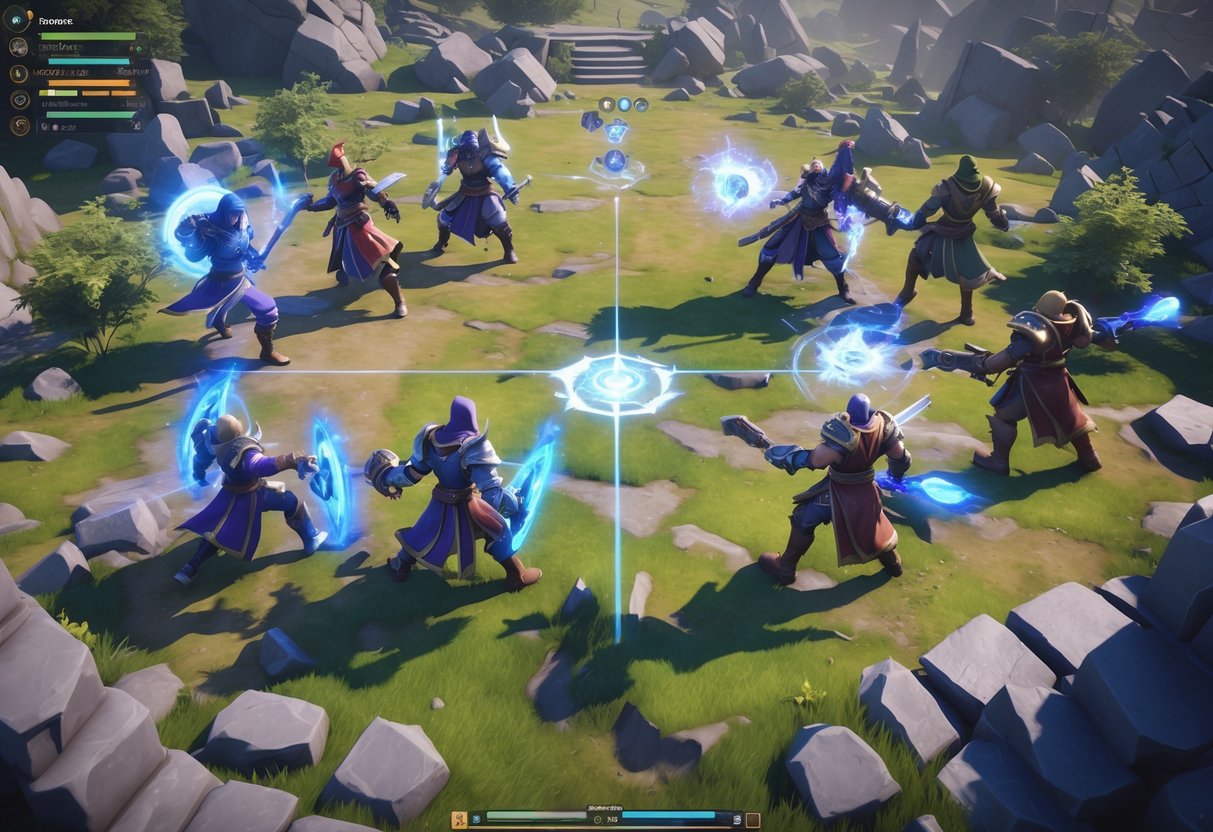
Team fights take real planning and sharp execution if you want to grab objectives or win games. You really need to prep well, make smart calls, and stick together with your team.
Preparing for Team Fights
Vision control is where it all starts. We should drop wards around big objectives like Dragon or Baron about a minute before they spawn. That way, we get a heads-up on enemy movements and can position safely.
Team composition shapes how we fight. If we’ve got strong engage champs like Malphite or Leona, we look to start fights. But if we’re running poke champs, like Jayce or Xerath, we try to chip away at enemies before diving in.
Item timings can tip a fight either way. We check our power spikes and compare them to the enemy’s before going in. Grabbing a mythic item or something like Zhonya’s Hourglass can change everything.
Positioning before the fight is just as important as during. We group up based on what gives us the best shot—sometimes that means forcing a fight, other times it’s better to play slow and wait for scaling.
Engagement and Disengagement
Starting fights needs clear calls and good timing. Our engage champ should pick the target and wait for everyone to be ready. We skip fights if key teammates are down or missing ultimates.
Target prioritisation is pretty straightforward. We go for the biggest threat we can safely reach—usually enemy carries, unless we need to peel for our own backline.
CC chains let us pile on damage and control. We line up crowd control abilities to lock down high-priority targets. Thresh lands a hook? We follow up with more stuns or slows.
Knowing when to disengage can save the game. If our engage flops or we lose someone early, we get out fast. Hanging around in lost fights just throws away our lead.
Exit strategies need to be in place before we go in. We pick our escape routes and keep mobility abilities handy for a quick retreat.
Vision and Positioning for Fights
Ward placement gives us safe zones around objectives. We plant vision in river bushes, jungle entrances, and choke points enemies have to cross.
Formation positioning depends on our team composition:
- Protect the carry: Tanks up front, carries in back.
- Dive composition: Assassins flank, rest of the team follows.
- Poke composition: Spread out so we don’t all get hit by AoE.
Flanking opportunities can break fights open. We send mobile champs around the enemy while the main group holds position.
High ground advantage helps with vision and makes escaping easier. We always want to fight from elevated spots if we can.
Range respect keeps us alive. We stay out of Malphite ult or Blitzcrank hook range until we’re ready to go.
Improving Macro Play Skills

Getting better at macro play means fixing mistakes, practicing key skills, and reviewing your games. These three things work together to help you make better decisions and control the map.
Common Mistakes and How to Avoid Them
A lot of players chase kills instead of focusing on objectives. We see teams running after low-health enemies while the other team grabs towers or dragons.
Fight for the wrong reasons. Don’t just start fights because you can. Think about what you actually get from winning. If there’s no objective nearby, maybe hold off.
Ignore your win condition. Every game has a way your team wins. Sometimes it’s keeping your ADC alive; other times, it’s letting your split-pusher do their thing while you stall.
Some of the most common macro mistakes include:
- Starting fights with no objective in sight
- Leaving your carry unprotected
- Fighting when your strongest player is split-pushing
- Taking bad recalls and losing map pressure
- Staying in losing fights instead of cutting losses
Poor timing with recalls. If you go back at the wrong time, you lose control of the map. Recall after you shove waves or secure an objective—not right before a fight.
Drills and Practice Routines
Start with wave management. Spend 10 minutes in practice tool learning how to freeze, slow push, and fast push.
Map awareness drills are a must. Set a timer for every 30 seconds in your games. When it beeps, glance at the minimap and count visible enemies.
Practice these macro basics every day:
- Objective timing: Know when dragons, barons, and buffs respawn.
- Wave states: Learn when to push and when to freeze.
- Positioning: Stay where you need to be for your team’s win condition.
- Communication: Call out enemy spots and timers for objectives.
Decision-making exercises help your instincts. Before making a big move, ask: What’s our win condition? Where are the enemies? What can we take right now?
Try the “5-minute rule.” Every five minutes, check what your team should do next. It helps you plan ahead instead of just reacting.
Tracking Progress and Analysing Games
Recording your games lets you spot patterns in your play. Try watching one replay a week, focusing just on your macro choices.
Key areas to review:
| Focus Area | Questions to Ask |
|---|---|
| Objective Control | Did we contest the right objectives? |
| Map Positioning | Were we in the right place before fights? |
| Resource Management | Did we waste time on bad recalls or roams? |
| Team Coordination | Did we follow our win condition? |
Look for times when your team had map pressure but didn’t use it. Those are usually big missed chances.
Track stats like objectives taken, average deaths, and time spent warding. Getting better at macro usually means dying less and controlling vision more.
Keep a simple notebook or doc. After each session, jot down one macro mistake and one good macro call you made. It really helps with self-awareness.
Use replay tools to jump to key moments: first dragon, mid-game team fights, baron attempts. Don’t bother with the whole game—just the important calls.
Communicating and Coordinating with Teammates
Good macro play relies on clear communication and smart coordination. We need to share info fast, adjust plans when things shift, and learn as a team.
Effective Communication in Matches
Quick calls win games. We use short, clear phrases our teammates can instantly act on.
The best teams say stuff like “dragon in 30” or “push mid after baron.” It’s straight to the point—no time wasted.
Pings beat typing. Most games let us ping objectives, warn about enemies, or signal retreat. We can get the message across in seconds.
Here’s what you should be calling out:
- Enemy positions: “ADC missing bot” or “jungler top side”
- Objective timing: “Baron in 45”
- Resource updates: “Need 200 gold for item”
- Positioning: “Group mid” or “split push top”
Listen as much as you talk. When a teammate makes a call, just say “got it” or ping back. It shows you’re on board.
We have to stay positive even if things fall apart. Blaming each other just kills focus for the next fight.
Adapting Plans Mid-Game
Games change fast. Sometimes our original plan just stops working if the enemy gets ahead or snags key objectives.
Good teams spot when to switch things up. If our early comp falls behind, maybe it’s time to play safe and look for picks instead of forcing teamfights.
Watch for moments that need a new plan:
| Situation | Original Plan | Adapted Plan |
|---|---|---|
| Enemy gets early lead | Aggressive plays | Safe farming, picks |
| We lose key player | 5v5 teamfights | Split pushing |
| Baron stolen | Push all lanes | Defend, wait for next |
Making new calls gets easier with practice. We start to notice when our approach isn’t working and suggest something else.
Communication is huge when plans change. We quickly say, “Change of plan—let’s play safe and scale,” or “They’re grouping, let’s split.”
Don’t force bad fights. If Plan A fails, doubling down usually just digs a deeper hole. Smart teams regroup and look for a new win condition.
Learning from Team Experiences
Every game teaches us something. We talk about key moments right after matches, while they’re fresh.
The best learning comes from discussing decisions. Ask, “Should we have gone for that fight?” so everyone can share their view.
Focus on decisions, not just mistakes. Instead of “You missed your skillshot,” try “Should we have engaged there at all?”
Keep track of what works:
- Communication styles that helped us coordinate
- Times changing plans led to comebacks
- Calls that set up successful plays
Practice scenarios outside ranked. We can talk through “What if…” situations: “If we’re behind and they start Baron, what’s our move?”
James Connolly, a gaming expert, points out that teams improve quickest by reviewing macro decisions together, not just mechanical plays.
Regular team talks build trust and understanding. We start to predict each other’s moves and make calls everyone can follow.
The goal is to develop a team voice, where ideas flow naturally and everyone chimes in during the big moments.
Frequently Asked Questions

Macro play can feel overwhelming at first. Most beginners wonder about setting up macros, hotkeys, and avoiding common mistakes. Getting a grip on the basics and picking the right tools makes everything easier.
What are the essential steps to get started with macro play in gaming?
Start by learning your game’s mechanics and spotting the repetitive tasks you do all the time. Those are great first targets for macros.
Download a beginner-friendly macro creator like OP Auto Clicker or TinyTask. These let you record clicks and key presses without any coding.
Practice with simple stuff first. Try automating basic clicks or key combos before you tackle anything fancy.
Check your game’s terms of service before using macros. Some games ban them, others don’t mind for certain things.
Set up good hotkeys for your macros. Pick combinations that won’t mess up your regular controls.
How can one create a basic macro for repetitive tasks?
Open your macro software and hit the record button. Usually, it’s a big red icon you can’t miss.
Do the actions you want to automate, slowly and carefully. The program records every click, move, and keypress.
Stop the recording when you’re done. Double-check that it caught everything you wanted.
Save it with a name that makes sense, so you don’t mix up your macros later.
Test the macro in a safe spot before using it for real. That way, you avoid any surprises during a big match.
Could you guide me through the process of assigning macros to keyboard shortcuts?
Head into your macro program’s settings or preferences. Look for “Hotkeys” or “Keyboard Shortcuts.”
Pick the macro you want to assign. Most programs show your saved macros in a list.
Click the hotkey field and press the combo you want. Function keys (F1-F12) or Ctrl plus a letter work well.
Avoid keys your game already uses for important stuff. That way, you don’t accidentally mess up your controls.
Test your hotkey by pressing it with the macro program running. The macro should fire off right away.
What are some common mistakes to avoid when creating macros for the first time?
Try not to record macros in a rush or with erratic mouse movements. If you keep things smooth and steady, you’ll usually get more reliable results.
Skip using absolute mouse positions—especially if your game window could move or resize. Most tools let you use relative positioning, and that just makes life easier.
Don’t make macros that give you an unfair edge in competitive games. Game developers crack down on this stuff, and you could lose your account for good.
Remember to set delays between your actions. Some games just need a bit of time to handle each command.
Stick to simple macros when you’re starting out. If you keep them single-purpose, it’s way easier to tweak or fix them later.
Can you suggest any beginner-friendly software for macro creation?
TinyTask is a great pick for beginners. It’s free, super simple, and you can save your macros as executable files—pretty handy.
OP Auto Clicker covers basic clicking and also has macro recording features. You can use it on Windows, Mac, or even Android, which is nice.
If you like tinkering, AutoHotkey might appeal to you. It’s free and lets you dive into scripting, though you’ll need to pick up some basic commands.
Macro Creator gives you a visual editor, so you don’t need to mess with code. The interface makes it easy to see what you’ve recorded and change things.
If you’re brand new to all this, maybe start with TinyTask or OP Auto Clicker. You can always move up to more advanced tools when you’re ready.
Why is it important to understand the game’s rules regarding macros before setting them up?
Game developers set their own policies about macro usage, and if you break the rules, you might lose your account for good. Some games just shut down any automation tools, no questions asked.
Competitive titles like Call of Duty and PUBG go out of their way to find and ban players who use macros. They see macros as a way to cheat and get an edge over others.
A few games might let you use macros for things like convenience, but they’ll still ban you if you use them for combat. If you know these differences, you’ll have a better shot at keeping your account safe.
If you actually read the terms of service, you’ll protect all the time and money you’ve put into your account. Once you get banned, you usually lose everything for good.
Not sure what’s allowed? Just reach out to the game’s support team. They’ll tell you what kind of automation is okay for that game.
