Emergency Procedures: Essential Steps & Best Practices Guide
Updated On: October 26, 2025 by  Aaron Connolly
Understanding Emergency Procedures
Emergency procedures lay out what to do when things go wrong and safety’s on the line. These plans cover everything from fires and medical emergencies to natural disasters and security incidents.
They help us act fast and stay focused when every moment matters.
Definition and Importance
An emergency procedure is basically a checklist for chaos. It spells out who does what, when it’s time to evacuate, who communicates with whom, and where everyone should go.
These steps cut down on confusion during high-stress situations. If you know what to do, you’re way less likely to panic or freeze up.
Key benefits include:
• Life protection – Clear instructions mean people stay safer.
• Damage reduction – Quick action can keep property losses down.
• Faster recovery – Organized plans help us bounce back faster.
• Legal compliance – Many workplaces legally need emergency plans.
Without a plan, people waste time figuring out the basics. That delay can turn a small incident into a disaster.
Common Types of Emergencies
Emergencies come in all shapes and sizes, and each one needs a different approach. Knowing what you might face helps you get ready for the real thing.
Fire emergencies are probably the most common at work. You’ll need to trigger alarms, use stairs (not lifts!), and head to your meeting point.
Medical emergencies need fast first aid and a call to emergency services. Someone who knows CPR should jump in, and others should keep the way clear for paramedics.
Natural disasters like earthquakes require special steps. For example, during a quake, you “drop, cover, and hold on” under something sturdy.
Security threats—like intruders—mean you lock down. Lock doors, stay out of sight, and only leave if the authorities say it’s safe.
Chemical spills? Get out, call for the specialists, and don’t try to clean up unless you’re trained and have the right gear.
Legal and Regulatory Compliance
UK workplaces have to stick to strict legal rules for emergency procedures. Employers need to protect everyone—staff and visitors—when emergencies hit.
The Health and Safety at Work Act 1974 says you must do risk assessments and have emergency plans. If a company skips this, they can get prosecuted and fined.
Fire safety regulations demand evacuation plans, fire wardens, and regular drills. Buildings also need clear exits, emergency lighting, and assembly points.
Industry-specific rules kick in for higher-risk places. Chemical plants, hospitals, and schools have extra requirements.
You’ve got to keep records of drills, update plans every year, and train new staff in their first month. Inspectors want to see this stuff, so don’t skip it.
If you don’t follow the rules, you’re risking lives and legal trouble. Insurance might not pay out if you ignored proper procedures.
Conducting a Risk Assessment
A risk assessment means looking for hazards in your workplace and figuring out how likely they are to hurt someone. This helps you decide which problems need fixing right away.
Identifying Hazards
Start by walking through your workplace and spotting anything risky. Don’t just look for the obvious stuff—think about every possible danger.
Physical hazards might be slippery floors, dodgy wires, or blocked exits. Chemical hazards could be anything from cleaning sprays to industrial chemicals.
Environmental factors matter too. Bad lighting, loud noise, or poor air can all create problems. And don’t forget about biological hazards like germs or viruses.
Key places to check:
- Equipment and machines
- Electrical systems
- Storage areas and exits
- Chemical storage
- Fire safety gear
Check at different times—night shifts might reveal things the day crew misses. Ask employees what they notice; they often spot risks that managers don’t.
Write down everything, even if it seems small. A tiny chemical spill could be a big deal if it happens over and over, or if there’s a fire risk.
Evaluating Potential Impacts
Once you’ve listed the hazards, figure out how bad things could get and how likely they are.
Severity levels:
- Minor: Just needs first aid
- Moderate: Doctor visit or time off work
- Major: Hospital stay or long-term injury
- Catastrophic: Multiple people badly hurt or worse
Likelihood:
- Very unlikely: Rare
- Unlikely: Could happen sometimes
- Likely: Happens pretty often
- Very likely: Happens all the time
A chemical spill might be rare if storage is good, but a fire in a flammable area could be both likely and disastrous if you haven’t prepared.
Think about who’s at risk—new staff, contractors, and visitors often don’t know the ropes.
Other things to consider:
- How many people could get hurt
- How long they might be exposed
- What safety measures you already have
- How well people are trained
- How fast help can arrive
Prioritising Risks
You can’t fix everything at once, so focus on the biggest dangers first.
Risk matrices combine severity and likelihood to help you set priorities:
| Likelihood | Minor | Moderate | Major | Catastrophic |
|---|---|---|---|---|
| Very Likely | Medium | High | Very High | Very High |
| Likely | Low | Medium | High | Very High |
| Unlikely | Low | Low | Medium | High |
| Very Unlikely | Very Low | Low | Medium | Medium |
Very high risks need action right now. Stop the risky activity until you fix it—think fire hazards near chemicals or blocked emergency exits.
High risks should get sorted in days or weeks.
Medium risks can wait a bit, maybe a few months.
Low risks? Keep an eye on them and fix them during routine maintenance.
Other things to weigh up:
- Legal deadlines
- Cost and practicality
- What stakeholders or the public might think
- Whether the risk could get worse
Write down your decisions. It helps explain your choices and makes sure you tackle the most urgent problems.
Developing an Emergency Plan
If you want a plan that actually works, you need clear goals, well-defined roles, and close ties with local emergency services. These three things keep people safe when the unexpected happens.
Setting Objectives
Before you write up your plan, decide what you want to achieve. Be specific—vague goals won’t help in a real crisis.
Primary safety objectives always come first: protect lives, prevent injuries, and make sure everyone can get out safely. Then, think about protecting property and keeping the business running if you can.
Every emergency plan should aim for:
• Life safety: Keep everyone alive and unharmed
• Property protection: Limit damage to stuff and buildings
• Environmental protection: Stop spills or contamination
• Business continuity: Keep the most important things running
Tailor your goals to your workplace. A factory and an office won’t have the same priorities.
Set targets you can actually measure. For example, “evacuate everyone in 5 minutes” is clearer than just saying “evacuate quickly.” This way, you can test your plan with drills.
Assigning Roles and Responsibilities
A good emergency team needs clear leaders and defined tasks. Everyone should know exactly what they’re supposed to do.
Start with the main roles. The Incident Commander runs the show and makes the big calls. The Safety Officer keeps an eye on hazards and protects the team. The Communications Lead gets info out to everyone who needs it.
Typical team roles include:
• Incident Commander: Calls the shots
• Safety Officer: Watches for dangers, keeps team safe
• Communications Lead: Handles emergency communications
• Evacuation Wardens: Guide people out and do headcounts
• First Aid Responders: Give medical help right away
Write down what each person does, who’s in charge of what, and who steps in if someone’s missing. People need written instructions they can follow, even when they’re stressed.
Train backups for every role. Your main team might be away or even injured, so you need alternates ready to go.
Practice matters. Hold monthly meetings and run drills every few months to keep everyone sharp and spot any gaps.
Collaborating With Emergency Services
Building good relationships with local emergency services can make a huge difference. When they know your site and plan, they can help more effectively.
Start with your local fire brigade. Let them know about your building, any dangerous materials, and possible risks. Invite them for a walk-through and share your emergency plan.
Other important contacts:
• Fire and rescue: Facility tours, risk info, coordination
• Police: Security and evacuation routes
• NHS ambulance: Medical needs, casualty areas
• Environmental agencies: Chemical spills or contamination
Keep them updated with site plans, lists of chemicals, and emergency contacts. They need accurate info to work safely.
Take part in community drills if you can. These big exercises show how well your plan works with outside help.
Set up direct lines of communication—dedicated numbers or radio channels can speed things up in a real emergency.
Emergency Communication Protocols
In an emergency, clear communication can literally save lives. You need fast, reliable ways to get the right info to the right people.
Notifying Authorities
First thing in any emergency—call the right people. In the UK, 999 gets you police, fire, or ambulance.
When you call 999:
- Say which service you need
- Give your exact location
- Briefly explain what’s happening
- Stay on the line until they tell you to hang up
For stuff that’s not urgent, use 101 for police. Some places have direct lines to local services for a quicker response.
Numbers to keep handy:
- Local police direct
- Fire non-emergency
- NHS 111 for health advice
- Environment Agency (floods)
- Gas emergency
Write these down and keep them in several spots. Phones can die or get lost, so paper copies are still important.
Internal Communication Methods
You need ways to reach your team, customers, and anyone else involved—especially if the usual systems go down.
Main ways to communicate:
- Phone trees: Each person calls a few others
- Text messages: Sometimes work when calls won’t
- Email: For longer updates
- Two-way radios: Handy if the phone network’s overloaded
Backups:
- Social media for public info
- Landlines if mobiles fail
- Designated meeting spots if tech is out
Keep contact lists with several numbers for everyone—mobile, home, maybe even a family member.
Test your systems regularly. It’s amazing how often networks fail right when you need them most.
Alert Systems and Technologies
Modern alert systems rely on a mix of technologies to reach people fast during emergencies. They blast out messages to thousands in just minutes.
Government alert systems:
- Emergency Alerts – They go straight to mobile phones in danger zones.
- Flood warnings – Automated calls and texts warn about flooding risks.
- Severe weather alerts – Warnings pop up about dangerous weather.
Business alert technologies:
- Mass notification systems for employees
- Automated voice calling
- Desktop pop-up alerts for office staff
- Digital displays flashing emergency messages
Personal alert apps:
- Weather warning apps
- Local authority emergency apps
- Community alert systems
- News apps with push notifications
Set up more than one alert source, just in case. Sometimes one system covers an area the others miss, or something fails.
Make sure your devices can get emergency alerts even when they’re on silent. These alerts might be the only thing that gets through in a real emergency.
Evacuation Procedures

Quick evacuation really can save lives. Clear routes, meeting points, and help for vulnerable people form the backbone of an evacuation plan.
Evacuation Routes
Every workplace should have multiple evacuation routes, clearly marked and lit. It’s smart to map at least two exit paths from each area in case one gets blocked.
Primary routes need to lead straight to emergency exits without passing through risky spots like chemical storage or kitchens.
Secondary routes give you another way out if the main path isn’t safe.
Emergency lighting should light up all evacuation routes, even if the power goes out. Battery-powered signs and floor-level lights help folks find their way in smoke or darkness.
Hang up evacuation maps in common areas. Maps should show:
- “You are here” markers
- Main and backup exit routes
- Emergency assembly points
- Fire alarm locations
Practice different routes during drills. In real emergencies, people panic and forget about alternative exits.
Assembly Points
Assembly points keep everyone safe and make it easier for emergency crews to check who’s out. Pick spots at least 50 metres from buildings to dodge falling debris or smoke.
Car parks, sports fields, or open courtyards usually work well. Avoid spots near:
- Chemical storage tanks
- Power lines
- Busy roads
- Other buildings that could catch fire
Pick more than one assembly point for big sites. This stops crowding and makes headcounts faster.
Assign trained staff as wardens at each assembly point. They check attendance, report missing people, and stop folks from going back inside.
Mark assembly points with bright signs that are easy to spot from evacuation routes. Add site maps showing the exact spot.
Assisting Vulnerable Individuals
Some people need extra help to evacuate. This covers wheelchair users, folks with hearing or vision impairments, pregnant staff, or anyone with a temporary injury.
Create personal emergency evacuation plans for anyone who needs it. Plans should say:
- What help is needed
- Who the buddy system partner is
- Alternative evacuation methods
- Where to find special equipment
Train helpers in proper techniques. Never leave vulnerable people alone during evacuation—always have a backup helper in case the main one can’t make it.
Put evacuation chairs near stairwells in multi-storey buildings for people who can’t use stairs. Train staff on how to use them safely.
Use visual alarms as well as loud ones. Strobe lights help deaf staff, and clear signs help those with cognitive difficulties follow the route out.
Shelter-In-Place and Lockdown Measures

Sometimes, it’s safer to stay put. Shelter-in-place and lockdown procedures are all about keeping you inside until the coast is clear.
When to Shelter-In-Place
Shelter-in-place works best when the danger is outside. Chemical spills are a classic reason.
If a train derails with toxic stuff, you’ll get told to stay indoors. Same thing during tornadoes or if hazardous materials leak nearby.
Key situations:
- Chemical or gas leaks
- Severe storms with dangerous winds
- Radiation emergencies
- Toxic smoke from fires
Local authorities usually announce shelter-in-place orders by TV, radio, or mobile alerts. Move to an inside room with few windows as soon as you hear.
Turn off heating and air conditioning. That keeps outside air from sneaking in. Slam windows and exterior doors shut and lock them.
If you think chemicals are leaking in, seal gaps with plastic sheeting and duct tape. Cover windows, doors, and vents completely.
Lockdown Scenarios
Lockdowns happen if there’s an immediate threat nearby. Active shooter situations are the most serious, but violent incidents or police operations can trigger them too.
Unlike shelter-in-place, lockdowns focus on keeping threats out, not just bad air.
Common lockdown triggers:
- Armed individuals in the area
- Violent crimes nearby
- Police manhunts
- Terrorist threats
As soon as lockdown starts, lock all doors and windows you can reach safely. Move away from windows and glass doors.
Stay quiet and don’t draw attention to yourself. Turn off lights if it helps you hide. Always follow police or emergency instructions to the letter.
Keep your phone on silent. Text instead of calling if you can, to avoid noise.
Safety Instructions
Both procedures need similar prep, but you act differently in each. Keep emergency supplies ready, just in case.
Must-haves:
- Battery-powered radio
- Torches and spare batteries
- First aid kit
- Non-perishable food for 72 hours
- Water (one gallon per person per day)
- Plastic sheeting and duct tape
- Personal meds
If you’re sheltering, seal yourself in tight. Use your emergency radio for updates. Don’t come out until officials say it’s safe.
For lockdowns, focus on staying hidden and secure. Barricade doors with heavy stuff if you need to. Be ready to move fast if authorities tell you to.
Set up a family communication plan ahead of time. Pick someone out of the area for everyone to call. Practice both shelter-in-place and lockdown with your household so nobody freezes up.
Responding to Fire Emergencies
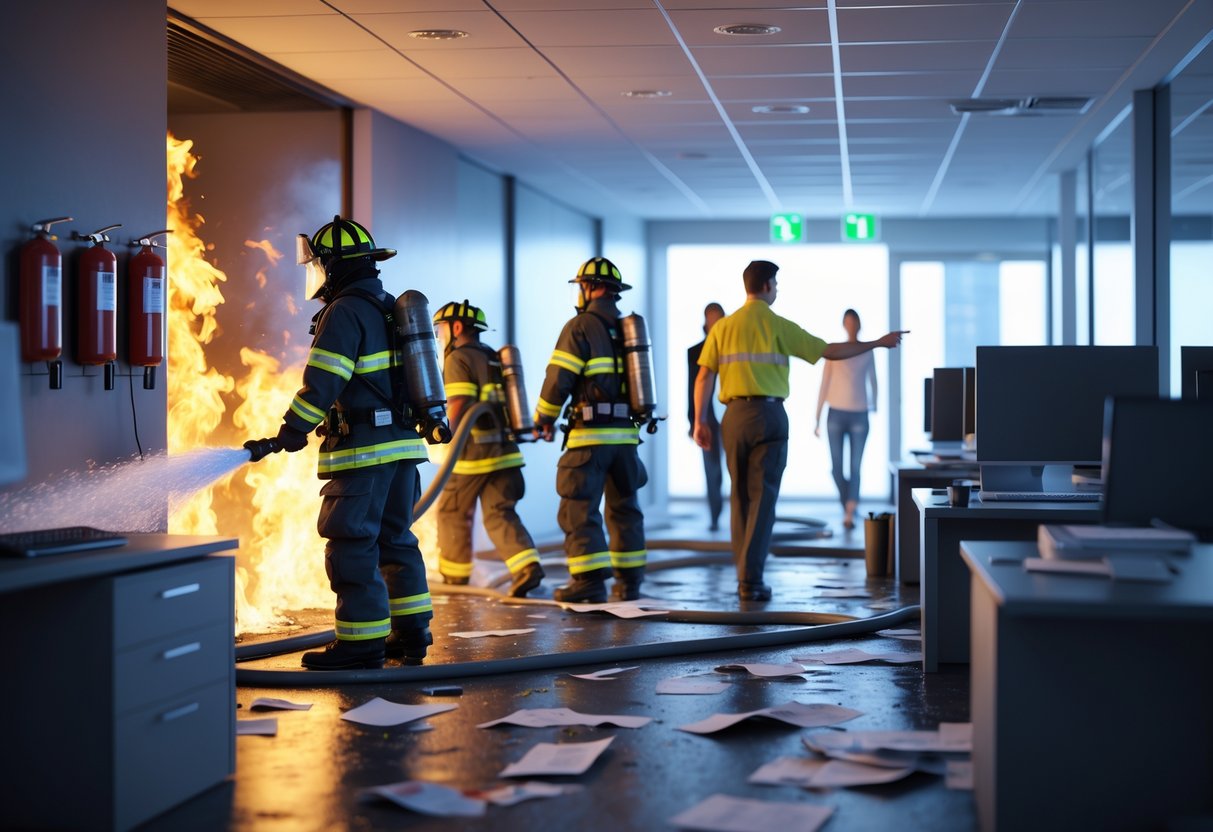
Fire emergencies demand quick action and a clear head. Pulling the alarm, using the right extinguisher, and having fire wardens in charge can make all the difference.
Raising the Fire Alarm
If you spot smoke or flames, pulling the fire alarm is the first thing you should do. Find the nearest call point and activate it right away, even if the fire looks small.
Most buildings put manual call points near exits. They’re red boxes—break the glass or press hard to set off the alarm.
Alarm steps:
- Find the nearest call point
- Break glass or hit the button
- Yell “Fire!” to warn people close by
- Start evacuating right away
Don’t assume someone else already pulled the alarm. Multiple activations just make sure the fire service gets the message.
After you set off the alarm, call 999 (or 112) to reach the fire brigade. Building alarms often don’t call emergency services on their own.
Using Fire Extinguishers
You can use fire extinguishers on small fires, but only if you grab the right type and know what you’re doing. Never fight a big or fast-spreading fire.
Here’s what works for what:
| Extinguisher Type | Fire Class | Best For |
|---|---|---|
| Water | Class A | Paper, wood, textiles |
| Foam | Class A & B | Liquids, solids |
| CO₂ | Class B & electrical | Electrical equipment |
| Powder | Class A, B, C | Most fire types |
Use the PASS method:
- Pull the safety pin
- Aim at the base of the fire
- Squeeze the handle
- Sweep side to side
Always keep an escape route behind you. If the fire doesn’t get smaller in 10-15 seconds, get out.
Never turn your back on a fire you’ve just put out. Fires can flare up again in no time.
Fire Wardens’ Responsibilities
Fire wardens run evacuation procedures and make sure everyone gets out safely. They’re trained to take charge if management isn’t around.
Main fire warden duties:
- Start the evacuation
- Check all rooms and spaces
- Help people with mobility issues
- Close doors to slow the fire
- Do headcounts at assembly points
Wardens need to know the building layout inside and out. If smoke or flames block the main exits, they guide people to backups.
Critical actions:
- Sound the alarm
- Lead people to the nearest safe exit
- Check toilets, meeting rooms, storage areas
- Close doors behind them if possible
- Report to the incident commander at the assembly point
Fire wardens never go back in once the evacuation starts. Their safety means they can give clear info to emergency crews about anyone still inside.
We really count on fire wardens to stay calm and make the right calls under pressure.
Handling Medical Emergencies

When a medical emergency hits, you need to act fast. Give first aid, call emergency services right away, and know what to do for things like poisoning.
Providing First Aid
First aid is the help you give right after something happens, before the pros arrive. Try to stay calm and check what went down.
See if the person responds by tapping their shoulders and asking if they’re okay. If there’s no response, check their breathing—watch their chest for about 10 seconds.
If they’re not breathing normally, start CPR. Put the heel of your hand in the center of their chest, other hand on top, and push hard and fast—at least 2 inches deep.
Do 30 chest compressions at 100-120 per minute. Tilt their head back, lift the chin, and give 2 rescue breaths. Keep going until help arrives.
If someone’s bleeding badly, press a clean cloth on the wound. Don’t pull out anything stuck in them—just press around it.
For burns, run cool water over the area for at least 20 minutes. Skip the ice or butter.
Contacting Emergency Medical Services
Call 999 right away for any serious emergency. This means things like unconsciousness, heavy bleeding, chest pain, trouble breathing, or a suspected heart attack.
When you call, speak clearly. Give your exact location, what happened, and how the person is doing.
Stay on the line until the operator tells you to hang up. They might give you instructions to help while you wait.
If you can, have someone else call while you give first aid. That saves precious time.
For less urgent stuff, call 111 for advice. They’ll let you know if you need emergency care or something else.
Clear a path for paramedics by moving furniture or other obstacles. If possible, have someone meet them outside to guide them in.
Managing Poisoning Incidents
Poisoning can happen from swallowing chemicals, medicines, or bad food. Symptoms can be nausea, vomiting, stomach pain, or confusion.
Call 999 or the Poison Information Service on 111 right away. Don’t wait to see if they get worse.
If someone swallowed poison, don’t make them throw up unless emergency services say so. Vomiting can hurt their throat or mouth more.
Take any leftover poison out of their mouth if you can see it, but don’t push it further back.
For chemical burns near the mouth, rinse gently with water. Remove contaminated clothing but don’t touch chemicals yourself.
Keep the poison container for paramedics. It helps them figure out the right treatment.
If someone passes out from poisoning, put them in the recovery position to keep their airway clear. Stay with them until help arrives.
Responding to Chemical Spills and Contamination
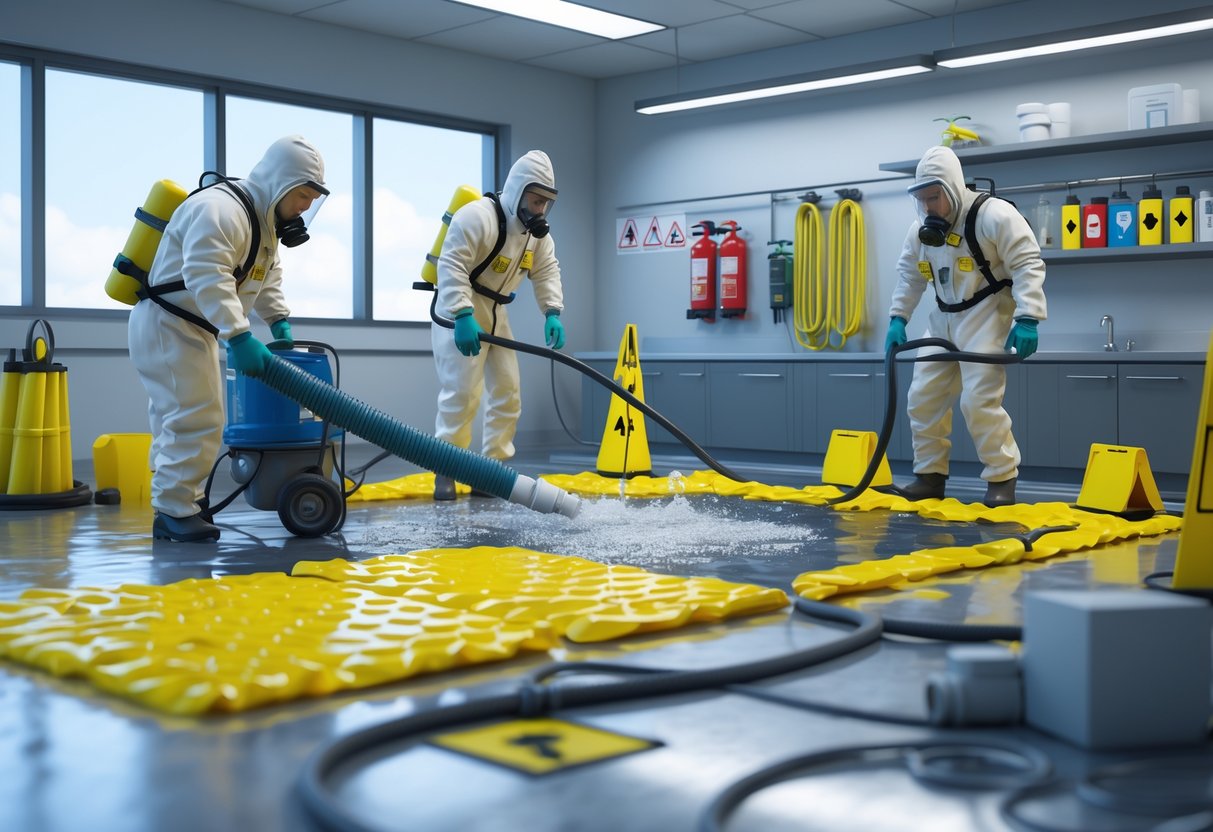
Chemical spills need quick action to keep people safe and avoid environmental damage. The main priorities? Make the area safe, isolate the spill, and clean up everyone and everything exposed.
Immediate Safety Steps
First, we size up the situation as fast as possible. We figure out which chemical has spilled and what its main dangers are—flammable, toxic, corrosive? The amount spilled matters a lot, too.
If we’re dealing with flammable stuff or something super dangerous like carbon monoxide, we evacuate the area and call 999 right away. We don’t go back for things or try to clean up ourselves.
Personal safety comes next. Before we even get close, we put on the right protective gear:
- Chemical-resistant gloves (not just latex)
- Splash goggles for our eyes
- Full-face respirator if there are toxic fumes
- Chemical-resistant suit if we can get one
We switch off gas, electrical stuff, and heating from a safe spot. Even a tiny spark could set off chemical vapors.
We jump in to contain the spill fast. Absorbent pads, spill pillows, or barriers stop the chemical from spreading. Blocking floor drains and water sources is crucial—can’t let it reach the water supply.
Isolation and Evacuation
We set up a safety perimeter around the spill. How big? It depends on the chemical’s risk and whether it’s giving off vapors. We make sure bystanders stay well away.
Communication matters. We warn everyone nearby with clear, simple messages: “Chemical spill in the workshop—leave the building now.”
For big spills, we get help right away:
- 999 for immediate danger
- National Response Centre at 0800 80 70 60 for environmental threats
- NHS 111 if anyone feels sick or poisoned
We never try cleanup solo. For small spills, at least one other capable adult helps. If we get splashed or breathe fumes, we might not be able to call for help ourselves.
Evacuation routes need to stay open. We figure out the safest, quickest way out before starting any cleanup.
Decontamination Procedures
We strip off contaminated clothing immediately. If chemicals hit our clothes, we cut or rip them off instead of pulling them over our heads. That way, dust or liquid doesn’t get in our eyes or mouth.
We bag up dirty clothes and cleanup gear using tongs. Double-bag everything, seal it tight, and label it. Never toss these in the regular trash.
For skin decontamination:
- Brush off solids first
- Rinse with clean water for at least 15 minutes
- Wash gently with soap and water
- Take off jewelry that could trap chemicals
We use emergency showers and eyewash stations if they’re there. These blast lots of water at low pressure—keep rinsing for at least 15 minutes.
Any tools or rescue gear used get bagged up and disposed of just like contaminated clothing. Proper disposal is a must.
We call the council or fire service to find out where to take contaminated waste. Dumping it wrong can cause a public health mess.
Procedures for Natural Disasters

Natural disasters hit fast. Staying calm, following basic safety rules, and knowing when to shelter or evacuate can make a huge difference.
Earthquake Safety
When an earthquake starts, those first few seconds matter most. If you’re indoors, drop to your hands and knees under a sturdy desk or table.
Cover your head and neck with your arms if there’s nothing to hide under. Stay away from windows and anything heavy that could fall.
If you’re outside, move clear of buildings, trees, and wires. Find open ground and stay down until the shaking stops.
Don’t run outside while it’s shaking. Most injuries happen when people try to move.
After the shaking, check for injuries and hazards. If you smell gas, turn it off. Use only torches or battery lights—matches or candles could spark a fire.
Expect aftershocks for hours or days. Each time, drop, cover, and hold on again.
Flooding and Flood Response
Flood water is way more dangerous than it looks. Just six inches can knock you over.
Never drive through flooded roads. Two feet of water can float a car. Turn around and find a safer route.
If you’re trapped, head to the highest floor. Don’t go to basements—water rises fast and can trap you.
Stay out of flood water. It’s often full of sewage, chemicals, and all sorts of nasty stuff.
Flood water risks include:
- Stomach bugs and headaches
- Electric shock from downed wires
- Hidden debris and sharp objects
- Strong, fast-moving currents
If you need to leave, grab your emergency kit with three days of food and water. Don’t come back until authorities say it’s safe.
After a flood, don’t use electrical appliances until they’re checked. Get rid of wet materials within 24–48 hours to stop mold.
Dealing With Explosions
Explosions are chaos—flying debris, collapsing buildings, fires, toxic fumes. What you do depends on where you are.
Hear an explosion? Drop flat and cover your head. Glass and debris can travel a long way.
Don’t run to windows or exits right after. Sometimes a second blast follows.
If you’re inside, check for blocked exits. Always use stairs, not lifts—power could fail.
Explosion evacuation basics:
- Check yourself for injuries first
- Help others only if you’re okay
- Leave quickly but don’t push or run
- Once outside, move away from the building
If you smell gas or chemicals, cover your nose and mouth with cloth. Get upwind to avoid breathing fumes.
Call 999 as soon as you’re safe. Don’t use your phone near the blast—sometimes mobiles can trigger more explosions.
Stay at least 100 metres from damaged buildings. Emergency crews need space to work.
Emergency Equipment and Resources
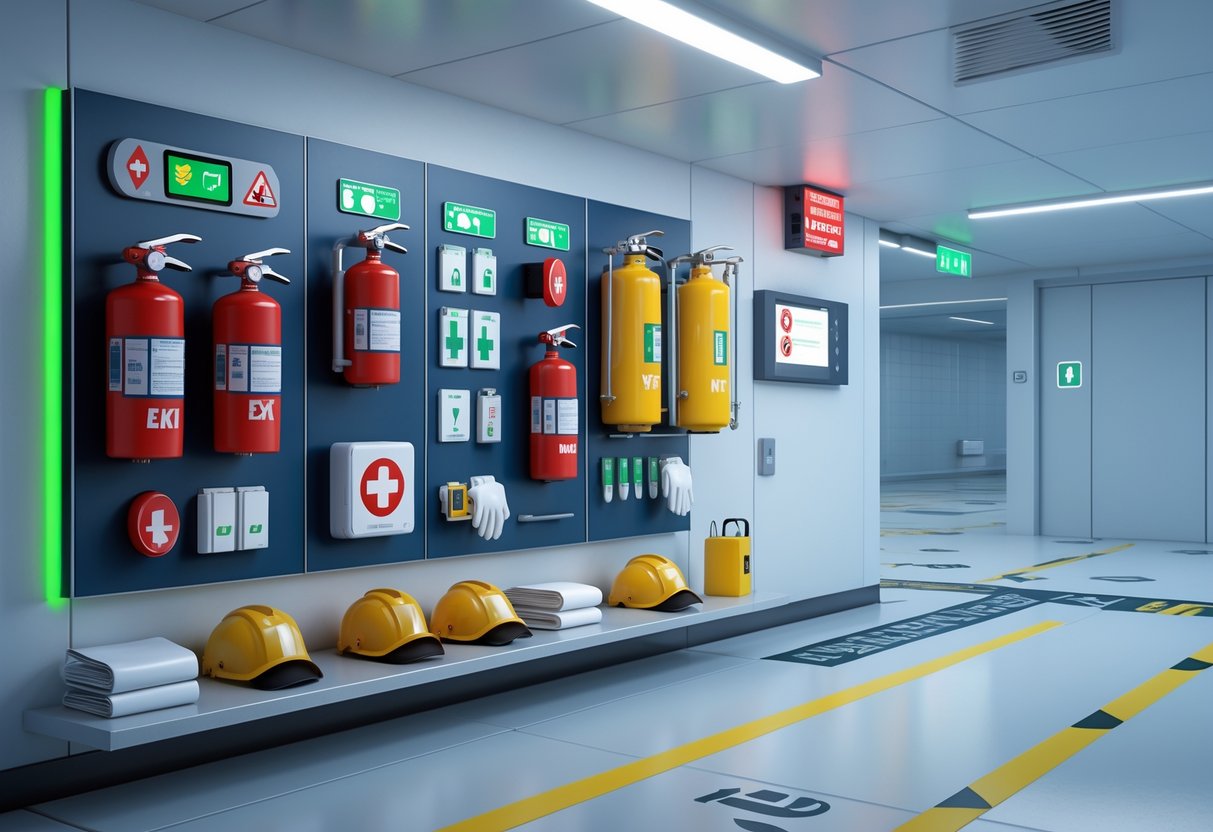
Having the right gear ready—and making sure it works—can save lives in an emergency. Emergency lighting keeps escape routes visible, and rescue equipment gives us the tools to act fast.
Location and Maintenance
We need to know where our emergency equipment is and make sure it’s working. All safety gear should be visible, easy to grab, and ready to go.
Draw up a simple map showing fire extinguishers, first aid kits, and emergency tools. Stick these maps near lifts and main hallways. Check equipment every month with a checklist.
Monthly checks include:
- Testing torch batteries and emergency lights
- Checking first aid supplies and expiry dates
- Making sure fire extinguisher pressure is normal
- Verifying emergency phone numbers are up to date
Keep logs simple—just the date, what you checked, and any problems. Replace expired stuff right away.
Store backup batteries and supplies in a locked cabinet. Label everything with purchase dates.
Rescue Equipment Essentials
Basic rescue gear helps us deal with workplace emergencies before the pros arrive. Pick practical tools that people can actually use.
A basic rescue kit should have:
- Heavy-duty torches and spare batteries
- First aid stuff—bandages, antiseptic
- Emergency blankets and basic tools
- A portable radio
- Rope or webbing for simple rescues
Don’t overthink it. Most workplaces need basic first aid, not fancy gear. Train a few people on how to use everything.
Keep kits in several spots around big buildings. Use weatherproof boxes and check them every few months. Think about the specific risks in your workplace when choosing gear.
Emergency Lighting and Exits
Emergency lighting helps people get out safely if the power goes. Exit signs should stay lit for at least 90 minutes during an outage.
Install emergency lights along all escape routes, not just at the exits. Stairwells especially need extra lighting during evacuations. Test emergency lights monthly—just flip off the main power for a bit.
Key lighting requirements:
- Battery backup for all exit signs
- Glowing path markings on floors
- Emergency lights in toilets and plant rooms
- Backup power for security systems
Don’t block escape routes with stuff, even temporarily. Mark exits with green running man signs that show up even in smoke. Make sure assembly points outside have enough light for evacuations after dark.
Swap out emergency light batteries every 3–4 years or sooner if tests show they’re fading.
Training, Drills and Continuous Improvement
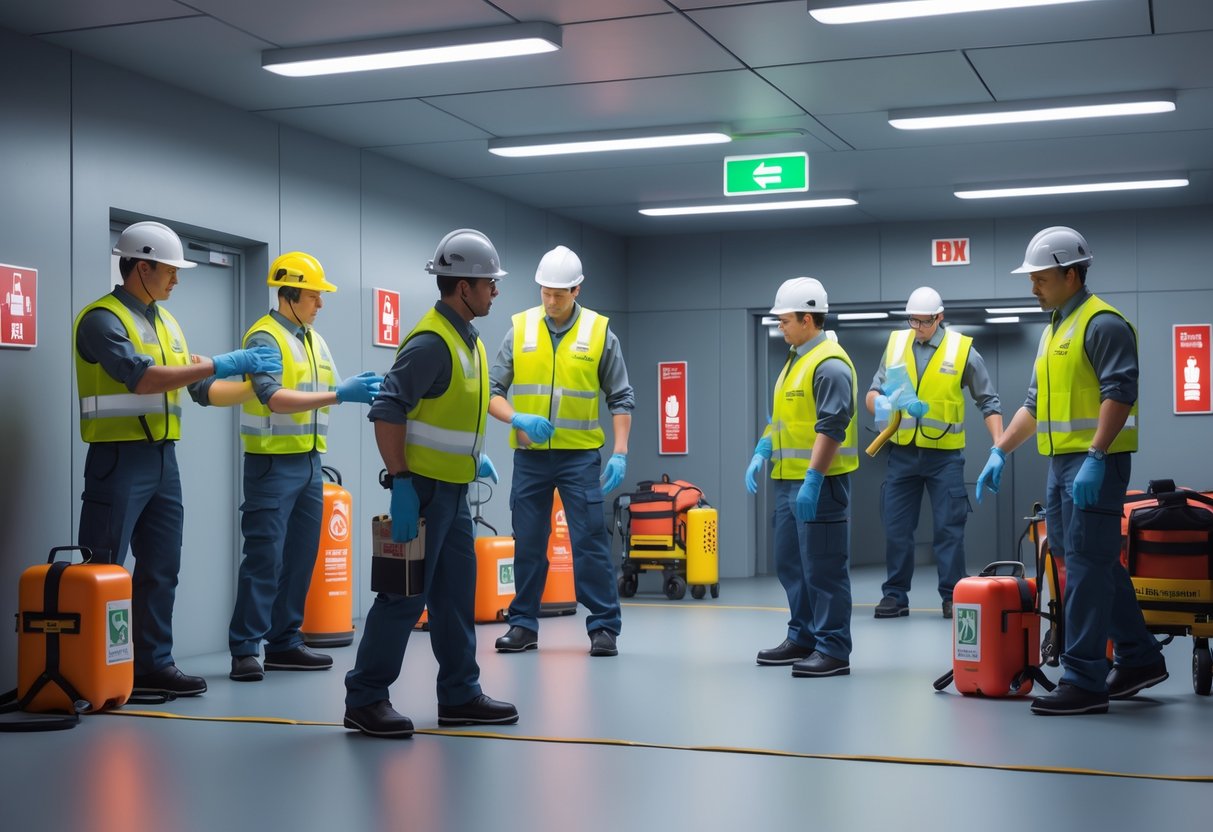
Real emergency preparedness means regular training, realistic drills, and keeping procedures up to date. Let’s look at how to build staff confidence, run useful drills, and keep improving.
Staff Training Programmes
New hires need emergency training before they start. That covers evacuation routes, alarm sounds, and what they should do if something goes wrong.
Refresher sessions should happen every six months. Focus on hands-on practice—people remember better when they actually do things.
Training should cover different emergencies:
- Fire evacuations
- Medical emergencies
- Security threats
- Chemical spills
- Bad weather events
Each emergency team member needs special training. Floor wardens learn crowd control. First aiders keep their certifications up to date.
Quick tip: Use short, 15-minute training sessions each month instead of one long workshop. People remember more with frequent, bite-sized lessons.
Document all training. Track who attended and when certifications expire.
Conducting Drills
Mix up drill times and days to cover all shifts. Sometimes, don’t warn staff—surprise drills show how people really react.
Pick scenarios that fit your workplace. An office needs different drills than a warehouse.
During each drill:
- Time the evacuation
- Check that all areas are cleared
- Test communication systems
- Watch if people use the right routes
Assign observers to spot problems—blocked exits, confusion, equipment failures.
Bring in emergency services now and then to test teamwork.
Safety first—never put anyone in real danger. Use signs or announcements to simulate hazards.
Reviewing and Updating Procedures
Meet within two days after each drill while it’s still fresh. Pull in managers, safety leads, and staff who took part.
Get feedback from:
- Written forms
- Group chats
- One-on-one talks with key people
Common issues to fix:
- Slow evacuations
- Communication problems
- Unclear roles
- Broken equipment
Update procedures based on what you learn. If people keep using the wrong exit, maybe the route needs to change.
Review everything at least once a year, even if nothing seems wrong. Staff change, buildings get tweaked, and new rules come in.
Track changes in a simple database—drill times, what went wrong, what got fixed. This shows inspectors and managers that you’re always improving.
Frequently Asked Questions
Here are answers to the most common workplace emergency questions, from fire evacuations to security threats. Each one gives you clear steps to keep everyone safe.
What steps should you take during a fire evacuation?
Leave right away when you hear the fire alarm. Don’t waste time grabbing your stuff or finishing up work.
Take the nearest exit and use the stairs—never the lift. Before you open any door, check it with the back of your hand. If it feels hot, pick another way out.
Walk quickly, but don’t run. If there’s smoke, get low and follow the exit signs.
Head straight to your designated meeting point outside. Wait there until emergency crews say it’s safe.
Don’t go back into the building. If someone from your group is missing, let the fire brigade know.
How do you respond to a medical emergency at work?
Call 999 right away if someone’s badly hurt or very ill. Only move them if they’re in real danger.
Check if they’re awake and breathing. If they aren’t breathing, start CPR if you know how.
Grab the first aid kit and get a trained first aider to help. Most workplaces have someone who’s trained for this.
Keep the person as calm and comfortable as you can. If they’re cold, cover them with a blanket and loosen any tight clothes.
Clear out other people from the area. Stick with the injured person until help arrives.
Jot down what happened and when. You’ll need those details for the incident report.
Could you outline the basic emergency actions for a natural disaster?
Listen to local emergency services and do what they say right away. They usually know what’s best for your area.
Move to your building’s safe spot. If it’s an earthquake, get under a desk. For floods, head upstairs.
Stay away from windows and anything heavy that might fall. Don’t use the lift during any natural disaster.
Keep your emergency kit close if you’ve got one. Water, snacks, and a torch can make a big difference.
Wait inside until authorities say it’s safe to leave. Sometimes aftershocks or flooding make things dangerous for longer.
Text your family when you can. Calls might not go through if the lines are busy.
What procedures should be followed in the event of a security breach or intruder?
If it’s safe, run to the nearest exit. Forget your belongings—just get out.
If you can’t escape, hide. Lock the door, turn off the lights, and stay away from windows. Silence your phone.
Put something solid between you and the threat. Desks or cabinets work better than plants or curtains.
Call 999 when you’re safe enough to do so. Keep your voice low and give your exact location.
Don’t go checking out strange noises or try to be a hero. Leave that to the professionals.
Follow all instructions from emergency services. Sometimes they’ll want you to stay hidden even after they arrive.
Can you list the key components of an effective emergency action plan?
Mark clear evacuation routes and keep them clear. Everyone should know at least two ways out.
Set up meeting points far enough from the building to be safe. Make sure all staff know where to go.
Update emergency contact details often. Include local services, building management, and key staff.
Make sure communication systems will work in an emergency. This might mean PA systems, emergency phones, or mobile alerts.
Hold regular training sessions and run drills at least twice a year so people know what to do.
Assign roles and responsibilities. Someone should check toilets, and someone else should count people at the meeting point.
What is the correct procedure for reporting incidents and near misses?
Let your supervisor or safety officer know about the incident right away. Seriously, don’t wait until your shift ends.
Jot down exactly what happened while it’s still clear in your mind. Make sure to note the time, location, and who was involved.
If it’s safe, snap a few photos. Pictures can really help investigators figure out what went wrong.
Ask anyone who witnessed the incident for their statements. Sometimes, their perspective brings up details you didn’t notice.
Fill out your company’s incident report form as completely as you can. If something doesn’t apply, just write “not applicable” instead of leaving it blank.
Keep copies of all your paperwork for your own records. You never know when you might need them for insurance or later investigations.
Check in afterward to see that corrective actions actually happen. After all, the main goal here is to keep it from happening again, right?
