Streaming Overlays Guide: Master Your Stream’s Visual Identity
Updated On: November 13, 2025 by  Aaron Connolly
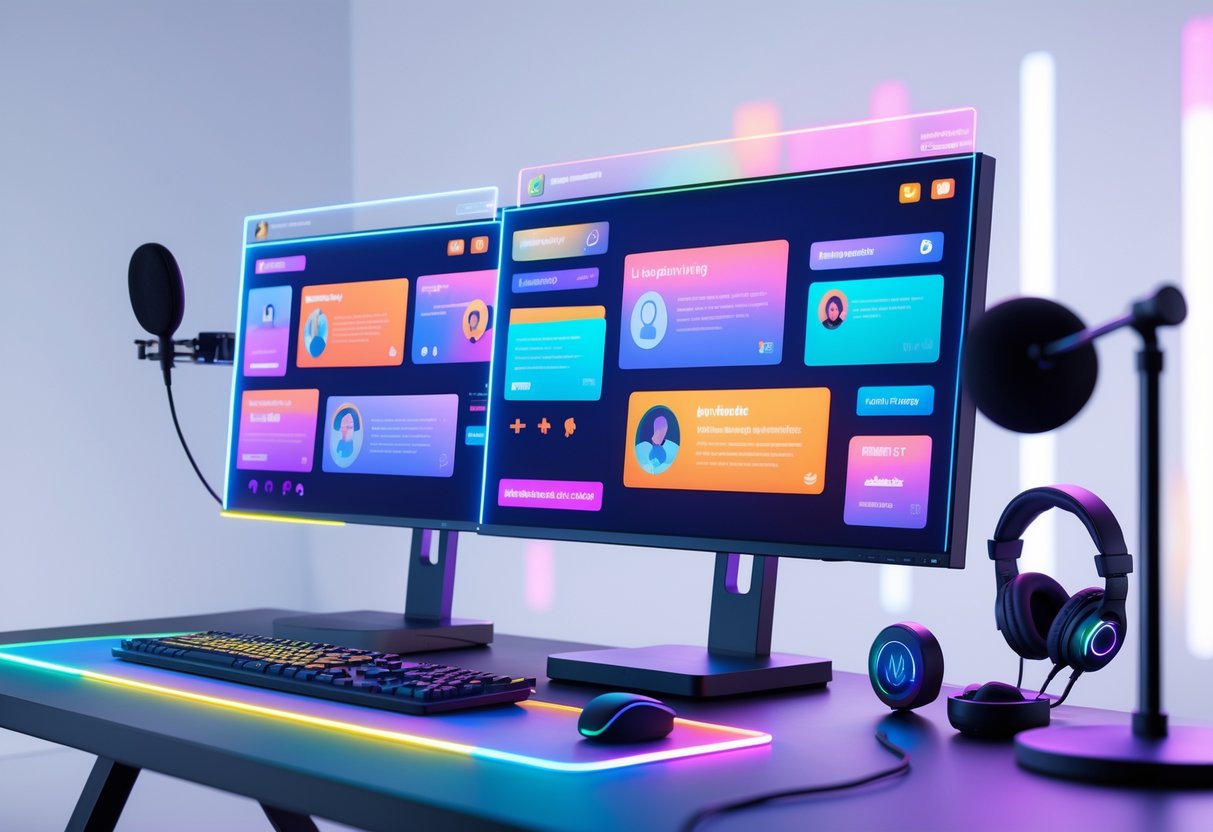
Understanding Stream Overlays
Stream overlays are those graphics you see layered over your gameplay or webcam feed. They boost your stream’s look and let you share info with your viewers.
They can be anything from webcam frames and chat boxes to alerts and branding. With the right overlays, your stream suddenly feels a lot more professional.
What Are Stream Overlays?
A stream overlay is just a bunch of graphics and widgets that show up on your stream while you’re live. It’s kind of like your stream’s visual skeleton.
You can show off your social media, highlight new followers, or pop up donation alerts. Overlays help keep your branding consistent and make your channel memorable.
Common overlay elements include:
- Webcam frames that outline your camera
- Chat boxes for viewer messages
- Alert boxes for new followers or donations
- Social media panels
- Game widgets showing stats or scores
Most overlays work with OBS Studio, Streamlabs, and other popular streaming software. You can grab free overlays or design your own to really match your vibe.
Key Components of Overlays
Webcam frames are everywhere. They wrap around your camera and let you match your stream’s colors or style.
Alert notifications pop up when someone follows, subscribes, or donates. These moments get people hyped and make your stream feel alive.
Information panels show things like your streaming schedule or social handles. New viewers find what they need fast.
Essential overlay components:
- Borders and frames for your webcam
- Text elements for usernames and titles
- Alert systems for interactions
- Background graphics for a unified look
- Widget spaces for real-time info
Chat integration is handy. Your overlay can show recent messages or highlight cool comments, so even viewers without the chat open feel included.
Differences Between Static and Animated Overlays
Static overlays use images that just sit there—no movement. They load quickly and don’t slow down your computer.
Animated overlays, on the other hand, bring in movement. You might see flowing backgrounds, spinning logos, or pulsing alerts. They look awesome but need a bit more power from your PC.
Static overlay benefits:
- Lower CPU usage
- Fast load times
- Simple, professional look
- Good for slow internet
Animated overlay advantages:
- More eye-catching
- Dynamic alerts
- Modern, lively feel
- Great for gaming streams
If your computer’s a bit old or you play heavy games, stick with static overlays. Animated ones shine if you’ve got a beefy setup and want your stream to pop.
Choosing the Right Overlay for Your Platform

Every streaming platform has its quirks, and your overlay should fit right in. Twitch leans into alerts and community features, YouTube likes clean layouts for recordings, and Kick lets you get wild with bold designs.
Overlay Choices for Twitch
Twitch streamers need overlays built for tons of interaction and alerts. The Twitch crowd loves donations, subs, and raids.
Your Twitch overlay needs animated alerts for follows, subs, bits, and raids. These moments get people talking and encourage more support.
Keep your webcam frames tucked in the corners so you don’t cover up gameplay. Chat boxes fit right in—add them so viewers can see the conversation during highlights.
Twitch viewers like seeing recent followers and donation goals. It’s part of the culture.
Stick with darker colors that match Twitch’s purple branding. Bright overlays can look out of place.
Quick win: Try your overlay with Streamlabs’ alert box before your first stream. People often realize the sizing’s off only when the first alert pops up.
Optimising Overlays for YouTube
YouTube streaming needs overlays that look sharp live and in recordings. Lots of viewers watch on mobile, so keep things clear.
Use bigger, bolder text than you would on Twitch. Small fonts just don’t work on a phone screen. Keep important stuff away from the bottom, where YouTube’s app controls sit.
Subscriber alerts matter more here than follower notifications. YouTube’s monetisation is all about subs.
Go for brighter colors that stand out in thumbnails. Your overlay ends up everywhere your content does.
Don’t go overboard with animations. YouTube compresses recordings, so too many moving parts can turn into a blurry mess.
Warning: YouTube’s mobile app covers the bottom of streams. Always check your overlay on mobile first.
Overlay Options for Kick
Kick gives you a lot of creative space. The platform wants bold, flashy designs.
Try out big, dramatic overlays. What might seem too much on Twitch actually works here.
Focus on follow alerts and viewer count displays. Kick’s all about growth and building a community, especially for new creators.
Go with neon greens, electric blues, or bright purples. Kick’s crowd loves gaming and tech, so those colors really fit.
Animated backgrounds and scene transitions are fair game. Kick’s tech can handle these effects without lag.
Quick win: Since Kick’s community is smaller, unique overlays help you stand out way more. Custom designs show off your personality.
Getting Started with OBS Studio
OBS Studio is still the go-to free streaming software. You can add overlays, manage scenes, and go live on platforms like Twitch or YouTube. Let’s go over setup, adding overlays, and using animations to give your stream that pro look.
Setting Up OBS Studio
Download OBS Studio from the official site. Run the Auto-Configuration Wizard the first time you open it.
The wizard checks your computer and internet, then sets things up for you.
Pick “Optimise for streaming” if you’re going live. Go with “Optimise for recording” if you’re making videos.
Key settings to check:
- Output resolution: 1920×1080 works for most streams
- Frame rate: 30 FPS for stability, 60 FPS if your upload speed’s good
- Encoder: x264 for older PCs, NVENC if you’ve got NVIDIA graphics
Create your first scene by hitting the “+” in the Scenes panel. Name it something like “Main Stream” or “Live.”
Add a Display Capture to show your whole screen, or Game Capture for just your game. Drag the corners in the preview window to move or resize.
Hit “Start Recording” to test everything before you go live. This way, you can catch audio or lag problems without anyone watching.
Adding Stream Overlays in OBS
Download your overlay files and put them in a folder you’ll remember. Most overlays come with PNGs for static elements and WebM files for animations.
Click the “+” in Sources and choose “Image” for static overlays. Find your file and add it.
Layer your sources like this:
- Background elements (bottom)
- Game or display capture
- Webcam
- Overlay graphics (top)
Drag sources up or down in the list to put them in front or behind. Top ones show up in front.
Right-click any overlay and pick “Transform” to resize or move it. Use “Fit to Screen” for full overlays, or drag edges for frames.
Quick tip: Select a few overlay elements, right-click, and group them together for easy moving.
Using Media Sources for Animated Overlays
Choose “Media Source” in Sources to add animated overlays—stuff like moving borders or video backgrounds. Pick your WebM or MP4 file.
Set these options:
- Loop: So the animation keeps going
- Restart playback when source becomes active: Keeps everything in sync
- Close file when inactive: Saves resources
Move animated overlays just like images. Usually, you want these on top of your webcam and game.
Warning: Too many animations can slow things down. Start with one or two and see how your PC handles it.
Switch between scenes to check your animated overlays. They should loop smoothly without stutter.
WebM files are better than MP4 for overlays. WebM supports transparency and usually runs smoother in OBS.
Make different scenes for “Starting Soon,” “Live,” or “Be Right Back.” Switch scenes with transition controls while you stream.
Streamlabs and StreamElements Integration
Streamlabs and StreamElements both give you solid tools for overlays. The trick is knowing how to import overlays and set up widgets in your streaming software.
Importing Overlays into Streamlabs
Streamlabs makes overlay imports easy—just a couple clicks. Most pro overlay packs include a .overlay file that sets up everything for you.
In Streamlabs, hit the gear icon for settings. Go to Scene Collections, then click Import Overlay File.
Find your .overlay file and open it. Streamlabs will set up scenes, sources, and transitions automatically.
Quick win: Look for overlay packs with a .overlay file. It saves you tons of setup time.
Once it’s in, you can tweak each scene. Use the scene switcher to move around. Most packs give you “Starting Soon,” “Be Right Back,” and “Ending Stream” scenes.
Configuring Overlays with StreamElements
StreamElements widgets work in a browser—they show live info like new followers or donations.
First, make a StreamElements account and link it to your streaming platform. Create widget URLs from your dashboard for alerts and labels.
In Streamlabs or OBS, add a Browser Source for each widget. Paste in the URL.
Set the width and height to fit your overlay. Most widgets look best at 1920×1080.
Warning: Turn on “Refresh browser when scene becomes active” in the cache settings. Otherwise, widgets might glitch.
Test your widgets by firing off test alerts in StreamElements. Make sure they show up right before you go live.
Overlay Packages: Free and Premium Options
You’ll find overlay packs in two main flavors: free collections for beginners and premium packs for pro-level, exclusive designs. Whether you go custom or grab a pre-made set depends on your budget and how unique you want your stream to look.
Popular Free Overlay Sources
Free overlay packages let new streamers try things out without spending anything. Most collections come with basic webcam frames, alerts, and scene transitions.
Streamlabs has one of the biggest free libraries around. Their templates plug right into their streaming software. You’ll find hundreds of designs for all sorts of games and vibes.
Hexeum puts out some great free overlays that look surprisingly professional. Their sets usually have matching alerts and scenes. A lot of streamers start with these.
Nerd or Die focuses on animated elements and sound alerts. They’ve got free starter packs along with their paid stuff. Some of their free content comes with unique sound effects and animated graphics.
Most sites let you download overlays right after you make an account. Sure, a lot of people use the same designs, but these are perfect for figuring out what fits your channel.
Exploring Premium Overlay Packages
Premium packages usually cost between £5 and £50. You get much higher quality than with free overlays. These designs tend to be exclusive, so you won’t see them everywhere.
The big draw is professional design quality. Premium overlays use sharper graphics, smoother animations, and more detailed artwork. They often come in several colour options.
Complete packages include everything you need—webcam frames, alerts, panels, offline screens, and matching social media graphics.
Many premium overlays get regular updates. Creators add new elements or seasonal versions. Some even give you lifetime updates with a single purchase.
Top premium sites include OWN3D, FragileGFX, and Visuals by Impulse. They often bundle overlays, alerts, and stream music together.
Custom vs Pre-made Overlays
Pre-made overlays are ready to go right away and cost way less. You can buy them from marketplaces or grab free ones. The downside is, you might run into other streamers using the same look.
Most pre-made sets work with OBS and Streamlabs out of the box. They come with install guides and usually have versions for different streaming software.
Custom overlays are made just for you. A designer builds something unique based on your colours, logo, and style. Prices start around £50 and can go up to £300+ for big, complex sets.
Custom work takes about 1-3 weeks. You’ll talk with the designer, give feedback, and tweak things until it’s perfect. Platforms like Fiverr and Upwork make it easy to find overlay designers.
For most new streamers, pre-made overlays make sense. Once you’ve got a following and know your brand, custom overlays are worth the investment.
Essential Overlay Elements

Webcam frames and chat boxes are the backbone of most streaming setups. They help your stream look professional and keep viewers focused on your content.
Webcam Frames & Borders
A webcam frame puts a clean border around your camera feed. It keeps your face from just floating over the gameplay.
Match your frame to your stream’s style. Pick colours that fit your background or the game UI. Avoid loud colours that pull attention away from the action.
Size matters for webcam frames:
- Small frames (10-15% of the screen) are best for gameplay streams
- Bigger frames (20-25%) work for talk shows or reaction content
- Watch out for your game’s UI when placing the frame
Most streamers put their webcam frame in the bottom-right corner. That spot usually stays clear of important game info. If your game’s UI is on the right, try the left corner instead.
Frame styles you’ll see:
- Clean borders: Simple rectangles
- Themed designs: Game-inspired artwork
- Animated frames: Moving parts (don’t overdo it)
Chat Boxes and Panels
Chat boxes put your live chat on screen. This helps viewers who don’t have a second monitor keep up with the conversation.
Stick your chat box where it won’t cover anything important. Most people use the left or right side. Make it semi-transparent so it doesn’t take over.
Key chat box settings:
- Font size: Big enough to read, but not too big
- Message limit: 10-15 messages max
- Background opacity: 60-80% transparent
- Colour coding: Different colours for subs and mods
Information panels show stream details like recent followers, donation goals, or your socials. Place these in empty corners or along the bottom.
Good panels update in real time. Showing recent followers or donations keeps things fresh. Try not to cram in too many static panels.
Stream Alerts and Interactive Elements

Stream alerts pop up when someone follows, subscribes, or donates. These keep your community engaged and make your stream feel lively.
Setting Up Stream Alerts
You can get your first alerts running in minutes with the right platform. StreamElements and Streamlabs are the top picks for beginners.
Both platforms give you free alert systems. Just connect your streaming account and add an alert widget to OBS or whatever software you use.
The basic setup goes like this:
- Create an account on your chosen platform
- Connect your Twitch or YouTube account in the dashboard
- Go to overlays and make a new one
- Add an AlertBox widget to it
- Copy the overlay URL into OBS as a browser source
Heads up: Don’t turn on every alert type right away. Start with followers and donations. Add more later as your audience grows.
Most alert platforms have default sounds and animations. These are fine to start, but custom alerts help you stand out. You can upload your own images, GIFs, or even videos.
Keep alerts short so they don’t break up your stream. Around 3-5 seconds is usually plenty.
Configuring Follower and Donation Notifications
Follower alerts should be quick and friendly since you’ll get these often. A simple sound and the new follower’s name does the trick.
Set your follower message to something like: “Welcome {name}! Thanks for following!” The {name} bit will fill in the username.
Donation alerts are a bit more special since they involve real support. You can set up different alerts for different amounts.
Here’s a basic breakdown:
| Amount Range | Alert Duration | Special Features |
|---|---|---|
| £1-5 | 3 seconds | Basic sound + text |
| £6-20 | 5 seconds | GIF animation |
| £21+ | 7 seconds | Video + text-to-speech |
Turn on text-to-speech for donations so people hear their message out loud. This keeps things interactive even when you’re focused on the game.
Pro tip: Use the preview button to test your alerts before you go live. That way you won’t get caught off guard by broken or super loud notifications.
Set a minimum donation amount if you want. Some streamers use a £1 minimum to cut down on spam, but it’s up to you.
Designing Effective Stream Layouts
A good stream layout means putting your graphics and elements in the right spots. Viewers need to see everything clearly. The trick is to keep your overlay layers tidy and make sure nothing important gets blocked.
Organising Overlay Layers
Think of your stream elements as layers in a cake. The game footage goes on the bottom. Overlay graphics stack on top.
Start with these basics:
- Background (game or camera feed)
- Main overlay frame
- Webcam frame
- Chat box
- Alert notifications
Put your webcam in a corner where it won’t cover health bars, minimaps, or scores.
Layer order matters. Alerts should always appear above everything else. Webcam frames come next. Main overlay graphics go underneath.
OBS Studio and most other streaming apps let you drag layers up or down. Try different setups in practice streams. Move things around until you’re happy.
Save different scenes for different games. Shooters and strategy games need different layouts.
Balancing Visuals and Gameplay
Your overlay should look good but never hide what you’re doing. Viewers want to see your gameplay, not just fancy graphics.
Keep overlay pieces small and simple. Thick, flashy borders might seem cool, but they eat up screen space. Thin frames usually work better.
Try these size guidelines:
- Webcam frame: 10-15% of your screen
- Chat box: No wider than 20% of the screen
- Overlay borders: Under 50 pixels thick
Go for transparent backgrounds when you can. Semi-transparent overlays let gameplay show through.
Pick colours that stand out from your games. Dark overlays pop on bright games, and light ones look better with dark games.
Test your layout with different games before you stream. What works for one game might block something vital in another. Your overlay should help the viewing experience, not get in the way.
Scene Transitions and Professional Touches
Scene transitions let you switch smoothly between parts of your stream and add animated effects that make everything look polished. Custom animations and timing controls help you build your brand and keep people watching.
Creating Scene Transitions
You can set up basic scene transitions in OBS Studio in just a few clicks. Go to the Scene Transitions panel at the bottom right.
Open the dropdown and pick from built-in transitions like Fade, Slide, or Cut. Fade usually works best for most streams and gives a smooth look.
Popular types:
- Cut – Instant switch, no animation
- Fade – Scenes blend together
- Slide – One scene pushes the other off
- Swipe – New scene wipes over the old one
Start with a 300-500 millisecond fade duration. That usually feels natural.
Test each transition by switching scenes. Adjust the timing slider until it feels right for you.
Using Animation in Scene Changes
Stinger transitions use short video animations during scene switches. These look the most professional.
Download or make a quick video file (1-3 seconds) with your branding. People love animated logos, whoosh effects, or graphics that fit your overlay.
To set up a stinger:
- Click the + in Scene Transitions
- Choose Stinger
- Browse for your video file
- Set the transition point (when the new scene appears)
The transition point is key. Set it around 50-70% through your animation so viewers see the effect before the scene changes.
Keep stinger files under 5MB for smooth playback. MP4 with H.264 encoding usually works best.
Test your stingers during practice streams to make sure they don’t cause lag or audio problems.
Technical Considerations for Overlays

To get your overlays running smoothly, you’ll need to understand file formats and keep an eye on your system’s performance. These basics will help your stream look great without bogging down your computer or tripping up your streaming software.
File Types and Resolution
PNG files usually work best for most overlays since they support transparent backgrounds. That lets your graphics blend right in with your gameplay footage.
If you want animated elements like moving logos or ticker text, WebM files do the trick. They’re smaller than MP4s but still look sharp.
Try to stick with 1920×1080 resolution for full-screen graphics. Most streaming platforms use that as the standard.
You can size lower-thirds and corner logos smaller, like 600×100 pixels, to save on resources.
File size really matters for performance. Try to keep each overlay file under 5MB if you can help it.
Big files will slow down your streaming software and might even cause lag.
Set your media source settings in OBS or whatever software you use to match your overlay dimensions. If the sizes don’t line up, you’ll get pixelated graphics that look off.
Quick tip: Always test your overlay files before you go live. Just load them into your streaming software and make sure they show up like you want.
Performance and Resource Management
Overlays pull power from your computer’s CPU and GPU. If you load up too many animated elements, you’ll probably see frame drops or your audio could go out of sync.
Try to limit active overlays to just 3 or 4 during gameplay streams. If you’re running a talk show or commentary, you can get away with more, since gameplay won’t eat up as many resources.
Static images use less power than animated graphics. A simple PNG logo often works better than something that’s always moving.
Keep an eye on your CPU usage while you stream. Most streaming software shows you real-time stats.
Try to stay below 80% CPU usage if possible.
Heads up: Don’t run overlay editors and your streaming software at the same time. That just doubles the resource drain and can crash your setup.
Before you start, close any unnecessary programs. Things like web browsers, Discord, and extra game clients will all compete for resources your overlays need.
Accessibility and Viewer Experience

If you want everyone to enjoy your stream, good overlay design is essential—no matter their visual abilities or viewing conditions.
Even small tweaks to fonts and colors can make a massive difference for viewers with dyslexia, color blindness, or other visual issues.
Choosing Readable Fonts and Colours
The backbone of accessible overlays comes down to your text choices. Pick sans-serif fonts like Arial, Roboto, or Open Sans—they’re just easier to read on screens.
Skip the decorative or cursive fonts. Sure, they look fancy, but they’re a pain to read, especially on phones where a lot of people watch streams.
Font size is more important than you think. Use at least 18-24pt for any text your viewers need to read, like donation alerts or chat overlays.
High contrast is a must. Go for white text on dark backgrounds or black on light backgrounds for the best readability.
Tools like WebAIM’s Contrast Checker can help you see if your color combos actually meet accessibility standards.
Red and green together? Not great for color-blind viewers. Stick with blues, whites, blacks, and yellows—they’re safer bets.
Designing for All Audiences
Your overlay layout should work for people watching on big monitors or tiny phones. Keep must-have info, like social handles or your current game, in the same spots every time.
Give your elements some breathing room. Overlays stuffed with overlapping panels just confuse people and make things hard to read.
Use a grid system to line up text and graphics cleanly.
Keep motion effects in alerts subtle. Too much flashing or spinning can trigger seizures in sensitive viewers and honestly, it’s just distracting.
Add both visual and audio cues for important notifications. When someone follows or donates, combine a sound with a clear text pop-up.
Test your overlay on different screen sizes before you go live. What looks perfect on your main monitor might be unreadable on a phone, and more people are watching from mobile than ever.
Try adding semi-transparent panels behind text. That way, your words stay readable even if your gameplay gets bright or chaotic in the background.
Frequently Asked Questions

Getting into streaming overlays can feel like a lot at first. Most beginners start with free templates before spending money on custom designs.
If you want to make your own, you’ll need some basic design software know-how. OBS and StreamElements offer quick setup for ready-made overlays, so you don’t have to start from scratch.
What’s the best way to get started with free animated overlays for streaming?
Honestly, you can’t go wrong with free overlay platforms like FragileGFX or Streamlabs’ built-in library. They’ve got thousands of pre-made animated overlays you can use right away.
Download a full overlay pack instead of piecing together single elements. That way, your graphics match and your brand looks consistent.
Always test your overlay on a practice stream first. Some free animated overlays can cause frame drops if your PC isn’t up to it.
Could you guide me through the process of creating my own stream overlay template?
Grab free software like GIMP or Canva for the basics. Set your canvas to 1920×1080 pixels—that’s the streaming standard.
Use transparent PNGs for overlay elements. That lets your gameplay or camera show through just right.
Leave about a 10% margin around all edges. Mobile viewers often see cropped screens, so keep important stuff inside the safe zone.
Save different versions of your template with various color schemes. It’s fun to swap themes for special events or holidays.
How do I go about adding overlays to OBS with the help of StreamElements?
The StreamElements OBS plugin makes overlay setup way easier than doing it all manually. Download it from StreamElements, then install it into OBS.
Connect your StreamElements account through the plugin. Your custom overlay URL syncs with OBS automatically—no copy-pasting required.
Add your StreamElements overlay using the “Browser Source” option in OBS. The plugin takes care of the technical details.
Test your alerts and interactive stuff before you go live. StreamElements overlays include chat and follower notifications that need setting up.
Is there a simple method for incorporating overlays directly whilst using Twitch on my mobile?
Here’s the thing: Twitch’s mobile app doesn’t let you use custom overlays during live streams. You only get basic camera positioning and filters.
Try third-party mobile streaming apps like Streamlabs Mobile or Restream Studio instead. They offer overlay features more like desktop software.
Keep overlays super minimal on mobile. Fancy designs just turn into a mess on small screens and can crowd out your content.
Where can I find a free stream overlay template that’s perfect for YouTube content creators?
Check out YouTube’s Creator Studio for official overlay templates. Google actually provides free graphics designed for YouTube’s streaming style.
Nerd Or Die has great free YouTube overlays with the right aspect ratios. Their templates come with scene transitions and alert graphics that fit YouTube’s layout.
Look for templates with YouTube-specific stuff like subscriber goals and Super Chat displays. Those features won’t work elsewhere, but they really boost your YouTube streams.
Can you point me towards some user-friendly StreamElements overlay configurations?
If you’re just getting started, I’d recommend StreamElements’ Activity Feed overlay. It pulls together followers, donations, and chat messages into one tidy interface.
The Overlay Editor feels pretty intuitive, honestly. You just drag and drop stuff—no need to mess with any code.
You can tweak colours, fonts, and where things sit on the screen with simple visual controls. It’s actually kind of fun to play around with.
If you’re streaming games, check out the “Gaming” category templates first. StreamElements made these overlays for games like Fortnite, Valorant, and Minecraft, so they fit right in.
Also, don’t forget to play with the alert animation speeds in the settings. Some folks think the default ones zip by too quickly or just feel a bit much for their vibe.
