Gray Zone Warfare Competitive Mode: Features, Strategies & Gameplay
Updated On: November 12, 2025 by  Aaron Connolly
Core Mechanics of Gray Zone Warfare Competitive Mode

Gray Zone Warfare’s competitive mode throws three private military companies into a fight for control across Lamang Island. Every spot on the map can turn into a battleground, and honestly, nowhere feels safe.
Overview of Warfare Mode
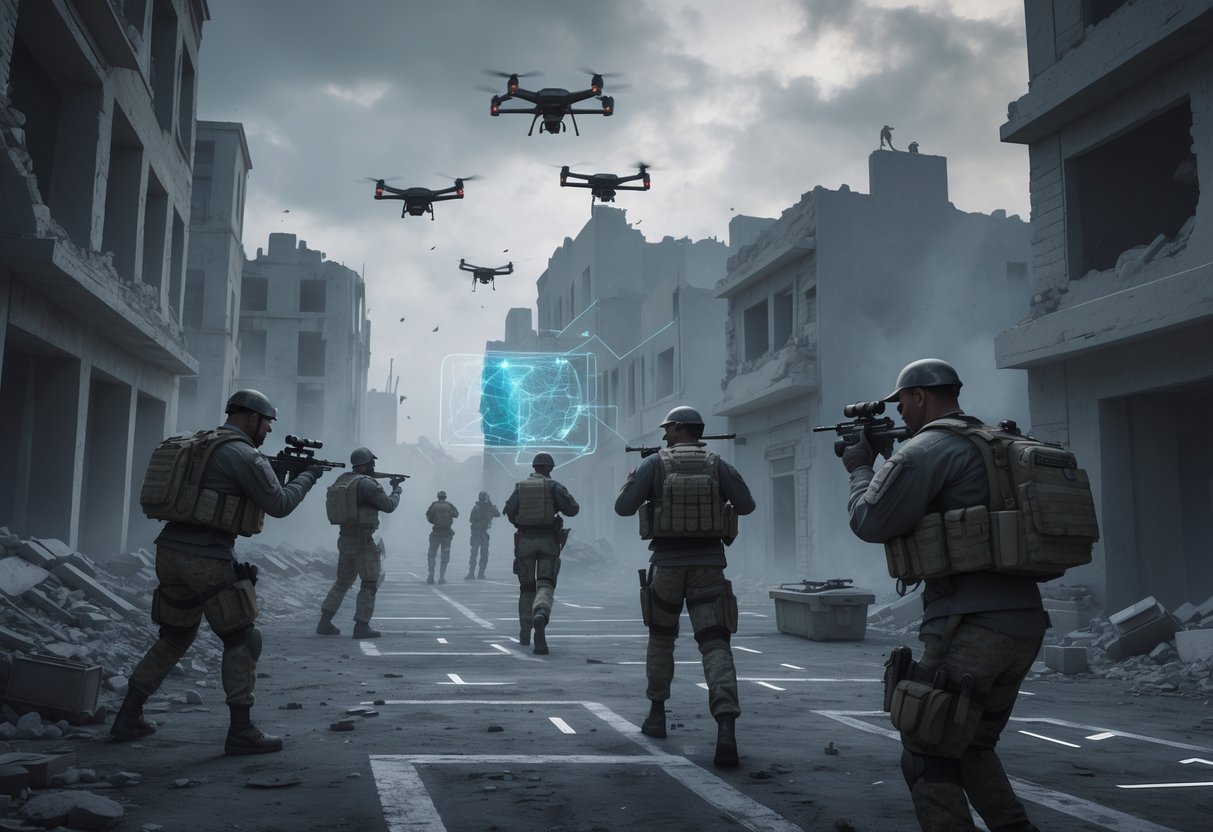
Warfare mode is all about PvPvE chaos. You can run into enemies anywhere, and unlike those old-school shooters, there aren’t any safe zones to hide behind.
Danger follows you, even inside your own faction’s base. The only real break you get is a super short 3-5 second invincibility right after you drop in by helicopter.
Conflict zones pop up as red circles whenever factions start fighting nearby. These zones get triggered when you suppress, hurt, or take out enemy faction players. The red circle sticks around for five minutes after the last gunshot.
| Action | Conflict Zone Duration |
|---|---|
| Suppression | 5 minutes from last shot |
| Damage dealt | 5 minutes from last shot |
| Player elimination | 5 minutes from last shot |
If you mess up and hurt or kill a teammate, you get the aggressor status. The game hits you with a one-hour penalty for team-killing, and the timer keeps ticking even if you log off.
Aggressor penalties stack up fast:
- Suppressing teammates: 5 minutes
- Wounding friendlies: 10 minutes
- Looting friendly bodies: 30 minutes
- Killing teammates: 1 hour
Private Military Companies and Factions
Three PMCs are always fighting for the upper hand across Lamang Island. Each one has its own bases and objectives, and you’re up against both of the other companies.
Your faction loyalty decides who’s friend or foe. Anyone from another PMC is fair game, anywhere, anytime.
Your faction choice also changes which bases you can enter and which COPs (Command Outposts) your team can claim. You can attack and defend enemy COPs, and AI will jump in to help out.
Progression is shared, so whatever you earn—gear, weapons, XP—in Warfare mode sticks with you if you switch over to Joint Operations. You don’t lose out.
Communication is all proximity-based voice chat. You’ll have to stick close to your squad if you want to actually coordinate when bullets start flying.
Role of Lamang Island
Lamang Island is the only place you’ll fight in competitive mode. Its mix of terrain means every battle feels a bit different.
COPs are scattered everywhere and act as the big objectives. If you control one, you get tactical perks and a handy spawn point for your crew.
COP mechanics shake things up in Warfare mode:
- You can attack enemy COPs
- AI guards defend every outpost
- Taking control of a COP shifts the map in your faction’s favor
The island’s layout decides where conflict zones show up. Red circles drop right between groups that are fighting, so sometimes you’ll see a bunch of battles happening at once.
Weather and the environment mess with your visibility and movement. One day you’re sniping in clear weather, the next you’re slogging through fog, and you’ll have to adjust your tactics on the fly.
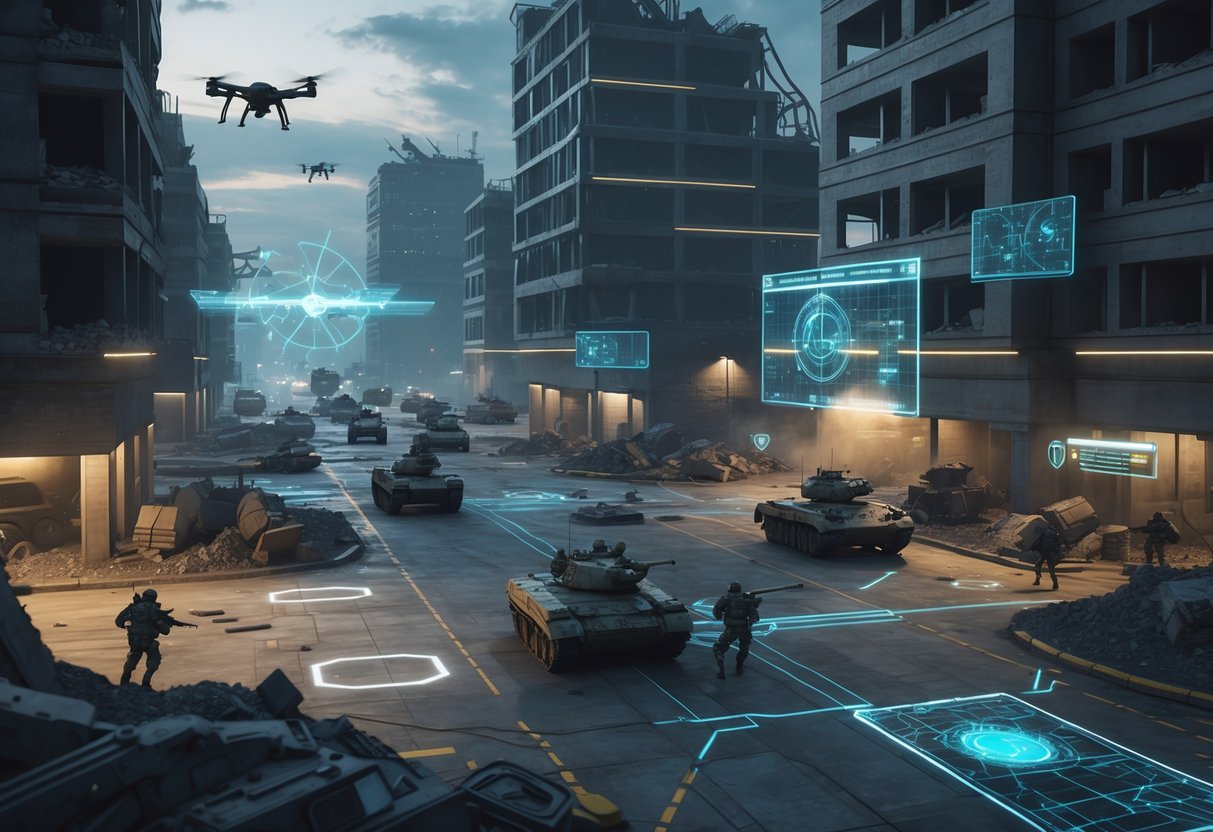
Combat Outposts and Control Points
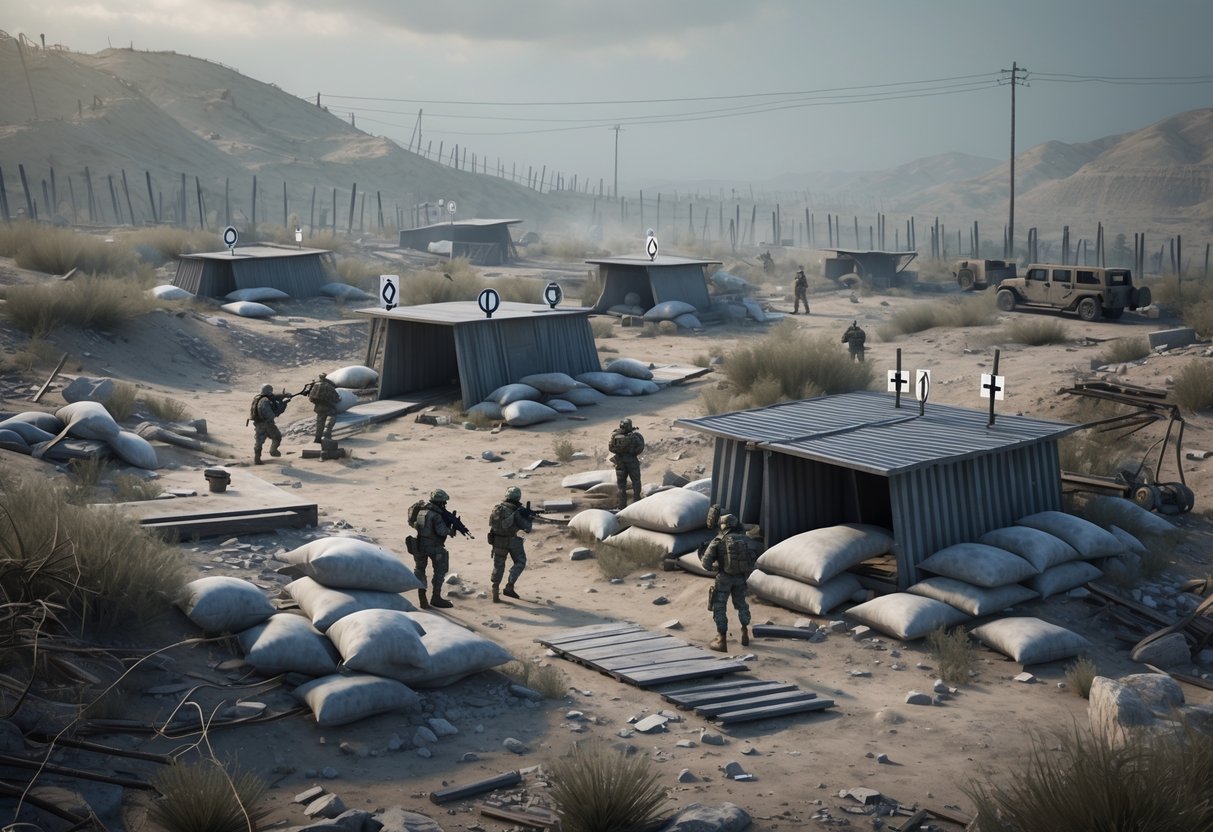
Combat Outposts (COPs) are the big prizes in Gray Zone Warfare’s competitive mode. You and your team fight to capture or defend these spots all across Lamang Island. Each COP gives you tactical perks—respawn points, supply access, and lets your faction control more ground.
COP Defence and Attack Dynamics
Minor COPs aren’t too tough if you coordinate, but Major COPs need serious teamwork and firepower. Enemy AI guards the outposts, and you’ll usually run into enemy players too.
When attacking, most teams clear rooftops first. Grenades come in handy for flushing out defenders, and smart squads attack from several directions to avoid bottlenecks.
To capture a COP, you have to wipe out all enemies before you can use the control terminal. If the terminal glows gray, either the fight isn’t over or something’s glitching.
Once you own a COP, you can set up AI guards for defense. Your faction’s defenders wear blue armbands, which helps a lot when things get hectic.
Major COPs draw a lot of PvP action since they’re the only places you can get certain loot. Expect snipers watching from afar and squads trying to storm the best positions.
Safe Zones and Vulnerabilities
If you hold a COP, it acts like a semi-safe zone. Friendly AI spawns in to help guard it, but honestly, nowhere is totally secure.
The perks of a safe zone are pretty sweet: stash access, vendors, and you can do quests. You can repair your armor, top off your ammo, and sort your inventory while you’re there.
But don’t get too comfortable—enemy teams can still attack your COPs. The AI helps, but determined players can break through.
During a capture attempt, the zone is especially vulnerable. Teams have to keep watch or risk losing the outpost.
Where a COP sits on the map matters. Outposts in the open get hit more often than ones tucked away in towns or behind cover.
COP Ownership and Rewards
Major COPs hand out PMC gear boxes with level 3+ armor, big backpacks, and high-end guns like SVDs and MCXs. You won’t find these anywhere else.
If you control a Major COP, you get access to the Vulture vendor. This special trader pops up at different COPs and sells gear looted from other players.
You’ll earn XP for every outpost you capture, both Major and Minor, and that all adds up for your character’s progression.
Weapon crates at Major COPs offer guns you can’t buy from normal vendors. You’ll want to grab these before the enemy does.
If your team holds several COPs, you can set up tactical networks across the island. That makes it easier to move supplies and retreat if things go south.
Conflict Zones and Map Dynamics
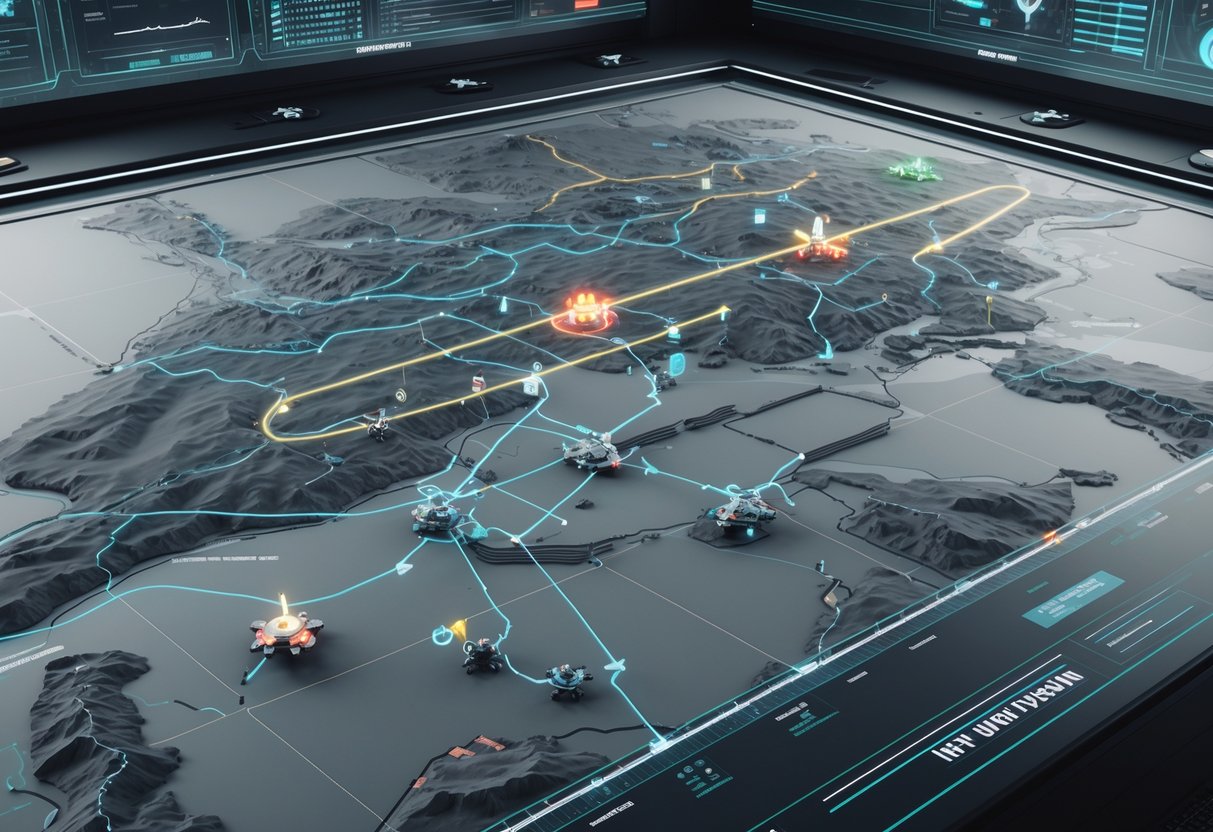
Conflict zones turn the map into dynamic battlegrounds when rival factions start shooting. Each zone lasts five minutes and gives out automatic XP for eliminations. They’re about 200 meters across and really shake up how you move and fight.
Conflict Zone Creation
Whenever players from different factions start fighting, the system drops a conflict zone right between them. Each one covers a 200-metre diameter and centers on the action as soon as it starts.
You don’t have to do anything special to make these zones appear. The game just knows when the bullets start flying between factions.
Your faction operator calls out these fights to everyone on your team. That way, nobody misses a chance to get in on the action—or walks straight into a mess unprepared.
What sets off a conflict zone:
- Shooting at enemy factions
- Blowing up grenades near enemies
- Dealing any kind of damage across faction lines
It doesn’t matter if you’re fighting in a city, a forest, or out in the open. The 200-metre circle gives you enough space to maneuver but keeps things tense.
Zone Timers and Resolution
Conflict zones stick around for five minutes by default. If more players jump in, the timer extends automatically.
You can check the map to see how much time’s left. Yellow markers show zones that are still active, and gray ones mean the fight’s over.
How the timer works:
- Starts at 5 minutes from the first shot
- Adds time if new players join the fight
- No real upper limit as long as fighting continues
- After a zone ends, there’s a 2-minute cooldown before a new one can pop up in the same spot
Once the timer runs out and no one’s left fighting, the zone disappears. Dead players don’t change the timer, but their teammates can keep it going by staying in the fight.
Smart teams keep an eye on several zones at once. You can move between them to rack up XP and get better positions.
Impacts on Player Movement
Conflict zones totally change how you get around. Active zones become high-risk, high-reward areas, so you have to think hard about your next move.
You have to choose: charge in for XP, sneak around to stay safe, or maybe just wait for things to cool off. Every choice changes how your mission plays out.
Things to consider:
- Direct fight: Jump in for XP but risk a quick death
- Avoidance: Skirt around to stay hidden
- Ambush: Set up on the edge for easy kills
- Timing: Wait for the zone to end before crossing
Active zones also show enemy locations to nearby teams. You can use that info to plan your next ambush or avoid a fight.
Because the 200-metre radius is pretty big, you might be fighting inside a zone without even realizing it at first. Check your map often if you want to snag those bonus XP rewards.
PvPvE Elements in Warfare Mode
Warfare mode smashes player-versus-player action together with AI-controlled enemies all over the map. There aren’t any safe spots—enemy PMCs and AI both want you dead while you’re chasing story objectives or leveling up.
Interactions with AI Forces
AI always defends COPs for all three factions. If you attack an enemy COP, their AI defenders will shoot back and trigger conflict zones just like a player fight.
Any time you suppress, hurt, or kill enemy AI, the game makes a red conflict circle.
AI rules are pretty simple:
- Enemy AI returns fire when you attack
- Friendly AI guards your own outposts
- All COPs get AI defenders, even if no players are around
- AI doesn’t care how many players are nearby—it always fights the same
AI makes sure there’s always PvE action, but it also keeps the territory control game going strong.
Blending PvP and PvE Objectives
You level up and unlock stuff whether you’re fighting players or just doing PvE. Story missions, weapon unlocks, and reputation all progress together, so you’re never wasting time.
Conflict zones show up whether you’re fighting players or storming a COP. They last five minutes after the last bullet, and you can see them on your map.
Everything you do counts:
- Level up your character and skills
- Build faction reputation
- Knock out story missions
- Unlock and buy new gear
You’ll end up flipping between hunting enemy PMCs and chasing down story objectives all in the same run. Sometimes a simple PvE mission suddenly turns into a wild PvP brawl.
If you attack your own team, the aggressor system kicks in. Penalties start at five minutes for suppression and go up to an hour for killing a teammate, so watch your fire.
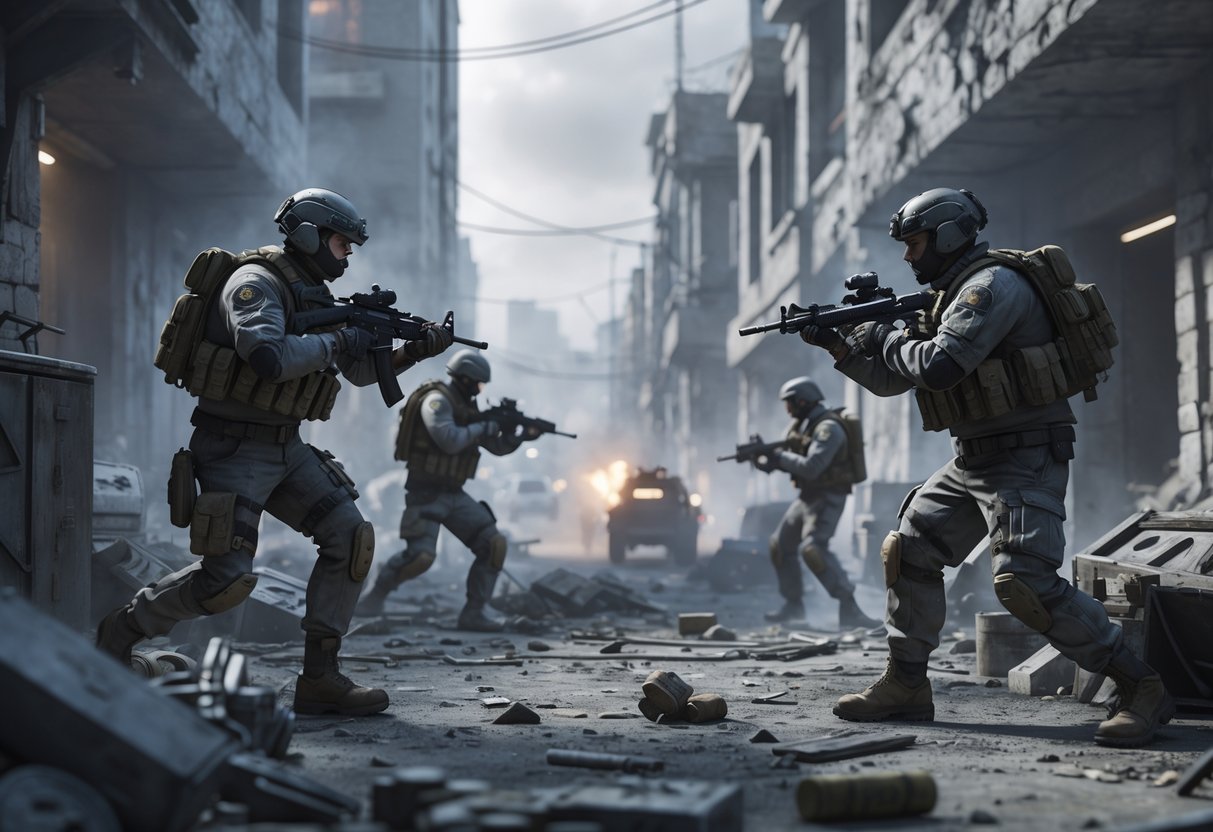
Faction versus Faction Encounters
All three PMCs go at it across the map, and everything you bring can end up in someone else’s backpack if you die. It’s high stakes and high tension.
Conflict zones appear as red circles wherever big fights break out. If all three PMCs get involved, you’ll see several circles at once—things can get pretty hectic.
Faction fight features:
- Full loot PvP—die and lose everything you had
- No safe zones—fights can break out anywhere, even at bases
- Short spawn protection—just 3-5 seconds after you land
- Red zones—see where the action just happened
The most intense fights usually happen near good loot or mission spots. Enemy PMCs love to camp these areas, so expect trouble.
Warfare mode rewards bold moves with better gear, but you pay for mistakes. Unlike joint ops, every choice here can cost you dearly.
Aggressor Status and Penalties
Gray Zone Warfare’s aggressor system flags players who hurt their own team, slapping them with penalties that can last for ages. If you want to compete, you really need to avoid this status and know how to handle the fallout if it happens.
Obtaining Aggressor Status
You’ll get aggressor status if you hurt or kill teammates by friendly fire. The system just kicks in—doesn’t matter if it’s an accident or on purpose.
Common scenarios that trigger aggressor status:
- Crossfire accidents in chaotic fights
- Mistaken identity when visibility is poor
- Equipment bugs or a simple misclick
- Grenade splash damage that hits your allies
The system treats squad members and random teammates exactly the same. If you kill someone from your own squad, you get the same penalty as if you shot a stranger. That’s honestly frustrating for teams that actually communicate and try to play together.
Some folks have reported getting stuck with aggressor status for way too long. There’s even a case where someone was marked for 164 hours straight—so yeah, the penalty system seems a bit buggy sometimes.
Effects of Aggressor Status
Aggressor status makes team play a nightmare. The biggest penalty? You can’t use team voice chat at all.
Active penalties include:
- Voice chat restrictions – No talking to your team
- Extended duration – Usually lasts 10 minutes to a few hours
- Team trust issues – People might avoid or even target you
- Base access maintained – You can still walk into friendly bases
You can still play the game mostly as usual. Bases, gear, missions—they’re all still on the table. But losing team comms? Forget about any real coordination.
Other players see your aggressor tag, and that often means social headaches. Teams may shun you or treat you with suspicion for the rest of the match.
Resolving and Avoiding Aggressor Penalties
Aggressor status clears itself after the penalty timer runs out. There’s no button to appeal or reset it, even if it’s a mistake.
Prevention strategies:
- Identify targets clearly before firing
- Communicate movement plans with your squad
- Stick to firing lanes in group ops
- Check what’s behind your target before tossing grenades
If you get tagged, you just have to wait it out. Some players have reached out to devs on Discord or official channels if the system really glitches.
Aggressor status only pops up in PvPvE modes. If you stick to pure PvE, you’re safe—no friendly fire penalties since you’re only fighting AI. That’s a solid option if you’re tired of the drama.
Quick tip: If you keep getting hit with aggressor status, maybe slow down and stay more aware of your teammates during hectic fights.
Progression and Character Development
Gray Zone Warfare uses a shared progression system, so your character’s levels and unlocks follow you between PVE and competitive modes. Time spent in either mode counts toward your overall development, but the way you progress definitely feels different.
Shared Progression Between Modes
Your character’s progress stays the same in both PVE and warfare modes. Experience, faction reputation, and gear unlocks all transfer seamlessly.
This lets you level up in the safer PVE mode before diving into competitive warfare. Lots of players do this to unlock better gear and skills without the stress of fighting other humans.
Key benefits include:
- Same character level no matter the mode
- Gear and weapons unlock everywhere
- Faction missions count in both modes
- Economy and vendor relationships stick with you
This system sparks debate. Some people think PVE-focused players get an unfair leg up in competitive matches since they can grind more easily.
Levelling and Unlocks
Your level decides what weapons, equipment, and faction missions you can access. Each new level needs more experience, and you get XP mainly from combat, missions, and looting.
Level progression unlocks:
- Levels 1-10: Basic weapons and starter armor
- Levels 11-25: Better guns and tactical gear
- Levels 26+: Elite equipment and special faction items
Finishing missions gives you the fastest XP. Fighting AI enemies helps you progress steadily, but PVP kills in warfare mode give big bonuses.
You unlock unique apparel through certain mission chains. These cosmetics show off your progress and act as status symbols in competitive play.
Skills and Certifications
Gray Zone Warfare ditches traditional skill trees. Instead, you build skills by actually using them—so weapon handling, medical training, and tactical skills all improve with practice.
You get better at combat by surviving firefights and landing shots. Heal teammates or yourself, and your medical skills go up. Move smart or sneak around, and your movement and stealth skills improve.
Skill categories include:
- Weapon Proficiency: Boosts accuracy and handling for specific weapons
- Medical Training: Faster heals and better treatment
- Tactical Awareness: Better at spotting enemies and noticing environmental cues
You’ll need to manage your resources as you level up. Higher-end gear costs more to buy and replace, so your tactical decisions start to matter a lot more in competitive matches.
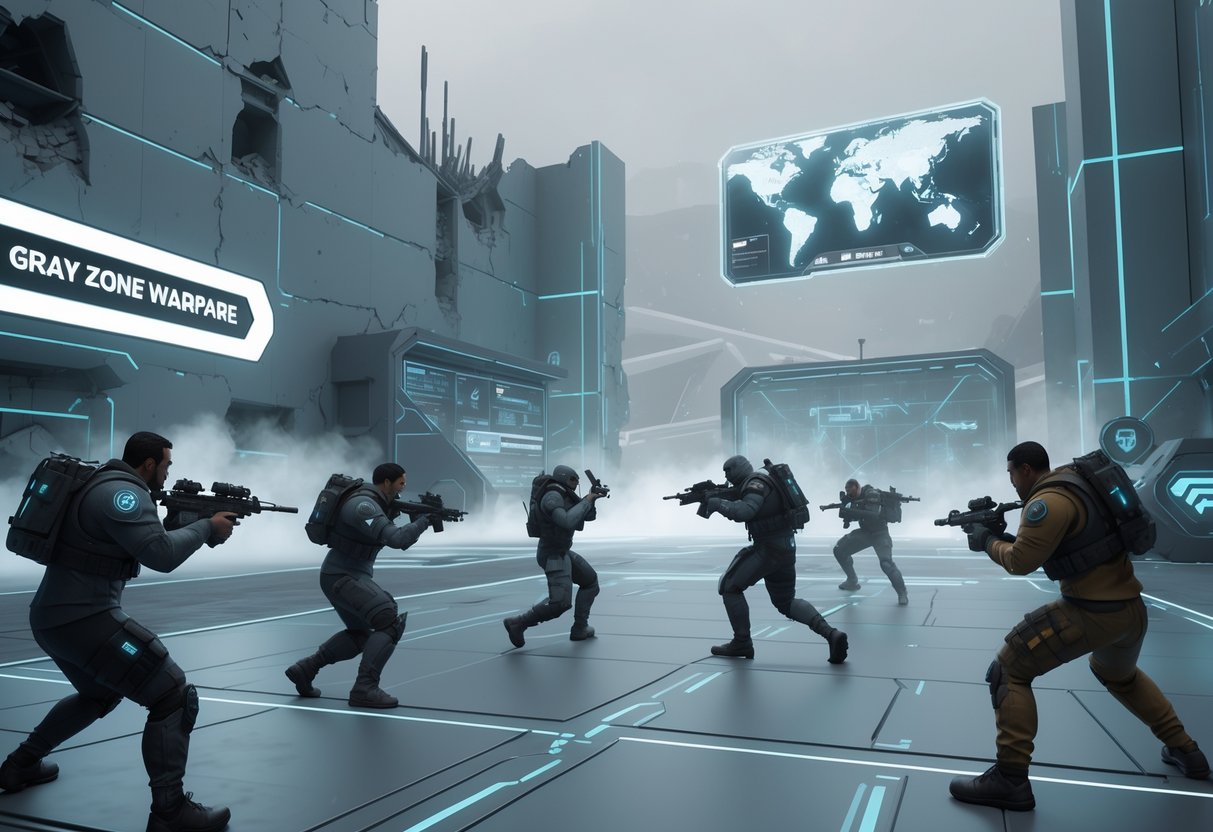
Team Tactics and Cooperation
Winning in Gray Zone Warfare’s competitive mode really comes down to teamwork. Squads that move together and actually understand friendly fire mechanics usually have the upper hand.
Squad-Based Play
Squad-based gameplay is at the core of Gray Zone Warfare. Everyone needs a clear role—medic, engineer, scout, or assault. Spreading out these responsibilities keeps your squad ready for anything.
Most teams use Discord for real-time coordination. Some even set up different voice channels for each mission phase. Quick callouts and sharing info can turn a match around.
Map knowledge is huge for squads. You need to know both the minimap for quick moves and the tactical map for planning. Knowing where to go, where to extract, and which routes enemies love to use? That’s a big deal.
Teams that move together and cover each other last longer. Practising formations, covering angles, and supporting each other in fights makes a real difference. Going solo usually means getting picked off.
Friendly Fire and Team Dynamics
Friendly fire makes everything riskier. A single mistake can wipe out your squad, so you have to identify targets before shooting. Teams should set up clear communication rules before the action starts.
Aggressor status changes how PMCs interact with each other and even with neutral factions. Knowing the mechanics helps you avoid unnecessary fights with potential allies. Teams need set rules for when to engage and when to hold back.
Trust is everything when friendly fire is live. You have to know where your teammates are at all times. Many squads use numbered callouts for precise locations.
Discipline separates good teams from chaotic ones. Sticking to engagement rules, sharing ammo, and setting medical priorities keeps things organized. Solid teamwork usually beats raw skill in competitive matches.
Lamang Island Map Design
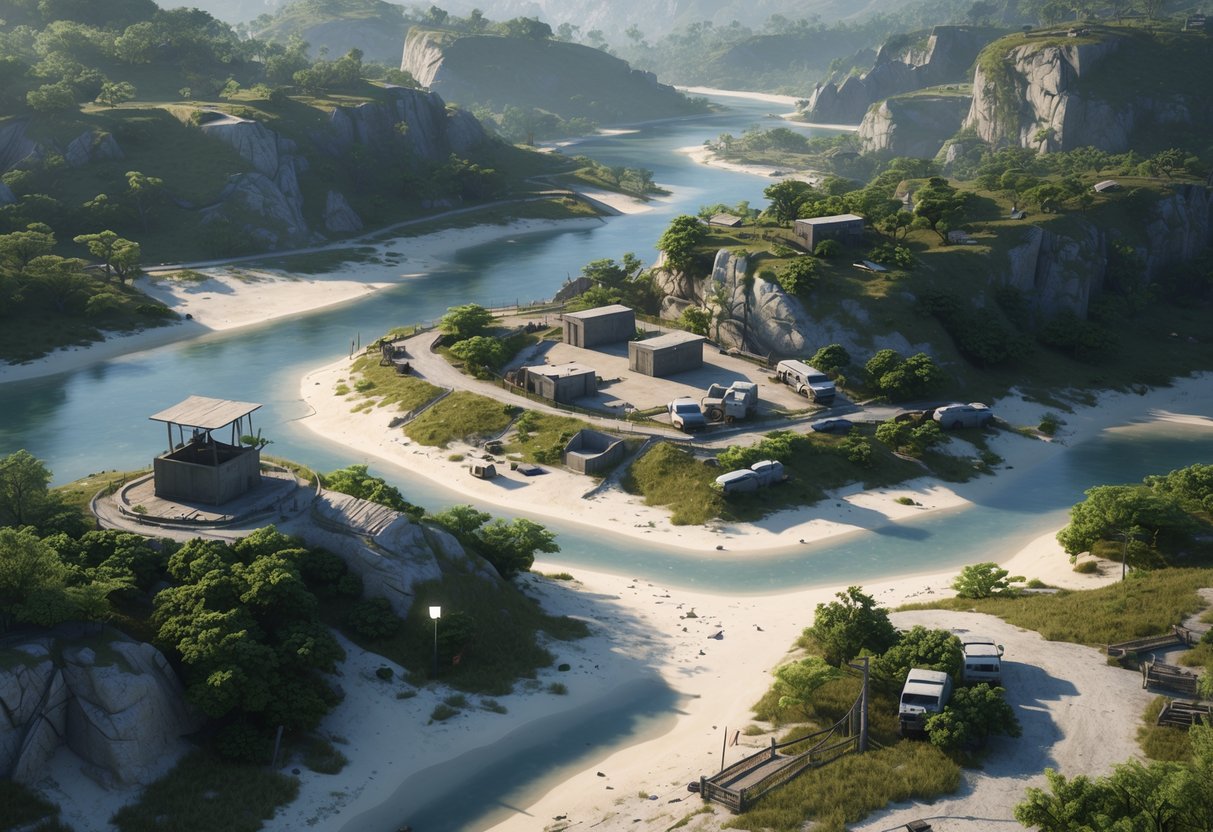
Lamang Island stretches across 430km², with 42km² used for active operations. The setting is fictional Southeast Asia, and the map mixes dense jungle with urban areas for plenty of strategic depth.
Major Locations and Landmarks
Central Urban Areas are where most of the action happens. These spots force close-quarters fights and offer multi-level buildings and tricky sightlines.
Settlements have key loot and faction bases. Main roads link these urban clusters and often turn into choke points.
Ground Zero is the most fought-over spot on the map. Teams rush here for top-tier loot and strategic positioning.
It’s got high ground and lots of ways in. Teams have to weigh the risk of fighting here against the rewards.
Jungle Sectors make up most of Lamang. Thick vegetation hides you but also limits your view.
You’ll find scattered compounds and resource points in the jungle. Getting around can be tough if you don’t know the map, so learning landmarks is a must.
Navigating Lamang
Landing Zones (LZs) are your main entry points. Each LZ connects to big routes leading to objectives and loot.
It’s smart to memorize where LZs are compared to your targets. How far they are apart affects early-game moves and rotations.
Road Networks tie all the main spots together. They’re faster, but you’re also more likely to get ambushed.
Jungle paths keep you hidden but are way harder to navigate. Teams have to balance speed and safety when picking routes.
Elevation Changes give tactical advantages. Higher ground means better sightlines and easier defense.
Ridges and hills become hot spots during fights. Knowing where the high ground is can really help your team.
Strategic Gameplay and Winning Conditions
Winning in Gray Zone Warfare’s competitive mode isn’t just about shooting. You need to juggle objectives, resources, and constant threats. Victory means controlling territory, finishing faction missions, and adapting as the battlefield shifts.
Objectives and Victory Criteria
Competitive matches focus on faction-based objectives—not just wiping out enemies. You have to finish missions and protect your faction’s interests all over the map.
Primary Victory Conditions:
- Mission Completion: Finish tasks for big progression points
- Territory Control: Hold Command Outposts (COPs) for strategic perks
- Resource Accumulation: Extract with valuable loot to help your faction
The mode keeps things dynamic. When factions clash, Conflict Zones light up as red circles. These stick around for five minutes after the last gunfire.
COPs are huge. Enemy factions can attack and take your COPs, which are guarded by AI. If you control more outposts, your team gets better tactical options.
Heads up: Friendly fire is a big deal. Team-killing slaps you with a one-hour penalty, and the timer keeps ticking even if you log off.
Resource Control and Extraction
Managing resources is what separates survivors from casualties. You have to balance attacking with keeping enough supplies to stay alive.
Critical Resource Types:
- Medical Supplies: Absolutely vital for longer fights
- Ammunition: You’ll run out fast if you’re not careful
- Equipment: You only keep high-value gear if you extract
Extraction always adds tension. If you die before extracting, you lose everything. That risk makes every decision feel heavier.
Quick Win: Always grab medical supplies before more weapons. Healing keeps you in the fight longer than extra firepower.
In Ground Zero, you have to choose fast—defend your spot or risk it all to extract your loot.
Squads that share resources do better. One person can focus on meds, another on ammo, making the whole team tougher.
Adapting to Dynamic Environments
The battlefield is always in flux. You have to adjust your approach as player actions and faction battles change the map.
Environmental Factors:
- Conflict Zone Movement: Hot spots shift as fights break out
- COP Status Changes: Who owns outposts changes safe routes
- AI Behaviour: Enemy AI reacts to what factions are doing
Mortars add another wrinkle. You can use them to block areas or break through, but you have to coordinate—friendly fire is still a risk.
Tactical Adaptation Methods:
- Route Planning: Watch conflict zones to dodge unnecessary fights
- Timing Coordination: Strike when enemies are distracted
- Equipment Flexibility: Change your loadout as the situation changes
What worked yesterday might flop today. You need to keep an eye on faction moves, resources, and shifting territory.
Talk to your team. Sharing info on enemy positions and loot spots makes everyone more likely to survive.
Upcoming Features and Future Updates
Gray Zone Warfare’s devs have big plans for competitive play through 2025 and beyond. They say Ground Zero will become the main battleground, and new features like stealth systems and faction warfare are on the way to shake things up.
Roadmap for Competitive Mode
The Winds of War update lands in Spring 2025 and brings dedicated PvP zones and Combat Outposts all over Lamang island. You’ll see dynamic weather—storms, fog, rain—that actually mess with how competitive matches play out.
Players will spot clearly marked battle zones, so you always know where the action is. The new day/night cycle shakes up tactics too, forcing you to adapt as matches go on.
Looking toward 2026, the Ground Zero feature is set to become the main competitive hub. This battleground will push alliances and decide who really controls the island.
Developers plan to roll out major updates every six months after the 2025 releases. They’ll use community feedback to keep tweaking the competitive side.
Expanding Warfare Mechanics
Stealth mechanics are on the way, finally giving competitive players more tactical choices. You’ll get to ambush from the shadows and grab the upper hand in PvP fights.
A crafting system will let you build survival tools and gear. Resource management will matter just as much as your aim.
Faction warfare will heat up. The new mechanics let you influence the power struggle between groups, and your choices will leave a mark on the world.
The certification system will track your skills and survival expertise. It’ll give competitive players a clear path to show off their mastery.
Custom Servers and Community Events
Gray Zone Warfare lets event organisers spin up custom servers. These temporary competitive spaces come with specialised rules, and community-driven events offer structured matches that go beyond standard matchmaking.
You can fit up to 126 players on these servers, and the unique game modes often bring everyone together for some truly organised chaos.
Accessing Custom Servers
Custom servers in Gray Zone Warfare aren’t just private lobbies for your friends. They’re open event spaces anyone can jump into while they’re live.
People like DamnitBennett host weekly custom games every Friday at 2 PM EST. These sessions stream live on Twitch and welcome all skill levels, so don’t worry if you’re new.
Key points about custom servers:
- Characters made on custom servers don’t connect to your main account
- Servers host up to 126 players at once
- You’ll need to switch to the public-experimental branch on Steam
- Events usually come with special rules and objectives
To join, follow community organisers on Twitch or Discord. Most events get announced there, and you’ll find instructions for how to hop in.
The GZW Community Events website lists upcoming sessions and recent winners. They hand out tier-based prize kits to the best performers.
Community-Driven Competitive Play
Community events in Gray Zone Warfare turn the game into something more organised and competitive. The GZW Events team runs competitions with all sorts of game modes.
Popular event formats include:
- Squad Hunt: Teams defend spots and hunt enemy squad leaders
- Hostage Rescue: Missions that demand teamwork and planning
- King of the Hill: Fights for territory control
- Combined Assault: Big, coordinated attacks
Events usually award tier 2 and tier 3 prize kits to winners. Recent champions like Darvixcze 2.0 and FullThrottleDG took home the top rewards.
Players say these events help them break out of their usual 2-4 person squads. Suddenly, you’ve got faction-wide goals and more people to work with.
Game Masters like TGxAltair, Tyy, and SWAT handle event coordination. They keep things running smoothly and balance the competition with plenty of community fun, so both casuals and hardcore players have a shot.
Tips for New Players in Competitive Mode
Competitive mode in Gray Zone Warfare isn’t like casual play. You’ll need a different mindset—understand the basics, avoid painful mistakes, and build momentum with smart early decisions.
Getting Started
Pick your faction carefully. That choice affects your spawn locations and who you’ll team up with.
Each faction starts in different areas, which changes your early missions and how you move around.
Get comfortable with the controls and movement in safe spots first. Try out the firing range before you risk it all in competitive games.
Essential first steps:
- Finish your starting faction missions to get some basic gear
- Study the map and figure out key spots and extraction points
- Use voice chat to talk with your squad
- Set up keybinds for quick weapon swaps
Start with pistol runs to learn the maps without risking expensive gear. This helps you spot enemy patrols and safe routes while you build up some cash.
Reach out to other players in chat or on Discord. Plenty of veterans are happy to help new folks learn the ropes.
Common Mistakes to Avoid
Gear preservation really matters. Lots of new players risk their best weapons on tough missions. Use gear you find on enemies for risky jobs instead of your personal kit.
Don’t stand still after shooting. Enemies and players spot you fast if you stay put. Move after every engagement.
Plan before you rush into missions. Take a minute to watch patrols and figure out your approach. Slow and steady usually beats charging in.
Resource mistakes to watch out for:
- Blowing all your money on fancy gear too soon
- Skipping loot on enemy bodies
- Trying missions that are too hard for your level
- Going solo when teamwork helps a ton
Ammunition is easy to waste. Treat every shot like it matters, and only pull the trigger when you’ve got an advantage or a way out.
Maximising Early Progress
Focus on scavenging and selling enemy gear to build your bank fast. Check every body and sell off what you don’t need for steady cash.
Priority progression tips:
- Get good with one weapon before branching out
- Learn where the best loot spawns for efficient runs
- Find teammates you can trust
- Practice extractions until you barely have to think about it
Pick weapons that fit your mission. Pistols are great for sneaking, rifles for long-range fights. Match your loadout to your goals.
Start with easier missions to build up confidence and resources. Winning early helps you get into the right tactical mindset for tougher challenges.
Keep an eye on your spending and upgrade gear gradually. Big upgrades can make you overconfident, and mistakes with expensive gear can set you way back.
Frequently Asked Questions
Players often find it tough to adjust to competitive formats and build solid team strategies. These questions cover the biggest challenges with communication, team roles, and keeping up with updates.
What strategies can players employ to succeed in the Competitive mode?
Map control really is the backbone of winning in Gray Zone Warfare. Teams that lock down key spots—like radio towers or compounds—grab major advantages.
Mixing up your loadouts matters, especially in long matches. Don’t let everyone run the same weapon; cover different ranges and roles.
Resource management is a big deal. Save your best gear for late-game pushes, and stick to budget loadouts when scouting early.
Information wins games. Send squadmates to scout different areas and call out enemy positions over voice chat.
How does team composition impact gameplay in the Competitive mode?
Balanced squads beat teams full of specialists. You’ll want at least one support carrying medical supplies and a marksman for distance fights.
A communication leader keeps things organised when chaos hits. Pick someone to make callouts so others can focus on moving and shooting.
Spread out valuable gear—like medkits and rare ammo—so you don’t lose everything if someone goes down.
Backup plans matter. Train players to fill multiple roles so you can adapt if a key squadmate gets eliminated.
Can you share some tips for communication and coordination during Competitive mode matches?
Clear callouts save lives. Use real landmark names and compass points, not stuff like “over there.”
Radio discipline is a lifesaver in messy fights. Decide who speaks first—usually the team leader or whoever’s in the most danger.
Share enemy positions right away, but save longer discussions for quieter moments.
When voice chat fails, switch to text commands or hand signals. It’s not perfect, but it helps in a pinch.
What are the common mistakes to avoid while playing in the Competitive mode?
Overextending gets squads wiped out. Always keep a fallback route and don’t push too far ahead of your team.
Don’t let “gear fear” stop you from using your best stuff. Save premium gear for big moments, but don’t hoard it forever.
If you spawn at different times, you’ll struggle to coordinate. Try to land together as a squad.
Never skip medical supplies. Even if someone else is the medic, always carry some basics yourself.
How do updates and patches affect Competitive mode gameplay and strategies?
Weapon balance changes mean you’ll need to tweak your loadouts after every big update. Keep an eye on patch notes and test setups before jumping into ranked matches.
Map changes can throw off your usual routes and plans. Spend some time exploring new areas in casual play first.
New mechanics can totally flip the meta. If you pick up on them fast, you’ll have a leg up on slower teams.
Bug fixes sometimes kill off old tactics. Stay flexible and always have a backup plan when patches hit.
What resources are available for players looking to improve their performance in the Competitive mode?
Practice servers let you try out new strategies without much pressure. You can mess around with different team setups or tweak your tactics until something clicks.
Community guides? Those are packed with tips from players who really know their stuff. If you poke around gaming forums or hop into Discord servers, you’ll probably find strategy breakdowns and some handy loadout ideas.
It’s worth checking out professional streams too. Watching top teams play live, you can pick up on how they handle tough moments or pull off tricky plays.
Grab a training partner or two and set up practice matches with other squads. Scrims against teams at your level can quickly show you what’s working—and what isn’t.
