Cable Management Systems: Complete Guide to Modern Solutions
Updated On: November 13, 2025 by  Aaron Connolly
What Are Cable Management Systems?
Cable management systems help organise, protect, and route electrical and data cables in buildings and workspaces. These systems keep cables tidy and make sure equipment runs safely and efficiently.
Definition and Purpose
Cable management means organising cables with specialised equipment and techniques. When we talk about a cable management system, we mean the group of parts that make this organisation possible.
These systems do a few important things. They keep cables from getting tangled or damaged.
They also help avoid safety hazards like tripping or electrical faults.
Productivity benefits show up when maintenance and troubleshooting get easier. If cables are organised, technicians can spot and reach specific connections quickly.
Organised routing also helps equipment last longer. When cables aren’t under stress, connectors don’t wear out as fast.
A tidy setup just looks better too. Clean cable runs make offices, data centres, and industrial spaces look more professional.
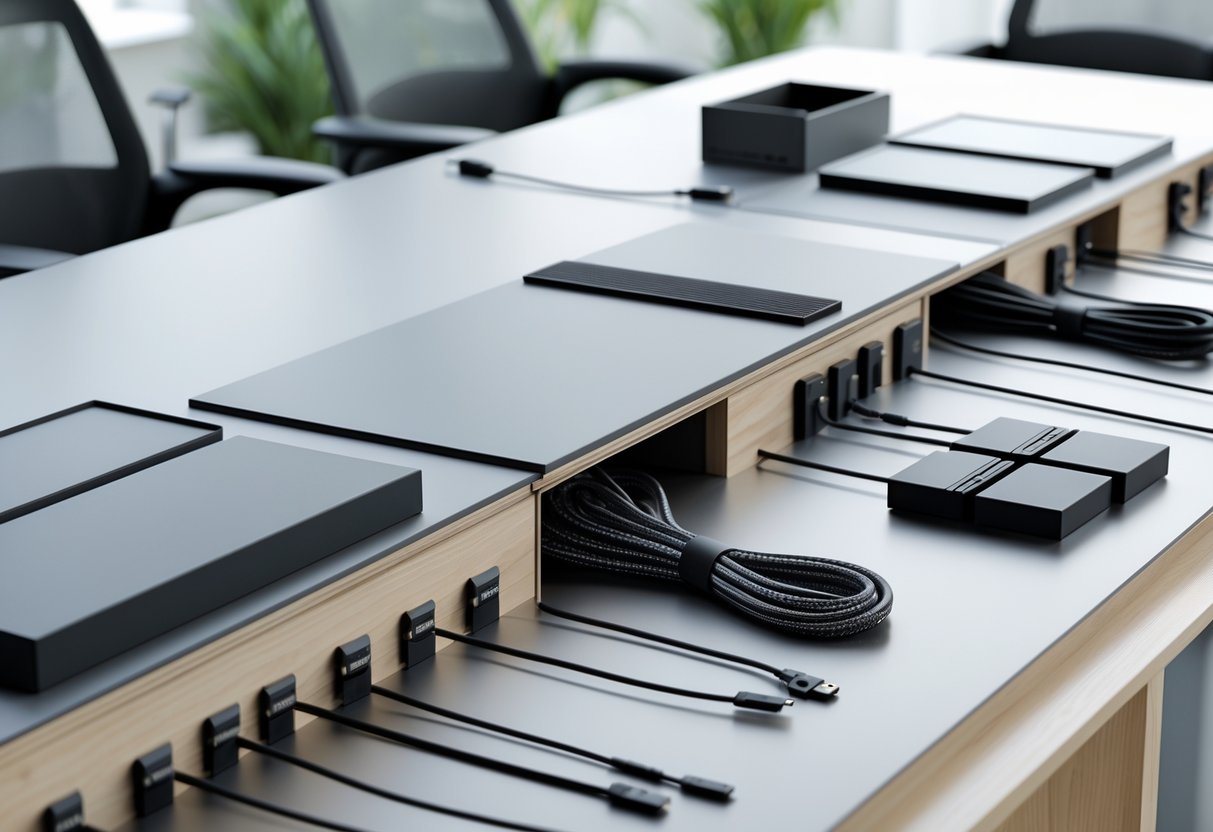
Key Components
Cable management systems use various components that work together.
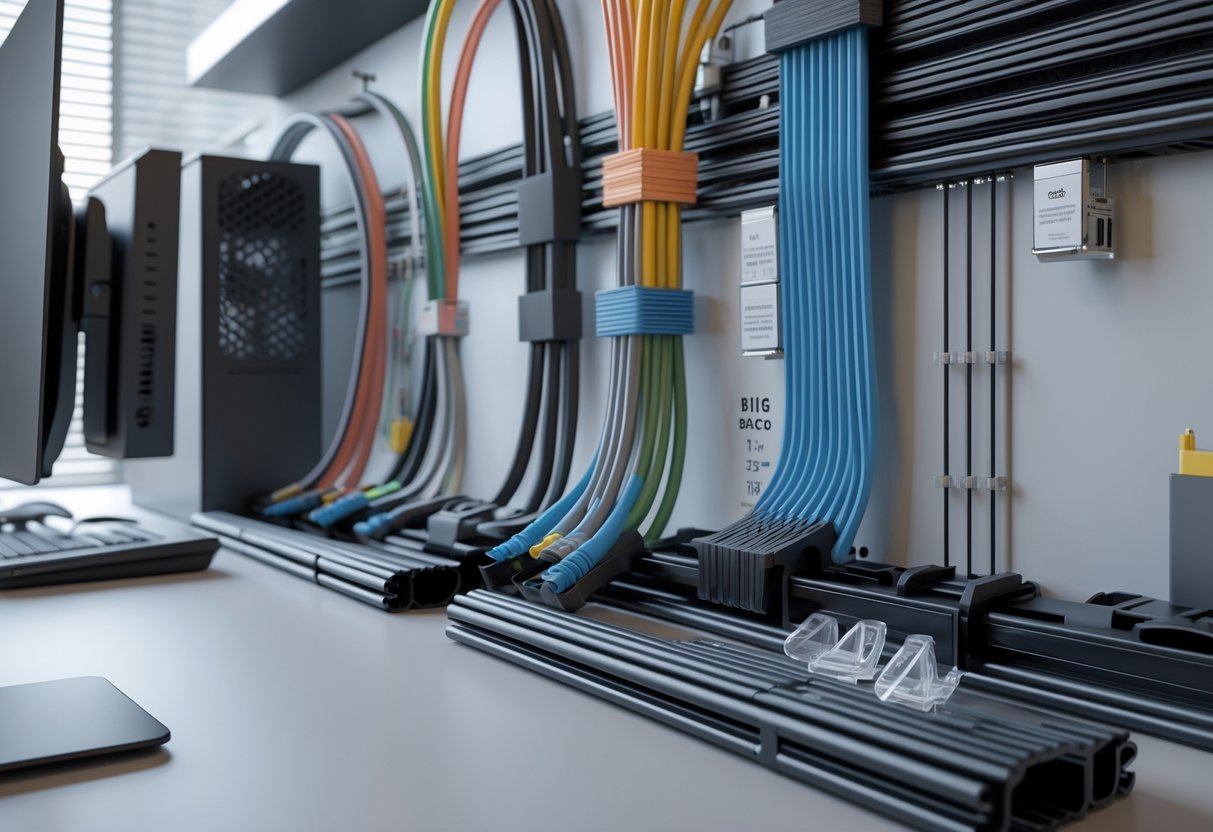
Cable trays and baskets support lots of cables at once. You can clip them together quickly, which is handy for network cabling like Cat 5 or Cat 6.
Conduits are protective tubes that shield cables. PVC conduits work well in damp spots, while metal conduits offer extra protection. We connect them with couplings and mount them using brackets called saddles.
Trunking systems handle bigger bundles of cables. Standard trunking fits most offices, and dado trunking gives you separate spaces for power and data cables.
Mini-trunking works for smaller setups and usually has sticky backing to attach to walls.
Cable reels help store and move cables during installation. Steel reels handle the heavy stuff, but lighter reels are fine for office cabling.
Types of Cable Management Systems
Different cable management systems work better in certain situations. Some keep server racks tidy, others route cables through walls and floors.
We’ll focus on four main types: horizontal and vertical managers for racks, cable trays for open runs, raceways and conduits for protection, and enclosures for full cable housing.
Horizontal and Vertical Managers
Horizontal cable managers fit between rack gear to organise cables running side to side. They have plastic or metal guides that keep things neat and stop tangles.
Vertical managers attach to the sides of server racks. They handle cables that run up and down. Most have covers you can pop off for quick maintenance.
These two types work together in data centres and server rooms. Horizontal ones handle patch cables between switches and servers. Vertical ones take care of power cables and longer network runs.
Common features:
- Plastic finger guides for gentle bends
- Metal D-rings for bigger bundles
- Brush strips that let cables move but seal gaps
- Snap-on covers for fast setup
Most rack managers fit standard 19-inch racks. You can get them in 1U, 2U, or bigger sizes depending on how many cables you have.
Cable Trays and Pathways
Cable trays act like highways for cables in buildings. They’re open, so air can flow and keep cables cool.
Ladder trays look just like metal ladders and support heavy cables, like armoured power lines. The rungs keep cables supported but easy to reach.
Basket trays use mesh sides and are lighter. They’re great for data cables and lighter electrical runs. You can usually clip them together without any tools.
Solid-bottom trays protect sensitive cables from falling debris. They’re handy in dusty places or where you worry about electromagnetic interference.
You can connect tray systems with special fittings for corners, T-junctions, and changes in height. Most are made from galvanised steel or aluminium, so they last.
Raceways and Conduits
Conduits are tubes that fully enclose cables for top-notch protection. Metal conduits stand up to tough environments, while PVC ones are best indoors.
Electrical conduits protect single cables or small bundles. We connect them with threaded couplings and support them with saddle brackets every few metres.
Surface raceways mount straight onto walls and floors. Their covers pop off so you can add or swap cables. Mini-trunking versions are perfect for small office runs.
Floor ducts hide cables under floors in commercial spaces. They pop up through floor boxes where you need connections.
Dado trunking runs around office walls at desk height. It splits power, data, and phone cables into separate spaces to stop interference.
Enclosures and Cabinets
Server cabinets hold networking gear and handle all cable management in one place. They come with built-in cable managers, ventilation, and locking doors.
Most cabinets have side panels you can remove and adjustable rails. Cable management arms keep things organised behind servers.
Wall-mount enclosures work for smaller jobs. They swing open like a door for easy access and have basic cable routing inside.
Outdoor enclosures keep cables safe from weather with sealed gaskets and drainage. You want at least an IP65 rating to handle rain.
Junction boxes connect different cable runs. They range from small plastic boxes for homes to big metal boxes for industrial setups.
Most enclosures use cable glands or grommets where cables enter. These keep the seal tight but let cables move if needed.
Essential Features of Effective Cable Management
Good cable management really relies on three things. These features help protect your equipment, keep things tidy, and let your system grow.
Organisation and Accessibility
We need cable management systems that make it easy to find and work with cables. Clear labelling is a must for any organised setup.
Every cable should have labels showing where it starts and ends. Colour coding helps too—power cables might get red labels, network cables blue. It’s a small thing, but it saves time during repairs.
Cable grouping keeps similar wires together. Power cables stay with power, data with data, so you avoid interference. Use cable ties or velcro straps to hold everything in place.
Leave enough space between cable runs for air to flow. This stops overheating and makes it easier to add more cables later. Try to leave at least 25% extra space in trays and conduits.
Documentation tracks what each cable does and where it connects. Even a simple spreadsheet or diagram helps anyone working on the system figure it out fast.
Scalability
If you want your cable management to last, it needs to grow with you. Modular systems use standard parts that snap together. You can add new sections without tearing out the old stuff.
Oversized trays and conduits give you room for more cables. Go at least 50% bigger than what you need now—trust me, it saves headaches down the line.
Flexible routing paths let you reach new spots as your setup changes. Removable panels and open pathways make tweaks simple. Avoid anything that’s too permanent and blocks future cable runs.
Plan for different cable types, too. Fibre optic cables need different handling than copper. Design paths that can handle both.
Check your system every year or so. Spot places where you might need to expand before it becomes a problem.
Safety and Protection
Protecting cables stops downtime and keeps people safe. Physical barriers shield cables from bumps, moisture, and heat. Metal conduits work in factories, plastic trunking is fine for offices.
Support cables every 1.5 metres so they don’t sag. This keeps plugs and sockets from wearing out.
Fire safety matters—use fire-rated cables in public areas and escape routes. Install fire stops where cables go through walls to keep flames from spreading.
Keep power and data cables apart. Leave at least 300mm between high-voltage and data lines. This prevents interference and lowers shock risks.
Environmental protection is key in tough spots. Use waterproof enclosures outside. UV-resistant materials stop cables from breaking down in the sun.
Add ground fault protection and surge suppressors to guard against electrical faults. These will cut power if something goes wrong. Test them regularly to make sure they’re working.
Cable Management Solutions for Homes
Modern homes need different cable management tricks for each space. Desk areas do well with under-desk trays and clips. Walls look tidy with sleeves and covers. Floor systems use J-channels and skirting board solutions to hide cables completely.
Desk and Entertainment Area Setups
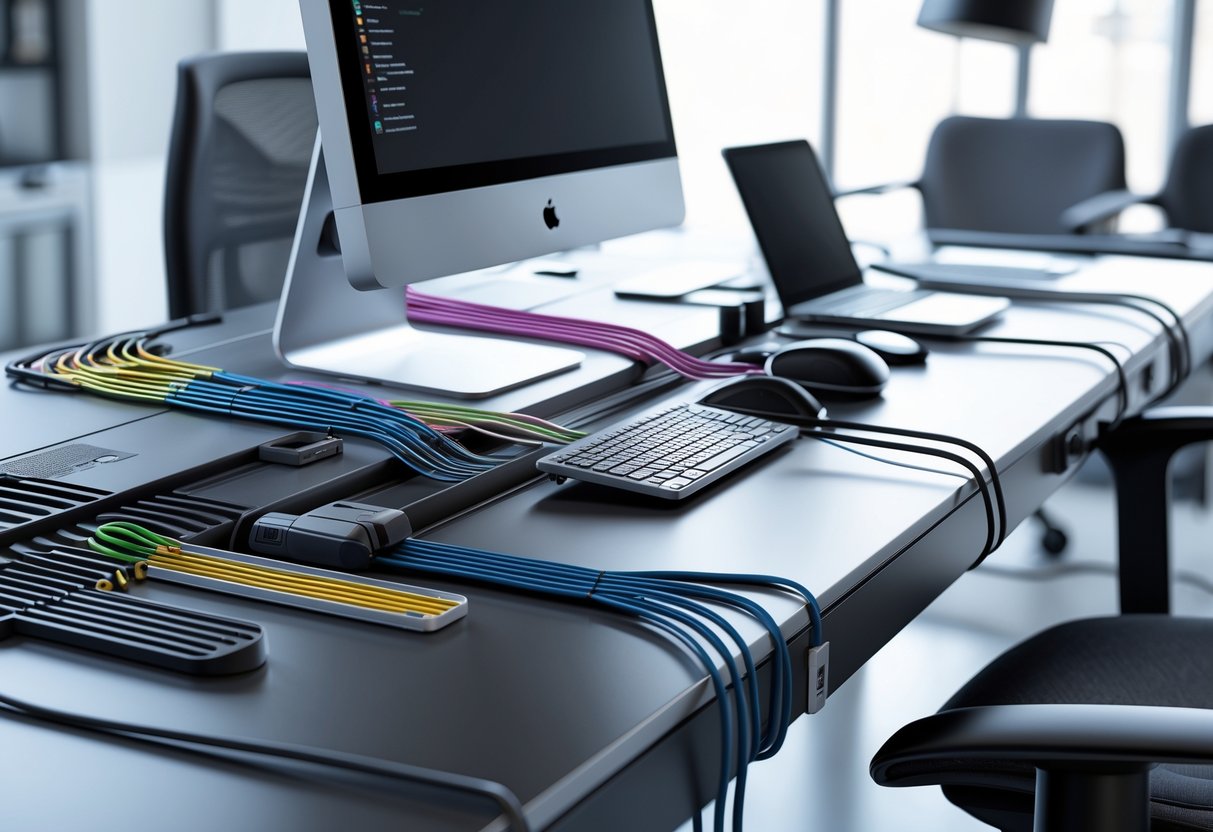
Under-desk cable trays are great for home offices and entertainment centres. Mount them under desks to keep power cables, USB leads, and HDMI cords off the floor.
Cable clips with adhesive stick to desk edges and walls. They come in black, white, or clear so you can match your setup. These clips hold single cables in place—no tools needed.
Cable management boxes hide messy power strips and transformers. Wooden boxes blend in with classic furniture, while plastic ones look right at home in modern spaces.
For entertainment areas, cable sleeves bundle cords together. They zip around HDMI, power, and audio cables, keeping things neat behind your TV.
Velcro cable ties beat zip ties for temporary setups. They’re reusable and won’t pinch your cables if you need to make changes.
Concealing Cables Along Walls
Wall-mounted cord covers create clean lines from your TV to the outlet. These plastic channels stick to painted walls and come in a few finishes.
Measure your cables first. Standard covers fit most HDMI and power leads, but thicker cables need wider channels.
Cable sleeves work for longer runs between rooms. The flexible fabric bundles multiple cables but still lets you reach them if you need to.
Paintable cord covers blend into your wall. Just add primer and paint to match.
Corner pieces and junction boxes make corners look tidy. They also stop covers from peeling away at bends.
Floor and Skirting Board Systems
J-channel cable raceways run along skirting boards and floor edges. The open design makes it easy to add more cables without pulling everything apart.
You’ll find these channels handy in:
- Home offices with lots of devices
- Living rooms with lamps and speakers
- Kitchens with small appliances
Floor cable covers protect wires crossing walkways. Rubber covers handle foot traffic, while plastic ones work in lighter areas.
Skirting board channels hide behind your existing trim. Paint them to match and they’ll disappear completely.
Carpet cable covers make safe paths under rugs and carpets. The flat shape stops tripping and protects cables from furniture and vacuums.
Office and Commercial Cable Management
Modern offices need clever cable management to keep workspaces tidy and professional. Good cable routing boosts safety, keeps equipment cool, and makes future changes less of a headache.
Open Plan Workspace Solutions
Open offices bring some unique cable messes. People share spaces with lots of devices, so power and data cables get tangled fast.
Under-desk systems work well for individual workstations. Mount trays under desks to hold power strips and keep cables away from feet. These setups cost around £30-80 per desk but hide cables completely.
Floor-mounted solutions handle shared power and data runs. Cable raceways protect wires crossing walkways and stay flush with the floor. We like rubber versions—they won’t crack under office chairs.
Wireless tech cuts down on cables a lot. Offices use wireless charging pads, Bluetooth gear, and Wi-Fi to get rid of many wires.
| Solution Type | Cost Range | Best For |
|---|---|---|
| Under-desk trays | £30-80 | Individual workstations |
| Floor raceways | £15-40/metre | Shared cable runs |
| Cable spines | £20-60 | Height-adjustable desks |
Height-adjustable desks need flexible cable management. Cable spines attach to desk legs and move with the surface. They stop cables from catching or stretching when you change desk height.
Conference Room Setups
Conference rooms squeeze a surprising amount of tech into one space. Projectors, screens, microphones, and laptops all need power and data connections. It can get messy if you don’t plan ahead.
Ceiling-mounted systems keep projector cables tidy. Metal conduits or cable trays run from projectors to wall connections. This setup usually costs £100-300, but it hides cables completely out of view.
Table cable management puts connections right where people need them. Pop-up boxes built into conference tables provide power and data ports at arm’s reach. These systems run £150-500 per table and help presentations feel more polished.
Wall-mounted solutions keep permanent equipment organised. Cable management panels behind displays hide power and HDMI connections. We rely on these for video conferencing and digital signage.
Wireless presentation systems cut down on cables altogether. Modern conference rooms use wireless display adapters and battery-powered microphones to keep cable clutter to a minimum.
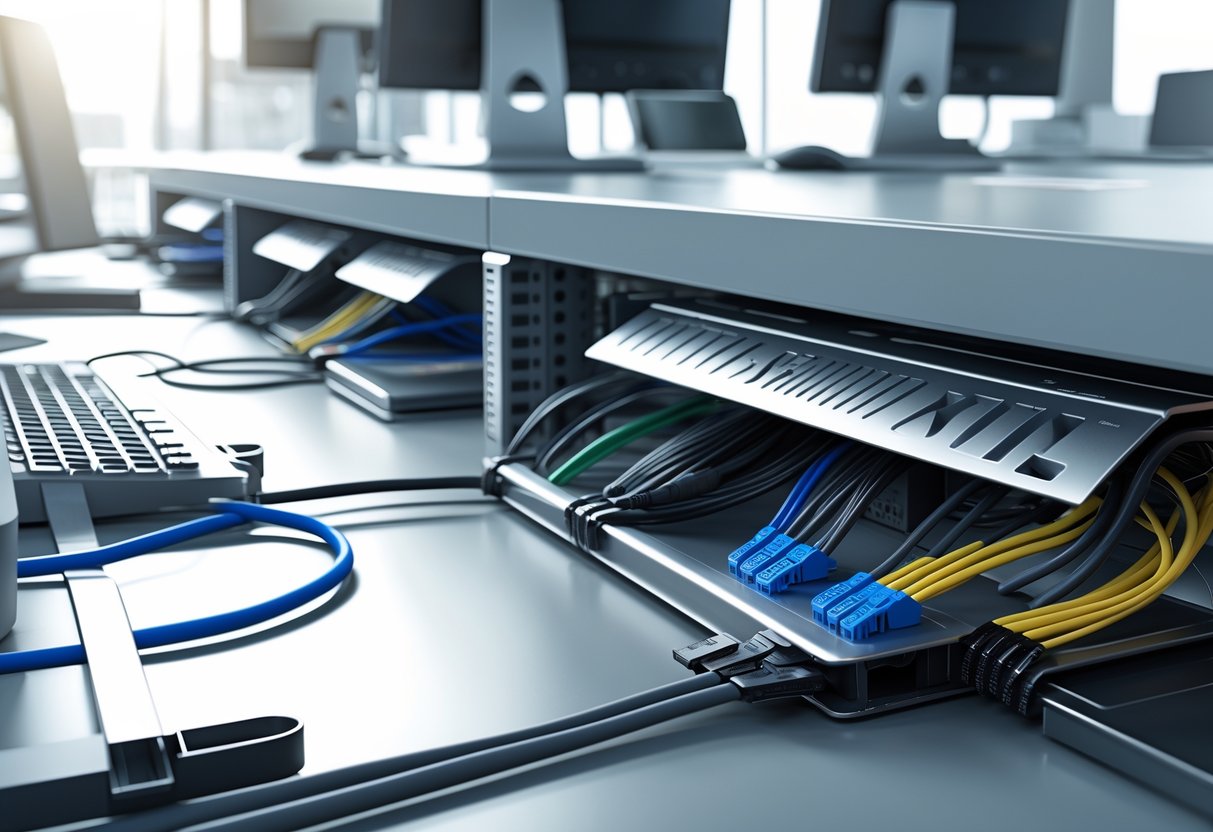
IT Closets and Server Racks
Server rooms thrive on good cable management. Equipment stays cool and accessible when cables are routed properly. If you let cables sprawl, airflow gets blocked and troubleshooting turns into a nightmare.
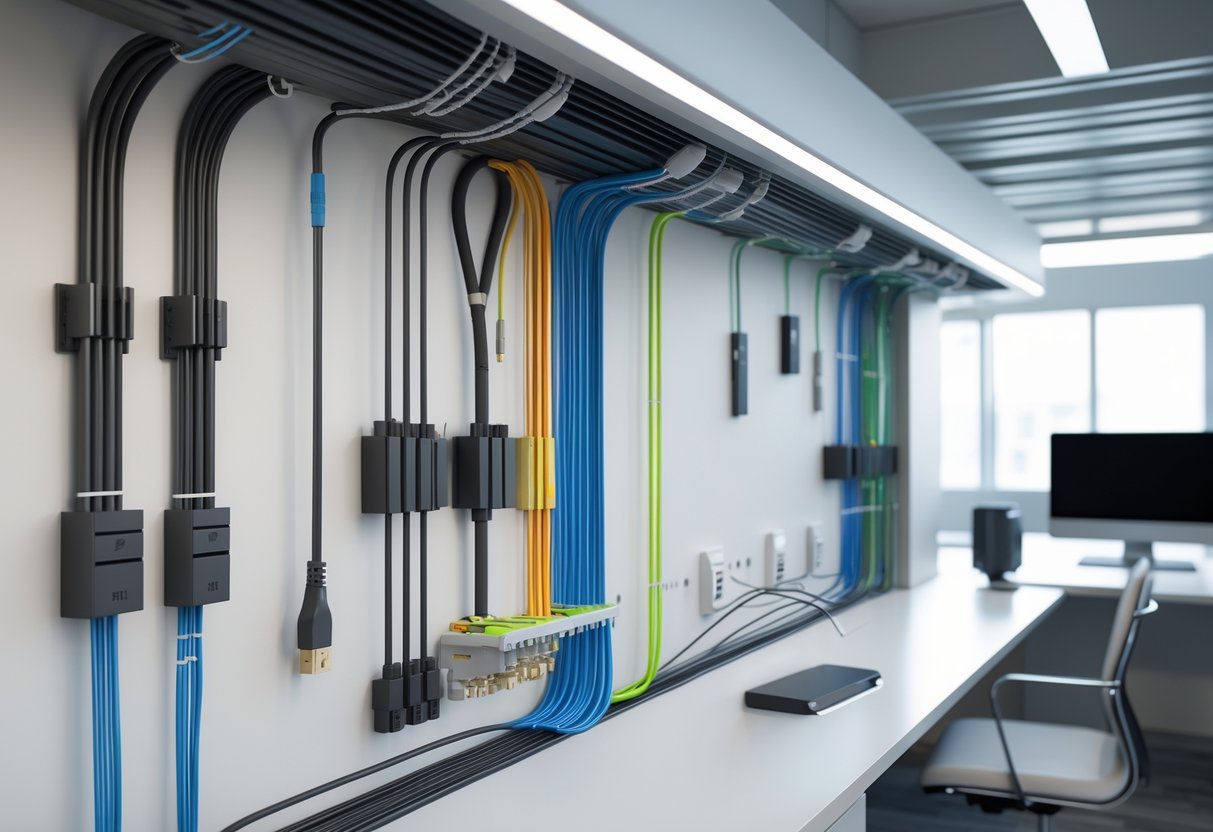
Vertical cable managers mount along rack sides and guide cables between equipment levels. These plastic or metal guides cost £40-120 each and keep things neat as gear changes.
Horizontal managers fit between rack units to spread cables across equipment rows. They use brush strips or finger ducts so cables don’t get pinched or bent.
Rear cable management keeps power and data connections tidy behind equipment. Hinged panels swing out for access, but keep everything neat when closed.
Colour-coded systems make maintenance faster. We use different coloured cables for power, data, and management. Matching Velcro ties speed up changes and help avoid mistakes.
Airflow considerations really matter. Cables can block cooling airflow if you don’t route them properly. We keep cable density below 40% in any pathway to keep everything cool.
Data Centre Cable Management Practices

Modern data centres juggle thousands of cables and still need to run at peak performance. High-density solutions, thermal control, and clear documentation keep things running smoothly.
High-Density Cabling Techniques
Managing huge volumes of cables in tight spaces requires clever solutions. High-density cable management systems use structured layouts to keep everything in order.
Fibre optic panels act as central hubs. They tidy up cable runs by providing neat termination points for multiple connections. Testing and maintaining network links becomes way easier.
Modular cassettes add flexibility. We can add or remove connections quickly, and it doesn’t disrupt nearby cables. This design makes network upgrades and changes much simpler.
Pre-terminated cables beat field terminations hands down. They arrive cut to the right length, so you don’t end up with extra slack and tangles. Custom lengths keep pathways neat.
Vertical cable management squeezes more out of rack space. Ladder racks and cable trays route connections vertically between equipment.
| Technique | Space Saved | Installation Time | Flexibility |
|---|---|---|---|
| Fibre panels | 40-60% | Medium | High |
| Modular cassettes | 50-70% | Fast | Very high |
| Pre-terminated | 30-50% | Very fast | Medium |
Thermal Management for Racks
Bad cable placement blocks airflow and leads to overheating. We need to route cables so cooling systems can do their job.
Hot and cold aisle separation depends on careful cable routing. Cables can’t cross between aisles and block airflow. Overhead trays or under-floor pathways work best.
Cable density really affects temperature. Bundled cables trap heat and slow down air movement. We limit bundle sizes and use perforated trays for better airflow.
Strategic cable placement keeps cables away from air intakes. We separate power and data cables to reduce heat buildup.
Equipment inlet temperatures should stay under 27°C. Good cable management can cut cooling costs by 15-30% just by improving airflow.
Cable Labelling and Documentation
Clear labelling saves time during maintenance and upgrades. We stick to consistent systems that anyone can follow.
Label both ends of every cable with the same info. Add source, destination, and cable type. Use tough labels that won’t fade or peel.
Colour coding helps identify cables fast. We assign colours to different cable types or network segments. This simple trick reduces errors.
We keep digital records up to date with every physical change. These records show cable paths, connection points, and specs.
Cable management software tracks connections for us. It generates reports and helps plan for capacity upgrades.
Standard labelling formats keep things clear:
- Format: RACK-UNIT-PORT (e.g., A01-U12-P03)
- Include: Cable type, length, install date
- Avoid: Handwritten labels that fade or smudge
Quick maintenance depends on finding the right cable instantly. Good documentation can cut troubleshooting time by more than half.
Cable Fastening, Routing, and Support

Securing cables properly means fastening them at regular spots, guiding them through set pathways, and giving them enough support to prevent damage. These steps combine—using ties, clips, support bars, and routing accessories—to make a setup that looks professional and works well.
Cable Ties and Velcro Straps
Cable ties are the go-to for bundling and securing cables. Plastic zip ties offer a permanent fix for cables you don’t plan to move.
You’ll find ties in all sorts of lengths and strengths. Standard ones work for office cables, while heavy-duty ties are built for thick industrial cables or outdoor use.
Velcro straps are a better pick for cables that need regular access. You can open and close them as much as you want—no scissors needed. That’s why we use them in server rooms and network cabinets.
Velcro straps cost a bit more, but they save time during maintenance. They also look neater than a bunch of snipped zip ties.
Best practices: Don’t crank ties too tight or you’ll damage the cable insulation. Leave a little slack. Swap out old ties before they turn brittle.
Cable Clips and Fasteners
Cable clips attach right to walls, desks, or mounting points to guide cables along their path. Adhesive clips work for temporary setups and smooth surfaces.
Screw-on clips give a stronger hold for permanent jobs. They handle heavier cables and resist being pulled loose better than sticky ones.
Special fasteners include cable staples for wood and masonry clips for concrete. Each one fits a certain surface and cable weight.
Spacing matters—put clips every 12-18 inches on horizontal runs and every 6-12 inches vertically. This stops cables sagging and keeps lines tidy.
Some clips open up so you can add or remove cables without unscrewing them. Others have built-in strain relief to protect connections.
Support Bars and Rings
Support bars bridge bigger gaps where single clips just aren’t enough. They create mounting points for lots of cables in ceiling spaces or equipment rooms.
Vertical cable rings mount inside racks and cabinets. They guide cables from top to bottom and keep everything accessible.
Most rings have smooth edges to avoid damaging cables. Some even adjust to fit different bundle sizes.
Horizontal support bars work for routing cables across rooms or between racks. You can mount them to walls, ceilings, or special frames.
Material choices vary. Steel bars are tough for heavy-duty or outdoor use. Plastic ones are cheaper and good for offices.
Support spacing depends on cable type and weight. Power cables need more support than lighter data cables.
Choosing the Right Cable Management System
The right cable management system really depends on your setup, environment, and the types of cables you’re dealing with. Start by checking your cable density, pick materials that suit your space, and go for solutions that match your technical skills and installation style.
Assessment of Needs and Environment
Before you pick a cable management solution, figure out what cables you actually have. Count your power cords, USBs, HDMI leads, and ethernet runs.
Cable Volume Matters
- Small setups (1-5 devices): Basic ties and clips are enough
- Medium setups (6-15 devices): Cable trays and sleeves start to help
- Large setups (16+ devices): Go for professional raceways
Think about your environment. Gaming setups by a window face different problems than a basement office. Heat, moisture, and dust all play a role.
Environmental Factors to Check:
- Temperature swings
- Humidity
- Busy walkways
- Pets
- Room for future gear
Accessibility matters too. You’ll need to get to cables for upgrades or fixes. Systems that hide cables completely look great but can be a pain later.
Selecting Suitable Materials
Material choice really affects how long your cable management lasts. Cheap plastic clips snap easily, but quality stuff protects your cables for years.
Plastic Solutions Plastic ties and clips are cheap and fine for stable indoor setups. They get brittle over time and can’t be reused.
Metal Options Metal trays and brackets are tough. They handle heavier loads and last longer, but they cost more and are harder to install.
Rubber and Fabric Cable sleeves made of fabric or rubber are flexible and great for setups that change often. They also cut down on cable wear from rubbing.
| Material | Best For | Lifespan | Cost |
|---|---|---|---|
| Plastic | Light loads, permanent setups | 2-3 years | Low |
| Metal | Heavy loads, commercial use | 10+ years | High |
| Fabric | Flexible, changing setups | 3-5 years | Medium |
Pick what matches your cable weight and how permanent your setup is.
Installation Compatibility
Only choose what you’re comfortable installing. Stick-on clips need no tools. Raceway systems might need some measuring, cutting, and drilling.
Adhesive Solutions Stick-on clips work for renters or temporary setups. They come off cleanly and are perfect for lightweight cables.
Screw-Mount Systems Permanent mounting holds best. These setups handle heavy cables and big bundles. You’ll need a drill and a bit of DIY confidence.
Under-Desk Installation Cable trays under desks keep things accessible but out of sight. Measure desk thickness first—most trays need at least 20-30mm clearance.
Think about your workspace. Desk mounts and wall mounts work differently. Try removable options before going permanent.
Quick Installation Tips:
- Test adhesive on a small spot first
- Use a level for straight runs
- Leave 20% extra space for future cables
- Label cable entry and exit points
Match your install method to your skills and space.
Installation Tips and Best Practices
Getting cable management right from the start saves headaches later. Take time to plan your layout—it pays off in cables that stay organised and easy to reach.
Preparation and Planning
Planning ahead stops mistakes and makes sure everything fits.
Start by measuring your space and counting cables. List how many power cords, ethernet cables, and other connections you’ll need to manage.
Assess your space requirements:
- Measure desk width and depth
- Check wall space for brackets
- Find power outlet locations
- Note busy walkways
Choose cable routes with care. Keep power and data cables apart to avoid interference. Run cables along walls or under desks to prevent tripping hazards.
Consider what you might add later. Planning for extra cables now is way easier than redoing everything.
Draw a simple sketch of your setup. Mark where trays, clips, and sleeves will go. It helps you buy the right materials.
Step-By-Step Installation Guide
Here’s a quick guide for a smooth install.
Gather your tools first:
- Cable ties and clips
- Measuring tape
- Drill and screws
- Cable sleeves or conduits
- Labels
Clear your workspace. Move equipment so you can reach all mounting spots.
Start with the big pieces like trays or raceways. Mount them securely to walls or under desks—use a level to keep things straight.
Add smaller clips and guides along your planned routes. Space them every 30-40cm for good support.
Route cables one type at a time. Be gentle with data cables. Secure with ties, but don’t overtighten.
Label each cable at both ends. Use clear, permanent labels that stay put.
Common Mistakes to Avoid
Let’s talk about some mistakes that can mess up your cable management.
Don’t overtighten cable ties. If you pull them too tight, you’ll damage your cables and make any future changes a pain. Always leave a bit of slack so the cables can move a little.
Never mix power and data cables in one conduit. If you do, you risk interference that can wreck your network performance. Try to keep them at least 15cm apart whenever you can.
Avoid buying cheap materials. Cheap clips snap easily, and low-grade cable ties get brittle way too fast. Spend a bit more on good materials—they’ll last much longer.
Don’t forget to label your cables. If you skip this step, you’ll waste so much time later figuring out which cable is which during maintenance or troubleshooting.
Don’t cram too many cables into one space. Overcrowded conduits make it a nightmare to add or remove cables later. Leave yourself 25-30% extra capacity when planning.
Don’t secure cables too permanently. Use clips and ties that you can remove, so you can adjust things as your setup changes.
Maintaining and Upgrading Cable Management Systems
If you want your cable management to stay in good shape, you need to look after it. Regular checks help you avoid downtime and tangled messes that slow you down.
Routine Inspections
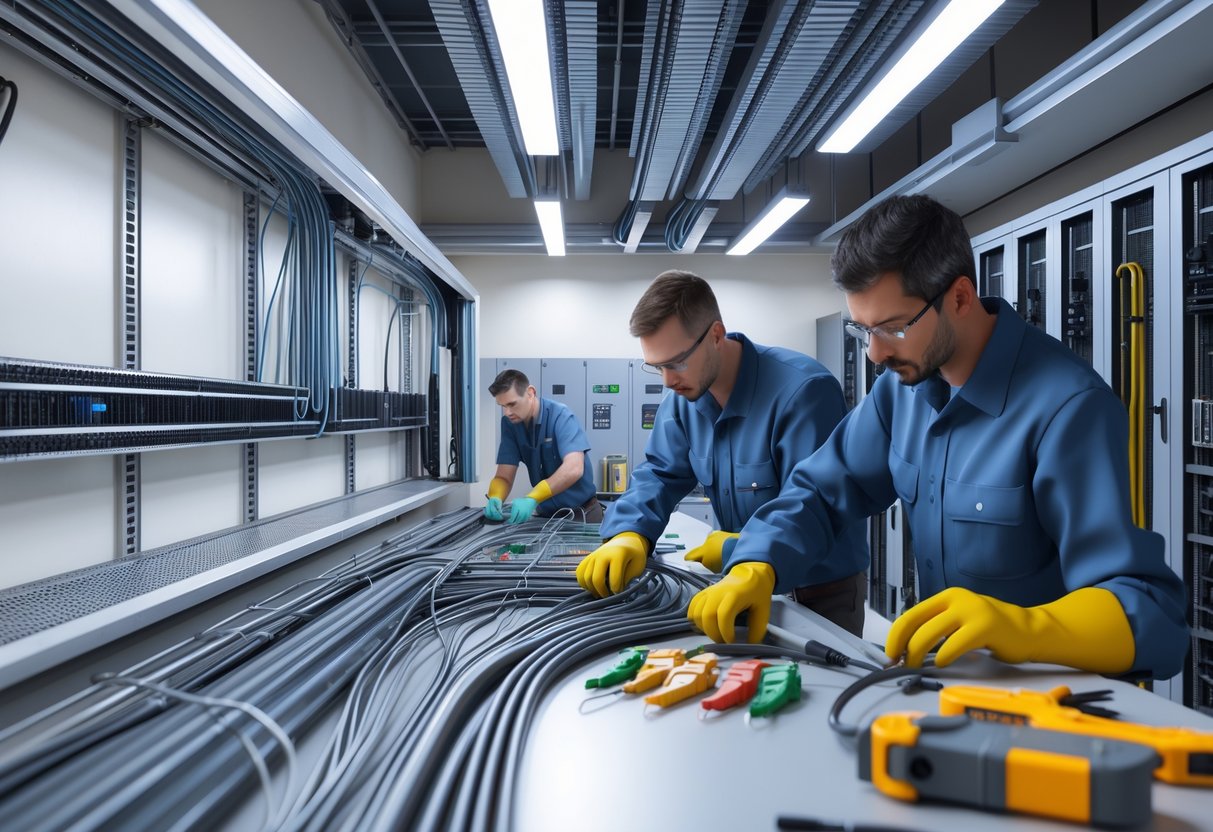
Check your cables and management systems every three months. This way, you can spot problems before they get expensive or out of hand.
Visual checks mean looking for obvious damage—cuts, kinks, or worn spots on cables. Make sure ties and brackets are still tight. Watch out for any weird discolouration that could mean overheating.
Electrical testing can reveal hidden problems. Test insulation resistance to see if any cables have started to break down inside. Run continuity checks to catch breaks or shorts you can’t see.
Clean out dust and debris from cable paths every month. Dust makes cables run hotter and makes future fixes harder. Tighten any loose connections you find.
| Inspection Type | Frequency | Key Checks |
|---|---|---|
| Visual | Monthly | Damage, loose fittings, overheating signs |
| Electrical | Quarterly | Insulation, continuity, voltage drop |
| Cleaning | Monthly | Dust removal, pathway clearing |
Adjustments and Moves
You’ll need to tweak your cable management as your setup changes. Adding new equipment means more cables, and sometimes old ones need to move.
Adding new cables? First, check if your trays and conduits can handle the extra load. If they’re overloaded, they might sag or break, which is dangerous.
Removing old cables matters too. Extra cables just get in the way and block airflow. They also make it harder to figure out which cables are actually in use when you’re troubleshooting.
Keep your cable documentation up to date when you make changes. Update diagrams and your cable database. You’ll thank yourself next time you do maintenance.
Use proper cable ties and supports when you move things around. Don’t yank ties too tight—they can slowly damage cables.
Upgrading for New Technologies
As tech changes, your cable management needs to keep up. Fibre optic cables, for example, need different supports than copper ones.
Capacity upgrades become important as your network grows. Try to estimate future needs before your current system gets packed. It’s way easier to add trays now than to replace everything later.
Safety upgrades help you stay compliant with the latest standards. New fire-stopping rules might mean changing seals around cable runs. You may also need to update grounding for new cable types.
Planning ahead saves you from expensive last-minute upgrades. When you buy new IT gear, set aside some budget for cable management. That way, your setup can handle new tech without chaos.
Consider modular cable management systems that you can expand as you go. These make it way easier to adapt without ripping everything out.
Aesthetic Cable Management Options
These days, cable management isn’t just about hiding mess—it’s about style too. You can pick design-focused products to match your gaming setup, coordinate cable colours, or even use custom covers to hide everything.
Design-Focused Products
We’ve seen gaming setups totally transformed by stylish cable management. Decorative sleeves come in fabric, braided nylon, or silicone, and they can match popular gaming aesthetics.
Cable management boxes now have sleek designs. Some look like decor pieces, with wood finishes or minimalist looks that fit right in with modern desks.
Adhesive cable clips are available in all sorts of shapes and colours. Some brands make clips that match your gaming gear or room theme. For a more industrial vibe, metal clips look premium.
Cable trays and raceways come in black, white, and wood grain finishes. You can mount them under your desk to keep things tidy and out of sight. Some even use magnets so you can move them easily.
Colour Coordination
Matching cable colours to your setup gives everything a unified look. Black cables blend with most setups, while white ones look clean and fit minimalist streaming spaces.
Custom cable extensions let you pick colours to match your RGB lighting or your favourite esports team. You can get cables in red, blue, green—pretty much any colour you want.
| Cable Type | Popular Colours | Best Use Case |
|---|---|---|
| Power cables | Black, white | Clean backgrounds |
| USB cables | Coloured sleeves | Accent matching |
| Audio cables | Clear, black | Minimal visibility |
Some companies offer colour-matched cable ties and organisers. These small touches really make a difference in professional-looking setups that show up on streams or videos.
Before you buy new cables, plan your colour scheme. Take a quick photo of your current setup to make sure everything matches.
Custom Faceplates and Covers
Wall-mounted covers can turn ugly cable runs into design features. Paint them to match your walls or pick patterns that fit your gaming room.
Desk grommets come in finishes like brushed metal, plastic, or wood grain. They make cable entry points look neat and hide the mess underneath. Some have brush inserts to close up gaps around cables.
Cable management panels can mount behind your monitor or TV. They hide connection points but still let you get to things easily. Some even come with LED lighting for extra flair.
Custom wall plates create clean connection points for setups where cables run through walls. They’re great for wall-mounted monitors or permanent gaming stations.
We’ve noticed that spending a bit more on decent faceplates pays off. Cheap plastic ones break or turn yellow, but metal or good plastic options look better for longer.
Sustainable and Eco-Friendly Cable Management
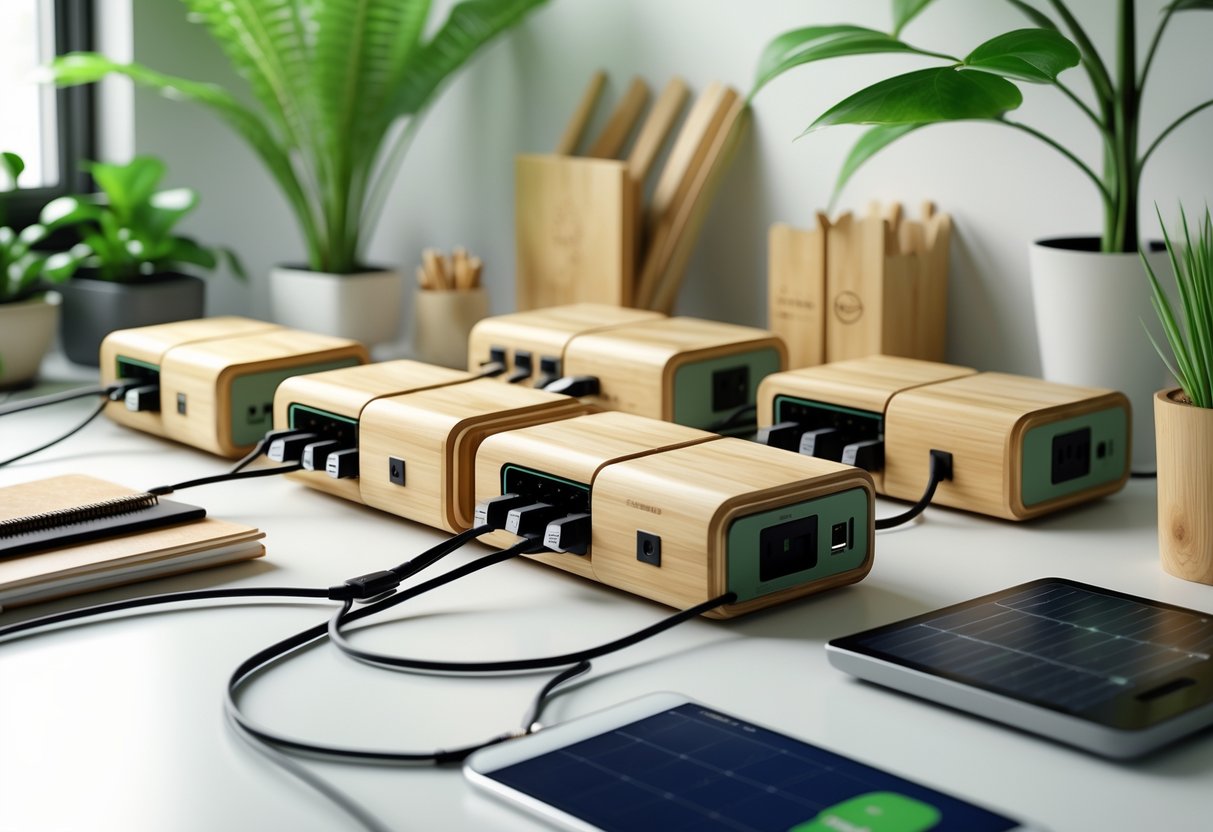
More cable management products now use recyclable materials and energy-saving designs to cut waste and lower cooling costs.
Recyclable and Modular Materials
Recyclable cable management is changing the game. Companies now use recycled plastics and biodegradable materials instead of the usual stuff.
Bamboo cable organisers are a great alternative to plastic. They’re light, strong, and look good on your desk.
Modular systems help you waste less by letting you add or remove parts as needed. You don’t have to throw out the whole system if your setup changes.
Key recyclable materials include:
- Recycled ABS plastics
- Bamboo and sustainable woods
- Biodegradable polymer blends
- Metal parts you can easily separate
These materials work just as well as traditional ones. Many even come with long warranties, which proves they’re built to last and better for the planet.
Energy Efficiency Benefits
If you manage cables well, you can actually lower energy use. Organised cables help airflow in racks, so cooling systems don’t have to work as hard—sometimes up to 20% less.
Better airflow keeps servers and gaming PCs cooler. That means your gear lasts longer and you don’t need as many loud, power-hungry fans.
Green data centres have seen:
- 15-25% lower cooling energy costs
- Hardware lasting 3-5 years longer
- Less maintenance needed
Planning your cable management stops you from buying too much. If you measure cable runs and use modular systems, you won’t end up with piles of unused stuff.
Sustainable cables tend to last longer too. Good network cables can work for 10 years, and power cables might last 30 years if you manage them right.
Frequently Asked Questions
Good cable management means organising all your cords and wires to avoid tangles, reduce hazards, and keep things accessible. Solutions range from simple trays under your desk to heavy-duty trunking for bigger jobs.
What are the best practices for organising cables under a computer desk?
Start with an under-desk tray that mounts below your desk. This hides power strips and excess cable nicely.
Use cable clips along your desk edge for USB, monitor, and ethernet cables. Space them every 30-40cm to keep things from sagging.
Group similar cables with velcro ties instead of zip ties. Velcro makes it easy to add or remove stuff later.
Keep power and data cables apart to avoid interference. Run them on opposite sides of your desk frame.
Label both ends of every cable with small tags. It’ll save you a ton of time when you’re making changes.
Could you suggest some effective wire management kits for home offices?
Most kits come with spiral wrap, adhesive clips, velcro ties, and a cable box for power strips. Look for kits with at least 20 clips and 10 velcro ties.
Under-desk trays work great if you’ve got multiple devices. Pick one that can hold 5-10kg if you’re storing adapters and surge protectors.
Cable spines or raceways are good for hiding cables running to wall-mounted monitors or speakers. You can get them in different colours to match your space.
Desk grommets keep cables tidy as they pass through your desk. Rubber grommets work best for different cable sizes.
If you’re mostly wireless, just manage the power cables and any wired connections. Sometimes a cable box under the desk is all you need.
How do you select an appropriate cable management box for your workspace?
Think about how many power bricks and surge protectors you need to hide. Most boxes fit 4-8 adapters easily.
Measure your space and check the box size. Leave about 15cm of space around vents so things don’t overheat.
Pick a box with multiple cable entry points. Side and rear ports give you more routing options than a single opening.
Look for removable lids for easy access. Some boxes let you mount them under your desk.
Make sure there are enough vents if you’re storing lots of adapters. Heat buildup can damage your gear or even become a fire risk.
What innovative ideas are out there for managing cables in industrial settings?
In industrial setups, heavy-duty tray systems support big cable bundles over long runs. Hot-dip galvanised steel resists corrosion in tough conditions.
Ladder racks give great ventilation for high-current power cables that get warm. They’re common in factories and warehouses.
Cable trunking protects cables where they might get damaged or need tamper-proofing. Multi-compartment trunking keeps power and data cables separate.
Basket trays made from wire mesh let you route cables around obstacles and make inspections easier. They’re popular in data centres and server rooms.
Pre-fabricated support systems make new installations quicker. Brands like Metsec offer complete kits with brackets and fixings.
Can you offer advice on choosing a computer cable storage organiser that keeps everything tidy?
Desktop organisers with several compartments are great for daily-use cables like chargers and USB leads. Go for one with 4-6 slots in different sizes.
Drawer organisers let you separate cables by type with dividers. This stops tangling in drawers or storage boxes.
Cable bags with clear windows make it easy to see what’s inside. Use different sizes for power adapters, audio, and data cables.
Wall-mounted organisers save desk space but keep cables handy. Hook-style racks work well for headphones and charging cords.
Think about modular systems that can grow with your collection. Stackable boxes or drawer units are handy as you add more gear.
What solutions does Humanscale provide for managing cables at workstations?
Humanscale builds cable management right into their monitor arms and desk accessories. They also include organized cable routing in their M/Connect docking stations.
You’ll find that their monitor arms tuck away display and USB cables inside the arm itself. This keeps things looking tidy, and you won’t need to mess around with extra cable covers.
Desk-mounted cable organizers from Humanscale clamp onto desk edges. They offer a few different paths for all sorts of cables, which pairs nicely with their other ergonomic gear.
Under-desk cable trays snap onto Humanscale’s adjustable desks. As you raise or lower the surface, the trays move along, so your cables stay neat.
Honestly, their workspace setups aim to cut down on visual clutter while still letting you reach cables when you need to. That’s pretty handy for offices that care about a clean, modern look.
