Practice Room Setup: The Complete Guide for Musicians
Updated On: November 12, 2025 by  Aaron Connolly
Choosing the Right Practice Room
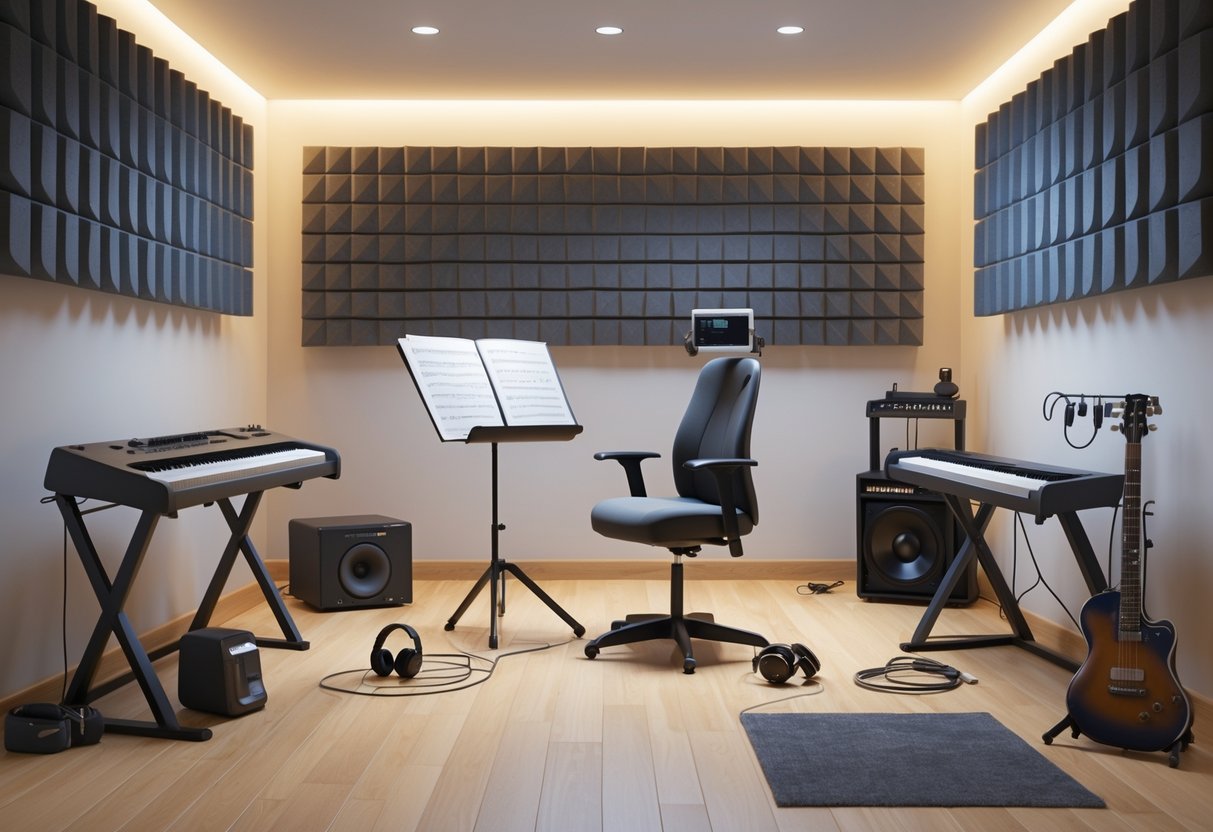
Where you set up your practice room can shape your entire rehearsal vibe. The right spot means you won’t battle noise or struggle to fit your gear.
Noise isolation and easy access matter a lot. You want enough space, but also a place you can actually get to without dreading the trip.
Location and Accessibility
Pick a location that fits your daily habits. Nobody wants to drag amps up three flights of stairs.
Think about when you usually practice. If your family is glued to the TV in the living room every evening, that’s not your best bet. Try a basement or spare bedroom instead.
Ground-floor rooms are a lifesaver for drummers and keyboardists with heavy gear. If you play guitar or sing, upper floors might be fine since you travel lighter.
Check for power outlets and WiFi. At least two sockets are a must for amps and lighting. If you use apps for backing tracks or lessons, solid internet is a bonus.
Look at the flooring. Hard floors like wood or concrete bounce sound around, while carpet soaks it up. Both can work, but it depends on your instrument.
Room Size and Shape Considerations
You don’t need a palace, but here are some good minimums:
- Solo: 3m x 3m
- Small band: 4m x 5m
- Full band with drums: 5m x 6m
Square rooms tend to mess with sound, creating weird standing waves. Rectangular spaces usually sound better for acoustics.
Give yourself room to move. Try to leave at least 1 metre between you and the walls so you don’t feel boxed in.
Ceiling height makes a difference, especially for drummers and folks who play standing up. Under 2.4 metres feels cramped. Higher ceilings usually sound and feel better.
Storage is a big deal. Set aside spots for cases, sheet music, and spare gear. Built-in shelves or cupboards keep things from piling up.
Privacy and Noise Isolation
Try to avoid rooms that share walls with your neighbours’ bedrooms or main living spaces. Corners in a house often give you better sound isolation.
Time of day matters. Shared walls might be okay during the day, but not so much at night.
Look for:
- Thick exterior walls
- Fewer windows
- Solid doors (not hollow)
- Some distance from busy areas
You can improve isolation by hanging heavy curtains, adding rugs, or moving furniture against shared walls. These tweaks really help keep sound in.
Think about your instrument’s volume. Acoustic drums need serious sound treatment, but a classical guitar barely makes a dent.
Test it out. Play at your normal volume while someone listens next door. You’ll quickly get a sense of how much sound escapes.
Acoustic Treatment Essentials
Good acoustic treatment can turn a noisy room into a focused environment where you actually hear the details. You’ll want to block outside noise and control echoes inside with the right mix of panels and soft stuff.
Soundproofing Techniques
Soundproofing keeps the outside world out—and your practice from annoying everyone else. It’s not the same as acoustic treatment, which is all about the sound inside.
Dense materials work best. Throw up heavy blankets, thick curtains, or proper soundproofing panels. Start with windows and doors, since that’s where most sound escapes.
Seal gaps around doors and windows with weatherstripping or acoustic sealant. Even tiny cracks let in a surprising amount of noise. If you see light under a door, sound is leaking too.
For serious soundproofing, you might add extra drywall or mass-loaded vinyl to the walls. That costs more and isn’t always possible if you’re just borrowing the space.
Acoustic Panels and Bass Traps
Acoustic panels stop echoes from muddying your sound. Bass traps soak up those deep rumbling notes that love to hang out in the corners.
Put bass traps in the corners first. These foam triangles tackle the low end, which is usually the hardest to control in small rooms. If you can, put one in every corner.
Mount acoustic panels on the walls in a checkerboard pattern. Don’t cover every inch—too many panels make the room sound weirdly dead. Focus on spots where sound bounces the most, usually opposite your main setup.
Pay attention to the area behind your monitors and chair. That’s where a lot of the worst reflections happen. Try a clap test: clap your hands and listen for harsh echoes.
If you’re on a budget, thick moving blankets or DIY rockwool panels do a solid job and cost about £25 to make.
Carpets, Curtains, and Diffusion
Soft stuff like carpets and curtains helps absorb sound and keeps the room comfy. These materials soak up mid and high frequencies and add a bit of diffusion.
Thick carpets or rugs cut down on floor reflections. Hard floors bounce sound all over, so a big rug under your setup can make a real difference.
Heavy curtains pull double duty—they block sound and absorb it. Hang them over windows or even bare walls. Go for velvet or thick cotton if you can.
Bookshelves, plants, and furniture break up sound naturally. They scatter echoes and keep the room from feeling too sterile.
Skip bare walls and hard surfaces when possible. Even a wall tapestry or foam pad can help your room sound better.
Furniture and Layout for Comfort
The right furniture and layout can turn practice from a slog into something you actually look forward to. Good seating keeps you playing longer, and smart lighting helps you focus without straining your eyes.
Seating and Ergonomics
Your chair makes a huge difference in how long you can play. Most musicians do well with an adjustable office chair that offers lumbar support.
Set the seat so your feet rest flat and your thighs are parallel to the floor.
Look for these features:
- Adjustable height and back
- Breathable fabric or mesh
- Armrests that don’t get in your way
- Wheels for easy movement
If you play piano, get a bench with adjustable height and a comfy cushion. Make sure it doesn’t wobble when you play with energy.
String players should skip chairs with arms. You need room to move your bow freely.
If you’re on the shorter side, grab a small footstool. It helps with posture and keeps your legs from getting tired.
Lighting and Ambience
Good lighting keeps your eyes happy and sets the mood. Natural light is best, so use it when you can.
Angle your music stand so it doesn’t catch glare from the window.
At night, mix overhead lights with a focused music stand lamp. Clip-on LED lights work great for sheet music.
Try this setup:
- Warm white LED bulbs (3000K-4000K)
- Adjustable desk lamp for your music
- Dimmer switches for flexible mood
- Skip harsh fluorescent lights
Soft background lighting makes the room feel inviting. String lights or table lamps add a cozy vibe without casting weird shadows.
Pick light paint colors if you can. They bounce light around and make the room feel bigger.
Organising Music Materials
A tidy practice room saves you time and keeps your head in the game. You don’t want to waste energy hunting for music.
Put your stand at arm’s length, just above eye level. That’s where most people find it easiest to read.
Handy storage ideas:
- Music folder organiser for your sheets
- Small side table for pencils, metronome, tuner
- Bookshelf for all your books
- Storage bench with compartments
Keep your go-to stuff within reach. A rolling cart makes it easy to move things as needed.
Use clear-pocket folders for sheet music. Label them by composer or genre so you can grab what you need fast.
Place a small bin nearby for old strings, broken pencils, or used rosin wrappers. It keeps the space neat.
Try a simple music library system. Number your pieces and keep a quick index. You’ll thank yourself when prepping for lessons.
Essential Practice Tools
If you want productive sessions instead of just noodling around, you need good timing and some way to track your progress. A metronome keeps you honest, and a notebook helps you see how far you’ve come.
Using a Metronome
A metronome is your best friend for building solid rhythm. It trains your internal clock and helps you stay on beat.
Start with simple BPM settings. Most pop songs are 120-140 BPM. Ballads drop to 60-80 BPM. Practice at 80% of your goal speed, then notch it up as you get comfortable.
Digital metronomes usually offer more features than old-school wind-up ones. Look for:
- Accent patterns for different time signatures
- Subdivision settings (like eighth notes or triplets)
- Volume control for your instrument’s loudness
| Feature | Basic Model | Advanced Model |
|---|---|---|
| Price Range | £15-30 | £40-80 |
| Time Signatures | 4/4 only | Multiple options |
| Subdivisions | Basic | Comprehensive |
Use the metronome every day. Start each session with 10 minutes of scales or warmups at a comfy speed. It makes a huge difference over time.
Incorporating Drum Machines
A drum machine brings your practice to life with full rhythm tracks. It’s way more interesting than a plain click.
Pick patterns that fit your style. Rock beats suit guitar and bass, jazz patterns are great for improv. Most drum machines come loaded with dozens of rhythms.
Modern ones hook up via USB or Bluetooth. That means you can:
- Record yourself with backing tracks
- Loop tricky sections
- Tweak drum volumes to focus on certain sounds
Start with slow, simple 4/4 beats. Play along with easy chords or scales before you tackle complex stuff. The steady groove helps you spot timing hiccups.
Budget models (£60-100) usually have plenty of features for home use. Pro versions cost more but offer deeper options and better sounds.
Practice Journals and Notes
Keeping a notebook helps you see your progress and spot trouble spots. A cheap notebook works fine and lasts months.
Write down three things each session: your top tempo, tricky sections, and goals for next time. This keeps you honest and stops you from spinning your wheels.
Try these sections:
- Date and how long you practiced
- Pieces you played (with bar numbers if needed)
- Technical stuff you worked on
- Goals for next time
Check your notes every week to see patterns. If the same chord or passage keeps giving you trouble, you’ll know where to focus.
Digital practice journals can sync across devices, but honestly, handwritten notes stick in your mind better. Plus, they don’t vanish if your phone dies.
Easy tip: Spend five minutes jotting notes after each session. Even a quick “bars 12-16 still rough” helps you improve next time.
Instrument Setup and Storage
Setting up and storing your instruments the right way keeps your gear safe and your practice room running smoothly. When you place things smartly and use sturdy storage, you’ll avoid damage and save time between sessions.
Stands, Racks, and Wall Mounts
Every practice space needs guitar stands. I like A-frame stands for just one guitar, but if you’ve got a collection, multi-guitar stands free up floor space. The Hercules GS432B holds three guitars steady and folds up flat when you’re done.
Wall hangers make a lot of sense if you’re short on space. Hang them at least 1.5 metres above the ground so you won’t bump them by accident. Auto-grip hangers like the Hercules GSP38WB grab the guitar automatically, which is pretty handy.
Keyboard stands need to be tough, especially for heavy keyboards. X-style stands are fine for lighter gear, but Z-style stands feel way sturdier for those big, weighted 88-key models. The Ultimate Support IQ-2000 lets you tweak the height anywhere from 60cm to 107cm.
Drummers need a good spot for all that hardware. Hardware racks keep cymbal stands and tom arms from piling up in a corner. Lots of drummers hang cymbal bags on wall hooks—no scratches, and you save some floor space.
Safe Storage Solutions
When you’re not playing, cases protect your instruments best. Hard cases keep valuable guitars and basses safe from knocks. Gig bags are lighter and fit better in tight spaces for daily practice.
Humidity can sneak up on you and ruin your gear. Try to keep it between 45-55% to stop wood from cracking or swelling. A simple humidity gauge costs less than £15 and could save you a massive headache.
Keep all the small stuff in dedicated organisers. Tackle boxes work wonders for picks, strings, and adapters. Label each compartment so you aren’t digging around during practice.
Cable management is a lifesaver. Velcro ties keep things tidy, and cable reels are great for those long XLR or instrument cables. Always coil cables loosely—wrapping them tight around small objects can ruin them.
Instrument Arrangement in the Room
Keep the instruments you use most right by your main practice spot. If you play guitar all the time, put it on a stand within arm’s reach.
Set up instrument zones based on volume. Acoustic stuff goes near the door for quick access, while electric gear lives by the amps and outlets. That way, you keep cable runs short and setups simple.
Make sure you’ve got at least 90cm of space to walk around drum kits and keyboards safely. You really don’t want to trip over anything.
Sight lines help a ton for group practice. Arrange instruments so everyone can see each other. Drummers usually sit at the back, and the rest of the band forms a semicircle facing in—makes communication way easier.
Setting Up Amplification

Getting your amplification right can turn a muddy jam into a crisp rehearsal. You’ll need to balance PA systems for vocals, pick bass amps that cut through, and know when a DI box will clean up your signal.
PA System Options
Active PA speakers are probably the easiest for most practice rooms. These all-in-one boxes combine the amp and speaker, so you just plug in your mixer.
Budget Options (£100-300 per speaker):
- Behringer Eurolive series
- Mackie Thump range
- Alto Professional TS series
Mid-Range Choices (£300-600 per speaker):
- QSC K series
- Yamaha DBR series
- EV ELX200 range
For most bands, a pair of 12-inch active speakers covers the volume you need. Put them on stands at ear level, angled a bit down toward the drummer.
Passive systems let you mix and match speakers or upgrade parts, but you’ll need a separate power amp and more cables. They take longer to set up.
Power Requirements:
- Small rooms (under 30m²): 300-500 watts per speaker
- Medium rooms (30-60m²): 500-800 watts per speaker
- Large rooms: 800+ watts per speaker
Bass Amp Choices
Bass needs some serious low-end to keep up with drums. Combo amps are fine for smaller spaces, but separate heads and cabs do better in big rooms.
Combo Amp Recommendations:
- Fender Rumble 500 (500 watts, 2×10″ speakers)
- Ampeg BA-210v2 (450 watts, 2×10″ speakers)
- Hartke HD508 (500 watts, 1×8″ speakers)
Head and Cabinet Setups:
- Ampeg SVT-3 Pro head with 4×10″ cabinet
- Hartke HA3500 head with 2×12″ cabinet
- TC Electronic BH550 head with matching cabinet
Set your bass amp at least one metre behind you. That way, you won’t get swamped by low-end or muddy up the room.
A lot of bassists prefer their amp off to the side, not right behind. That makes it easier to hear yourself without blasting everyone else.
DI Boxes and Line Connections
DI boxes change high-impedance instrument signals into low-impedance balanced ones. This cuts down noise over long cables and gives your mixer a cleaner sound.
When You Need DI Boxes:
- Bass guitars going direct to mixer
- Keyboards and synthesisers
- Acoustic guitars with pickups
- Laptop or phone audio connections
Passive vs Active DI: Passive DI boxes don’t need power and work great with high-output instruments. Active DI boxes need batteries or phantom power but handle low-output sources better.
Quality Options:
- Behringer DI100 (budget passive)
- Radial ProDI (mid-range passive)
- Countryman Type 85 (premium active)
Plug your instrument into the DI, then send one cable to your amp and another to the mixer. You’ll get both stage sound and a clean recorded signal.
Some bass amps have a built-in DI out, so you can skip the extra box if you want.
Mixers and Audio Routing
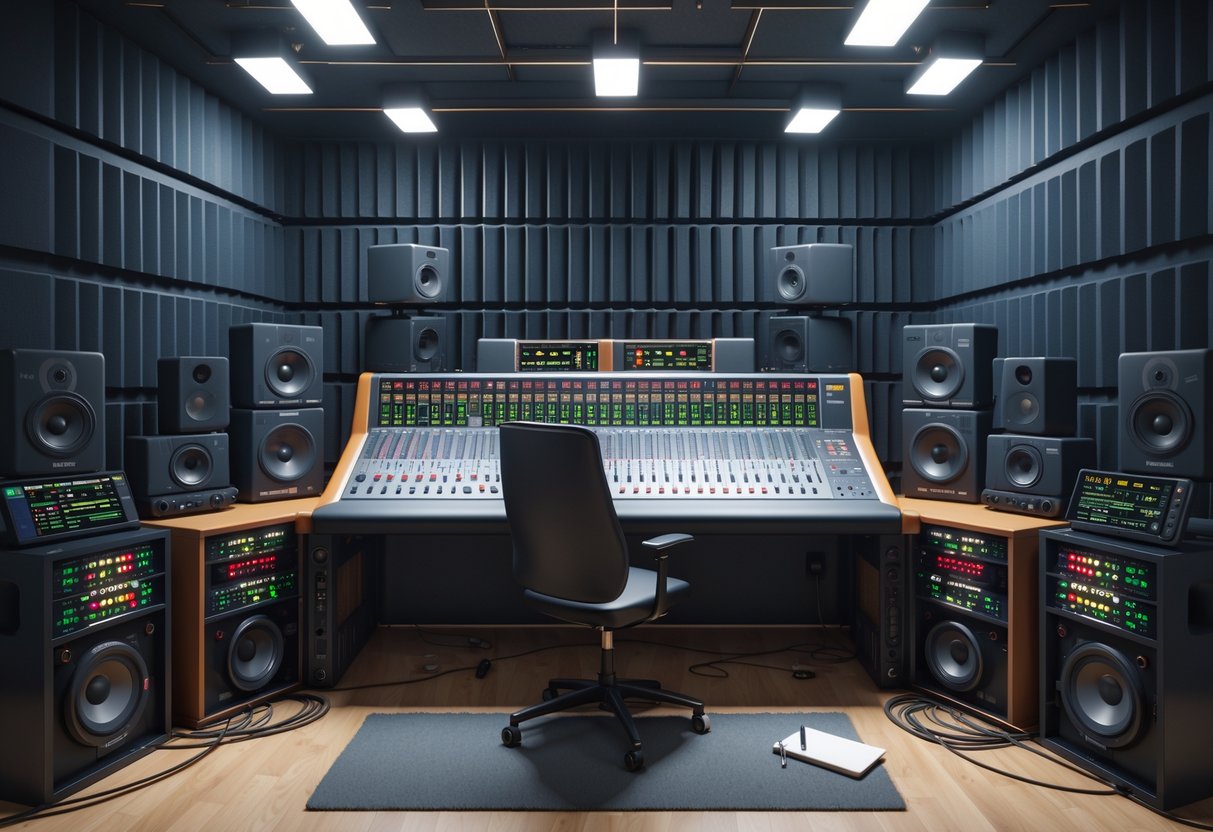
A good mixer turns into the heart of your practice room’s audio setup. If you cable everything up well and manage signals right, every mic and instrument will sound clear through your PA.
Choosing the Right Mixer
Start with at least 6 channels if you can. That’ll cover vocals, direct instruments, and leave room for extras.
Essential features to look for:
- XLR inputs for microphones
- Line inputs for keyboards and DI boxes
- Built-in effects like reverb and delay
- USB for easy recording
- Auxiliary sends for monitor speakers
Budget mixers like the Behringer Xenyx series get the job done for small setups. If you want more, the PreSonus StudioLive range brings better preamps and multi-track recording.
Think about your signal sources: Vocals want XLR inputs with phantom power. Electric guitars can go direct via DI or from your amp’s line out.
Cabling and Connectivity
Use XLR cables for all your mics to keep signals balanced and noise-free. Organise and label your cables so you don’t waste time sorting them out later.
Main connections include:
- Microphones to mixer inputs (XLR)
- Instruments through DI boxes into line inputs
- Mixer main outs to PA speakers
- Aux outs to monitor wedges
Keep power cables away from audio cables to avoid interference. Coil up unused cables and secure them away from where you walk.
Pro tip: Label both ends of every cable with tape. It’s a huge time-saver when you’re reconfiguring or troubleshooting.
Always use a DI box for bass guitars and keyboards that go straight to the mixer.
Audio Signal Management
Set your levels first with the PA off. Get the drums at a comfy volume, then match the electric instruments and vocals to that.
Use the mixer’s gain controls to get input levels right. Aim for peaks around -12dB—loud enough for a clean signal, but not so much you get distortion.
Basic signal flow:
- Set input gains for clean signals
- Adjust channel EQ to taste
- Send signals to main mix
- Control overall volume at the master fader
Give each musician their own monitor mix using aux sends. Everybody hears what they need without fighting over volume.
Keep effects light during practice. Too much reverb just makes it hard to hear what needs fixing.
Drum Kit and Percussion Setup
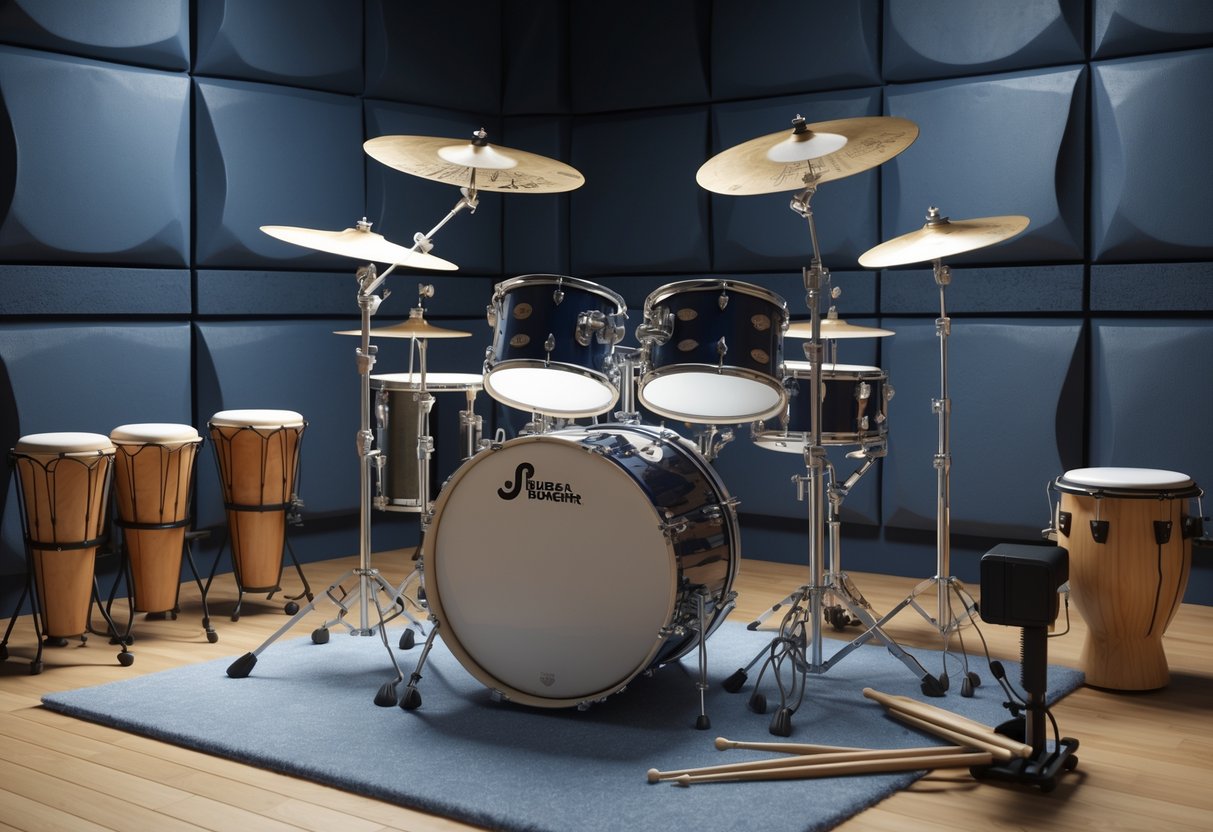
Setting up drums in a practice room takes some thought—kit choice, placement, and whether you want acoustic or electronic all matter. Your decision affects sound, neighbours, and how you record.
Selecting a Drum Kit
Most people do well starting with a 5-piece acoustic kit. That’s a kick, snare, hi-hat, and two toms—enough for most styles without hogging the whole room.
Budget-friendly options often come from second-hand Pearl, Tama, or Yamaha kits. You’ll find solid starter kits for £300-600. Just check the hardware works and the drum heads aren’t cracked.
For tighter rooms, a compact kit with a 20-inch kick drum saves space and still sounds good.
Essential accessories include:
- Adjustable drum throne
- Hi-hat stand
- Two or three cymbal stands
- Bass drum pedal
- Spare sticks
Don’t overcomplicate things at first. You can always add more toms and cymbals later when you’re ready.
Positioning and Rug Placement
A good drum rug really helps with sound and keeps the kit from sliding. Put a thick rug under the whole kit to soak up vibrations.
Place the kit away from shared walls if you can. Corners work well, using the room’s natural boundaries. Leave at least 60cm around the kit so you’re not cramped.
Set the snare comfortably between your legs. The hi-hat should be within easy reach, and toms should angle slightly toward you.
Think about the room’s acoustics. Hard walls bounce sound back, so try to place the kit where you won’t get harsh reflections.
Stick furniture pads under heavy stands to protect the floor—especially if you’re in a rental or have wood floors.
Electronic vs Acoustic Drums
Electronic drum kits pretty much solve noise problems when you use headphones. Roland and Alesis make good options starting around £400. They’re ideal for flats or thin-walled houses.
Modern electronic kits feel surprisingly realistic with mesh heads and decent stick response. Many come with built-in metronomes, play-along tracks, and recording tools. You can practice anytime, day or night.
Acoustic drums offer a feel and dynamic range you just can’t fake. If you want that real drum sound for recording, nothing else compares.
Some people go for hybrid setups—acoustic snare and hi-hat, electronic pads for toms. You keep the feel where it counts and cut down on noise.
Your room might make the choice for you. If you can’t soundproof, electronic drums are a lifesaver. If you’ve got a dedicated, isolated space, acoustic drums are still the gold standard.
Try both types before you buy if possible. Most music shops have demo kits so you can compare the feel and sound side by side.
Monitoring Systems for Practice
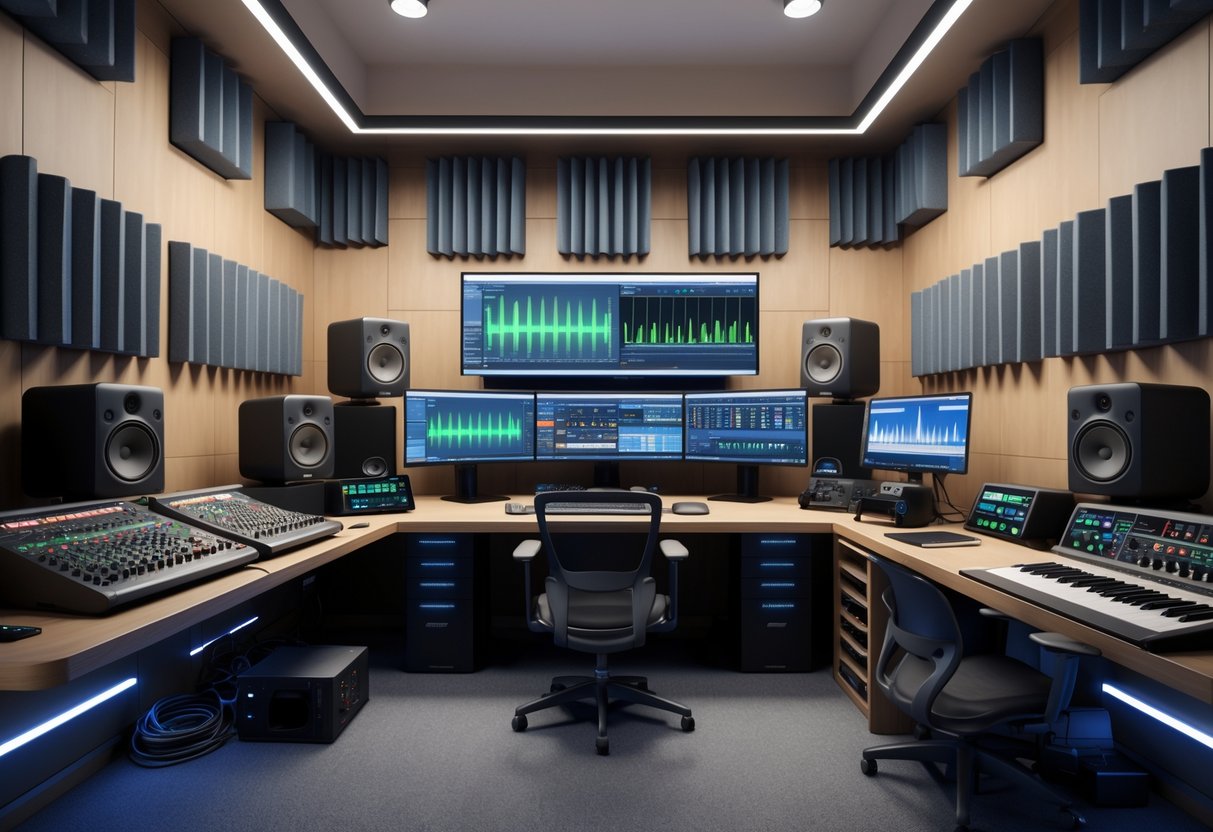
A good monitoring setup helps you hear every detail and actually improve as you practice. What works best depends on your budget, the room size, and whether you need to keep things quiet for the neighbours.
In-Ear Monitors
In-ear monitors give you super clear sound for practice. They block out outside noise almost completely, so you can really focus on your playing.
Professional models usually cost between £200-£800, but you can find good starter in-ears for around £50-£100. These already sound much better than regular headphones.
Why bother with in-ears?
- Neighbours won’t hear any sound bleeding
- Volume stays consistent
- You can pick out different instruments easily
- They stay comfortable even during long practice
A lot of musicians go for custom-moulded in-ears, especially if they play for hours at a time. Those cost more, but they fit perfectly and don’t fall out, even if you move around a lot.
On the flip side, you might feel cut off from your surroundings. Some players need time to get used to that, especially if they practise with other people.
Traditional Speaker Monitors
Speaker monitors let you hear your sound in the actual room. This feels more natural, especially if you play acoustic instruments, and it helps you get a sense of how you really sound to others.
Basic studio monitors start at about £100 per pair. If you want something more pro, like Yamaha HS5s, expect to pay £300-£400 per pair for really accurate sound.
Think about these things:
- Room size changes how monitors sound
- Where you place monitors matters more than price
- Acoustic panels make any speakers sound better
- You might have to keep the volume down at certain times
Set your monitors at ear height and aim them at where you sit. Keep them away from walls so the bass doesn’t get muddy.
If you’re on a tight budget, a simple PA system can do the job for practice. It costs less, but you won’t get the same clarity as with proper studio monitors.
Setting Up Headphones
Good headphones sit right in the middle between in-ears and speakers. They’re usually the cheapest way to monitor your sound, and you can use them anywhere.
Closed-back headphones block out more noise. Open-back ones sound more natural, but people nearby will hear what you’re listening to.
Top picks for practice:
- Audio-Technica ATH-M40x (£90-£120)
- Sony MDR-7506 (£80-£100)
- Beyerdynamic DT770 (£120-£150)
Go for headphones with a flat frequency response. Bass-heavy models might sound fun, but they aren’t great for serious practice.
Comfort makes a big difference. Adjustable headbands and soft pads help you avoid sore ears during long sessions.
If your audio interface doesn’t get loud enough, grab a headphone amp. They cost £50-£200 and can make a big improvement.
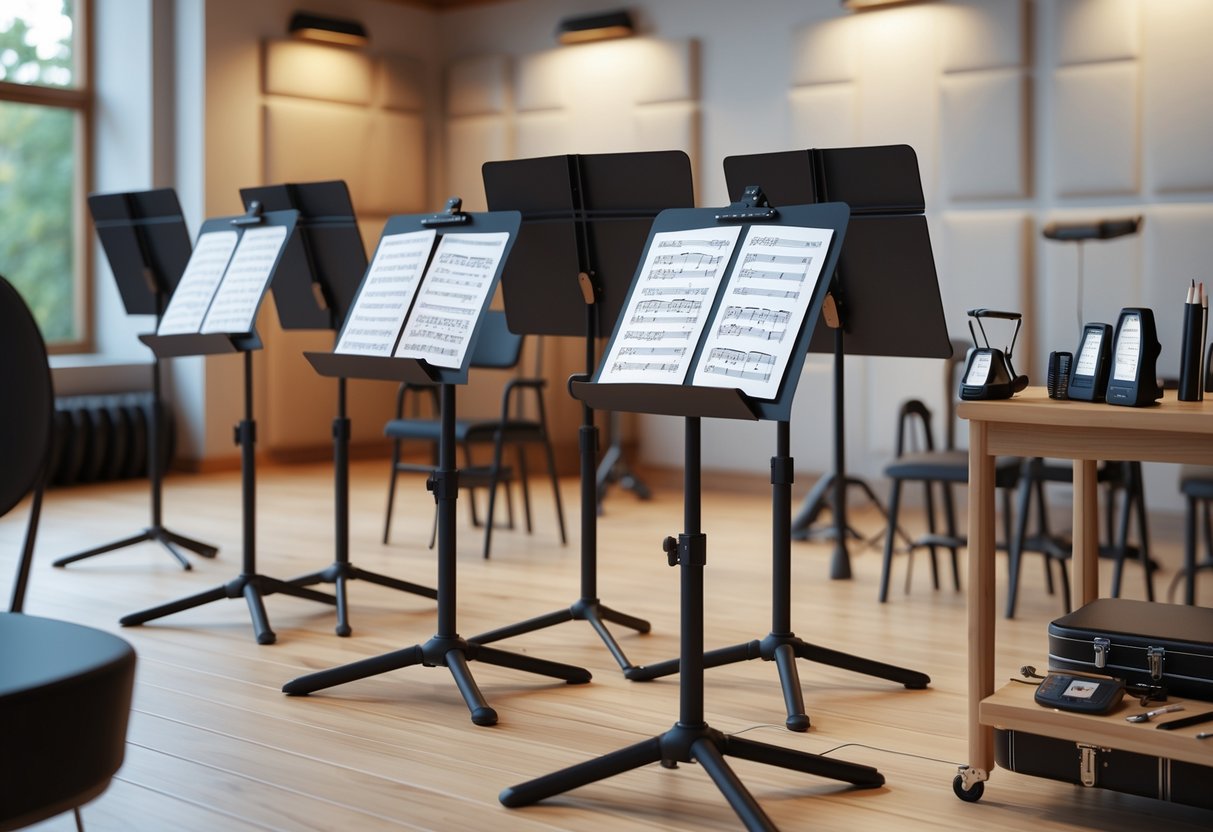
Music Stands and Accessories
A reliable music stand keeps your practice room running smoothly. Good lighting and storage accessories also help you stay focused and avoid annoying interruptions.
Choosing Durable Music Stands
It’s worth getting a sturdy music stand that doesn’t wobble around. Metal stands with adjustable height usually work best.
Find a stand with a wide ledge—at least 50cm—so your music doesn’t fall off. Little lips at the edge stop sheets from sliding away.
Look for these features:
- Tripod legs give better stability
- Height range should cover 60cm to 130cm for sitting or standing
- Folding design helps if you need to store it
- Weight capacity matters for heavy books or tablets
Skip those flimsy wire stands that cost under £15. They bend too easily and just get in the way.
If you use a tablet, get a stand with a holder or buy a clip-on attachment. That way, your device stays put and you can turn pages quickly.
Lighting for Sheet Music
Bad lighting makes your eyes hurt and reading music a pain. You need bright, even light with no shadows on the page.
LED clip-on lights work great for music stands. Just clip one on and point it where you need it.
What to look for:
- Brightness: 400 lumens or more is good
- Colour temp: 4000K–5000K (neutral white) keeps your eyes happy
- Power: USB rechargeable models last 4–6 hours
- Adjustability: Flexible necks let you point the light just right
Try to avoid glare from glossy sheet music. Some folks use two smaller lights instead of one big one.
Room lighting matters too. Overhead lights should cover the space, but let your music light do the detail work.
Accessory Trays and Holders
Little accessories can turn into a mess fast. Keep everything organised and close by with some smart storage.
Clip-on trays for your stand are handy for pencils, erasers, and metronomes. Get one with a few sections so stuff doesn’t roll around.
Handy storage ideas:
- Pencil holders—magnetic clips stick right to your stand
- Sheet music folders—keep loose sheets safe and tidy
- Tablet stylus holders—so you don’t lose your digital pen
- Rosin boxes—string players need a spot for this
If your stand can’t hold much, use a small side table. Rolling carts are awesome if you move around a lot.
Water bottle holders save your gear from spills. Some musicians clip them to their stands or use cup holders made for music stands.
Collaborative and Shared Practice Spaces

Shared practice rooms need some planning—think scheduling, secure storage, and access control. These things keep everything running smoothly when lots of people use the same space.
Scheduling and Etiquette
Booking Systems
Digital scheduling tools make life easier and stop double bookings. Google Calendar, Calendly, or special booking apps all work well.
Set up clear time slots and add 15-minute buffers between sessions. This gives everyone time to set up and tidy up.
Usage Guidelines
Write down rules about noise, especially during busy hours. Early mornings and late nights should be quieter to respect others.
Make a checklist for equipment that users fill out before leaving. That way, the next person finds everything ready to go.
Communication Protocols
Set up a group chat for last-minute updates or emergencies. WhatsApp or Slack channels keep everyone in the loop.
Post emergency contacts in each room. Add both the facility manager and local emergency numbers.
Storage for Multiple Users
Individual Storage Solutions
Give each person or group a locked locker or cabinet. Regular gym lockers work for small stuff like sheet music and cables.
For bigger instruments, use vertical racks with separate sections. Label each one clearly so there’s no confusion.
Shared Equipment Organisation
Set up a simple checkout system for shared gear—maybe a log book or a tablet. This helps keep track of microphones, stands, and amps.
Put shared items in marked spots. Colour coding or numbers make setup and cleanup faster.
Climate Control
Keep the room at a steady temperature and humidity to protect your gear. Put in dehumidifiers if the space gets damp.
Cover equipment left overnight to keep off dust and avoid damage.
Security Considerations
Access Control
Install keypad entry instead of handing out keys. Change the codes every few months or when someone leaves.
Smart locks you control remotely can help too. They track who comes in and out and make things safer.
Surveillance Systems
Put security cameras at the doors and in common areas. Don’t put them inside individual practice rooms—everyone deserves privacy.
Use motion-sensor lights in storage and hallways. They scare off intruders and save on electricity.
Insurance and Liability
Have everyone sign waivers for injuries or equipment damage. Spell out who pays for repairs if something breaks.
Check that your insurance covers multiple users and their gear. Sometimes you need extra coverage for commercial use.
Encourage people to get their own instrument insurance. The facility’s policy usually won’t cover personal items.
Personalising Your Practice Space
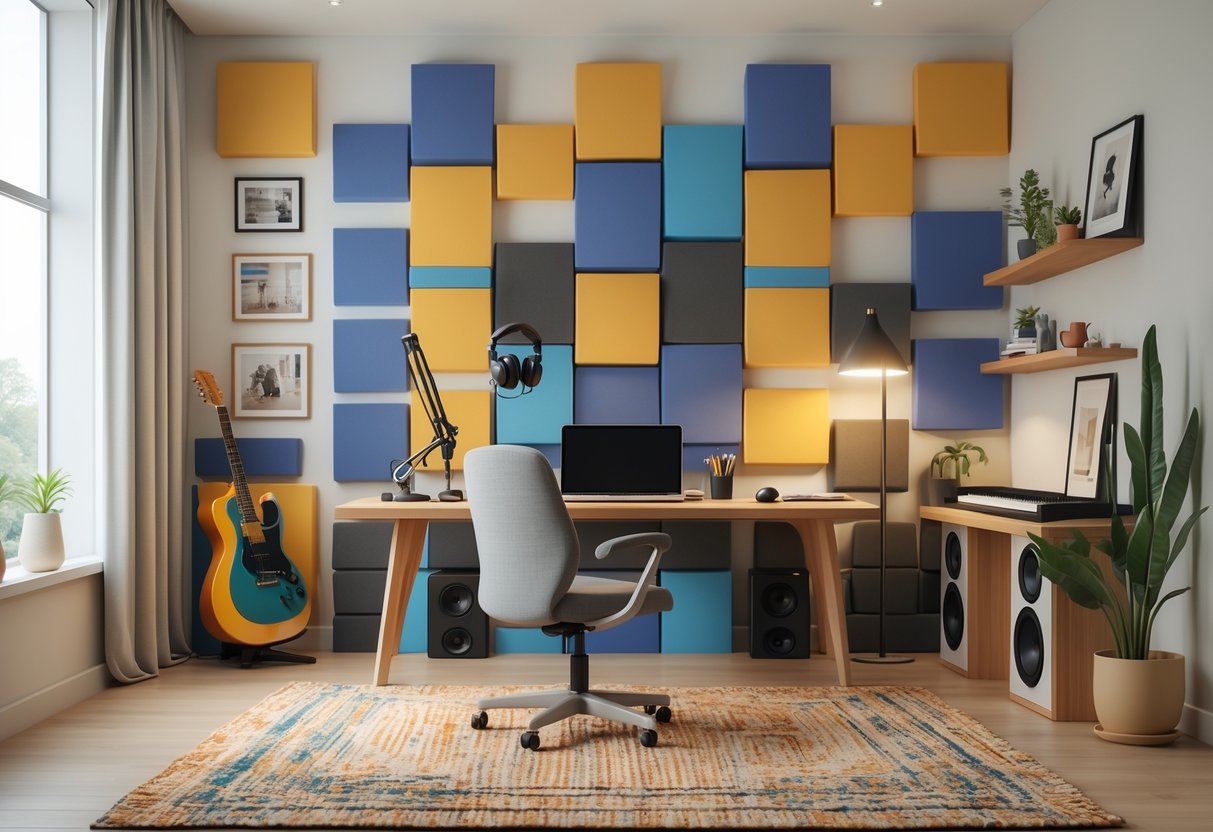
Personalising your practice room can boost your motivation and make you want to spend more time working on your skills. Adding personal touches, a bit of organisation, and some inspiration turns a boring room into your own creative spot.
Decor and Inspiration
Pick colours that help you focus or feel creative. Soft blues and greens are calming, while warmer tones can spark energy.
Hang up artwork that fires you up—maybe posters of your favourite teams, gaming art, or a quote from a pro you admire. Just don’t overdo it with decorations or you’ll end up with clutter.
Add a plant or two. Snake plants and pothos are easy to keep alive, even if your room doesn’t get much sun.
Lighting really matters. Try warm LED strips behind your desk or monitor to ease eye strain. Avoid harsh overhead lights that glare off your screen.
Show off personal stuff like trophies or collectibles. Put them where you’ll see them, but not where they’ll distract you from practising.
Display Boards and Whiteboards
A whiteboard is a great tool in your practice space. Use it to jot down daily goals, spot areas to improve, or sketch out strategies.
Break your board into sections:
- Daily goals (like aim drills or reaction time)
- Weekly targets (ranking up, tournament prep)
- Reminders (crosshair tips, positioning notes)
Cork boards are handy for pinning up schedules, team lists, or printed guides. Keep match times or events where you can see them.
Magnetic boards look neat and let you stick up notes without pins or tape.
Put your board somewhere you can see it from your setup, but not where it blocks your screens.
Creating a Motivation Zone
Set aside a small area for stuff that keeps you motivated. This could be awards, screenshots of your best ranks, or photos from events.
Track your progress with a simple chart. Mark down practice time, skill gains, or rank changes. Seeing those numbers climb can really help during tough stretches.
Make a ritual corner. Keep things like your hype playlist, breathing exercise notes, or a lucky charm right there.
Write out your goals and put them where you’ll see them—stuff like “Reach Diamond rank by March” or “Get my reaction time to 180ms.”
Add a small shelf for guides, books, or notebooks. If you keep resources close, you’re more likely to use them.
Keep the area tidy and update it often. Swap out old goals and add new wins to keep yourself inspired.
Frequently Asked Questions

Setting up a great practice room means balancing essential equipment, good acoustics, and comfort. Here are some common questions musicians ask when putting together their rehearsal space.
What are the essentials I need to include in my practice room for optimal musical training?
Start with a PA system—two speakers and stands will help balance your overall mix. This usually works out better than using separate amps.
You’ll want a mixer to send audio to your PA. A 12-channel analogue mixer covers most bands, but a 5-channel one is enough for small setups.
Make sure you have amps for electric guitars and use direct injection (DI) boxes for bass guitars and keyboards. Electronic drums need DI too, but acoustic drums are usually fine on their own.
If you need a drum kit, add one. Electronic kits are handy for rooms without much soundproofing. Put a drum rug underneath to keep it from sliding.
Don’t forget accessories like instrument cables, mic stands, and spare leads. Keep a basic toolkit on hand for quick fixes.
Could you suggest effective soundproofing techniques for my home practice room?
Start with dense materials like mass-loaded vinyl or acoustic foam panels on your walls. These soak up sound waves and help keep noise from spilling into other rooms.
Install weatherstripping around your doors and windows to block sound leaks. A door sweep at the bottom can really seal things up.
Throw down thick carpets or rugs on hard floors to muffle impact noise. If you add carpet underlay, you’ll get even more sound absorption for footsteps and moving gear.
If you’re up for a permanent fix, try double-wall construction with insulation sandwiched in between. That air gap does wonders for blocking sound.
When you practice, hang heavy curtains or moving blankets over your windows and doors. They’re easy to put up and take down, so you can stash them away when you’re done.
What’s the best layout for organising musical instruments and equipment in a practice room?
Put your drum kit in a corner to cut down on sound bouncing around. Keep it away from shared walls if you want fewer complaints from next door.
Set your guitar and bass amps at ear level, facing the center of the room. That way, everyone hears the mix without needing to crank the volume.
Stick your PA speakers at the front of the room and angle them in a bit. Use sturdy stands to cut down on vibration and get better sound spread.
Set up storage spots for instrument cases and spare gear. Wall hooks for guitars keep the floor open and make the room feel less cluttered.
Make sure there’s enough space to walk between equipment. Nobody wants to trip over cables or bang up their gear during a session.
How can I ensure proper lighting in my practice room to create a conducive learning environment?
Mix overhead lighting with task lights for music stands and gear. LED lights are bright and energy-efficient, plus they don’t heat up the room.
Install dimmer switches so you can tweak the lighting for different moods. Bright lights help when you’re reading sheet music, but sometimes you want things a bit cozier for jamming.
Stick a desk lamp or a clip-on light right on your music stand. That gets rid of annoying shadows on your sheet music or chord charts.
If you’re feeling creative, add some colored LED strips for a vibe during recording or jam sessions. Warm white lights make long practice stretches feel more comfortable.
Try not to put lights directly behind your music stand or equipment screens. Glare just makes it harder to read what you need.
What are some affordable ways to enhance the acoustics in my practice space?
Start with soft stuff—curtains, cushions, even a comfy chair. These soak up sound reflections without breaking the bank.
Hang thick blankets or duvets on the walls as makeshift acoustic panels. Use removable hooks if you’re renting and want to avoid leaving marks.
Line up bookshelves full of books along the walls. The uneven surfaces scatter sound and help cut down on echo.
Toss some area rugs around the room to soak up sound bouncing off the floor. Go for thicker rugs with padding if you can.
If you’re handy, make your own acoustic panels with rockwool insulation wrapped in fabric. Mount them on the walls where sound bounces most for a pro-level upgrade without the big price tag.
Can you recommend any ergonomic furniture for long practice sessions in my practice room?
Try using adjustable music stands—they make it easy to switch between sitting and standing. I’d go for stands with tilting tops and solid, sturdy bases so they don’t wobble while you’re in the middle of a session.
Drummers and keyboardists should pick stools or chairs with adjustable height and decent back support. Trust me, fixed-height seating just messes with your posture if you’re playing for hours.
Keyboard stands with several height options and angled surfaces work wonders. They keep your wrists happy and let musicians of all sizes find a comfy spot.
Guitarists and bassists might want to add a footrest, especially if you like sitting while you play. Adjustable footrests really help with instrument positioning and can save your back.
Don’t forget a cozy spot for breaks. Toss in a small sofa or a couple of armchairs—taking a breather now and then actually helps you stay focused.
